
We have the perfect airplane craft activity that’s sure to be a hit with even the littlest of aviators in your home!

Paper Plate Plane Craft
Are you looking for a fun and creative craft idea to do with your little ones? If so, let the Paper Plate & Paint Splat Airplane craft be your next family project!
This easy-to-follow guide will show you how to make an airplane in the sky design out of paper plates and colorful paint splats that is guaranteed to keep kids busy and entertained.
Not only will they have a blast getting messy with paint, but they’ll also love creating their own unique masterpieces that they can proudly display on the fridge.
So grab your kiddos (and maybe even the adults too!) and let’s get crafting! You can find ALL the details for this paper plate plane craft idea below! Then come share pictures of your finished paint splatter sky craft creations with us on our Facebook page to see! Happy crafting, my friends!
RELATED —> Popsicle Stick Airplanes

Who knew paper plates and paint could create such an awesome craft?! Let’s get creative and have some fun making this colorful “airplane in the sky” idea!
Craft Supplies:
- White Cardstock Paper
- Airplane Printable – on our landing page
- Large Paper Plate
- Tulip Puffy Paint {in two shades of blue}
- Scissors
- Stapler
- Embellishments
Directions:
- First fold your paper plate in half. Straight up the center.
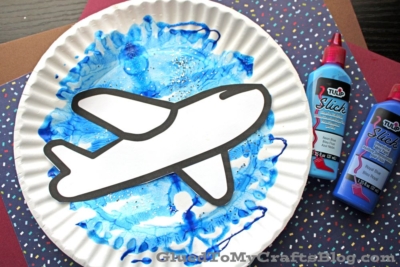
- Unfold the paper plate and squirt some paint on one side of the plate {I like the Tulip Puffy Paint for this particular step since it’s in a nice controlled squirt bottle} Be sure to keep the paint close to the middle of the plate.
- Once the paint is down, go ahead and fold/squish your piece of paper plate together again. Be sure to rub your hand all over the folded piece, so the paint will cover your design nicely.
- Now carefully unfold your piece to reveal your “blue sky” design.
- If desired, sprinkle loose craft glitter on top of the wet paint.
- Set aside your piece for a bit.
- Now grab your printable. Cut out ONE of the airplane shapes for your craft.
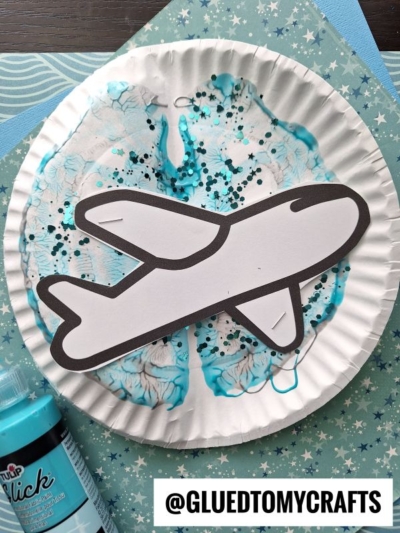
- To finish the Puffy Paint Airplane craft – glue your cardstock airplane to the center of the painted piece.
- And that’s it! Then set aside to let it dry completely before you display it proudly for ALL to see.
RELATED —> Popsicle Stick Hearts
So there you have it, a fun paper plate and paint splat airplane craft for kids! Not only does this craft provide a great way to engage with your children, but it’s also a creative way to teach them about the beauty of flight. We hope you are inspired to recreate it today!
RELATED —> Footprint Airplane Canvas

Paint Splat Airplane Craft
Here’s your checklist of supplies to bring this craft to life:
Prepare your creative haven by laying down a protective cover before the crafting magic begins!
Directions:
- First fold your paper plate in half. Straight up the center.
- Unfold the paper plate and squirt some paint on one side of the plate {I like the Tulip Puffy Paint for this particular step since it's in a nice controlled squirt bottle} Be sure to keep the paint close to the middle of the plate.
- Once the paint is down, go ahead and fold/squish your piece of paper plate together again. Be sure to rub your hand all over the folded piece, so the paint will cover your design nicely.
- Now carefully unfold your piece to reveal your "blue sky" design.
- If desired, sprinkle loose craft glitter on top of the wet paint.
- Set aside your piece for a bit.
- Now grab your printable. Cut out ONE of the airplane shapes for your craft.
- To finish the Puffy Paint Airplane craft - glue your cardstock airplane to the center of the painted piece.
- And that's it! Then set aside to let it dry completely before you display it proudly for ALL to see.


NEED MORE HELP DOWNLOADING OUR FREE PRINTABLES? PLEASE REFER TO OUR FAQ PAGE