
Are you looking for a fun, colorful activity to keep little hands busy this afternoon? This cotton ball and popsicle stick rainbow craft is the perfect weekend or after-school project for kids and families alike!
It brings a bright pop of color to any room and provides a wonderful opportunity for children to practice their fine motor skills. As they squeeze the glue bottle and arrange the colorful sticks, they are building coordination and learning color recognition. Plus, the fluffy texture of the cotton balls adds a fun sensory element to the experience!
Craft Supplies:
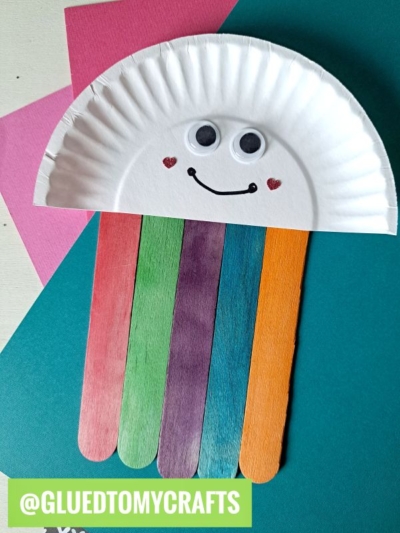
- Small Paper Plate {one per rainbow craft}
- Cotton Balls
- Jumbo Craft Sticks – six in various colors (or hand-paint them yourself}
- School Glue
Directions:
Ready to build your rainbow? Follow these simple steps to create a beautiful, fluffy masterpiece.
- Start by taking your white paper plate and cutting it straight down the middle. You now have two semi-circles. Each semi-circle will serve as the base for one rainbow cloud. Place the semi-circle flat on your table with the straight edge at the bottom and the curved edge pointing up toward the ceiling.
- Before you reach for the glue, take a moment to lay out your colored popsicle sticks. You want to plan out your color arrangement. Getting the sticks lined up beforehand ensures you know exactly where everything will go once the glue comes out.
- Flip your paper plate semi-circle over so the back side faces up. Apply a generous line of school glue along the straight bottom edge of the plate. Carefully press the top inch of each colored popsicle stick into the glue, making sure they sit closely next to one another. Keep them as straight as possible. Once all your colored sticks are attached, let the plate sit flat for about ten to fifteen minutes so the glue can set. This prevents the heavy sticks from sliding around during the next step.
- Once the sticks feel secure, flip your project back over so the front of the paper plate faces you. Now comes the best part! Cover the entire surface of the paper plate semi-circle with white school glue. You can use a paintbrush to spread the glue around evenly if you prefer.
- Take your cotton balls and press them firmly into the glue. Pack them closely together to completely hide the paper plate underneath. Make sure to place a few cotton balls right along the bottom edge where the sticks meet the plate. This hides the tops of the popsicle sticks and gives the illusion that a brilliant rainbow is shooting directly out of a fluffy white cloud.
- Set your finished craft in a safe, flat space to dry. Because cotton balls and wooden sticks require a fair amount of liquid glue, you should let the project dry for at least a few hours, or ideally overnight, before you try to hang it up or display it.
RELATED —> Rainbow Bunny Craft Idea For Kids
Crafting with kids is all about enjoying the process, getting a little messy, and watching their creativity come to life. This cotton ball and popsicle stick rainbow is a fantastic way to spend quality time together while making a bright, cheerful piece of art. On that note, we hope you have fun recreating this bright and colorful craft idea today! Happy crafting, my dear friends!


Popsicle Stick Rainbow Craft Tutorial
Create a vibrant popsicle stick rainbow craft with colorful sticks and fluffy cotton balls. Easy steps for fun crafting!
Here’s your checklist of supplies to bring this craft to life:
- School Glue
Prepare your creative haven by laying down a protective cover before the crafting magic begins!
Directions:
- Start by taking your white paper plate and cutting it straight down the middle. You now have two semi-circles. Each semi-circle will serve as the base for one rainbow cloud. Place the semi-circle flat on your table with the straight edge at the bottom and the curved edge pointing up toward the ceiling.
- Before you reach for the glue, take a moment to lay out your colored popsicle sticks. You want to plan out your color arrangement. Getting the sticks lined up beforehand ensures you know exactly where everything will go once the glue comes out.
- Flip your paper plate semi-circle over so the back side faces up. Apply a generous line of school glue along the straight bottom edge of the plate. Carefully press the top inch of each colored popsicle stick into the glue, making sure they sit closely next to one another. Keep them as straight as possible. Once all your colored sticks are attached, let the plate sit flat for about ten to fifteen minutes so the glue can set. This prevents the heavy sticks from sliding around during the next step.
- Once the sticks feel secure, flip your project back over so the front of the paper plate faces you. Now comes the best part! Cover the entire surface of the paper plate semi-circle with white school glue. You can use a paintbrush to spread the glue around evenly if you prefer.
- Take your cotton balls and press them firmly into the glue. Pack them closely together to completely hide the paper plate underneath. Make sure to place a few cotton balls right along the bottom edge where the sticks meet the plate. This hides the tops of the popsicle sticks and gives the illusion that a brilliant rainbow is shooting directly out of a fluffy white cloud.
- Set your finished craft in a safe, flat space to dry. Because cotton balls and wooden sticks require a fair amount of liquid glue, you should let the project dry for at least a few hours, or ideally overnight, before you try to hang it up or display it.
CLICK HERE TO PRINT THE DIRECTIONS FOR THIS CRAFT
If you've enjoyed our content or have any thoughts to share, we'd love to hear from you! Mention @gluedtomycrafts or tag #gluedtomycrafts on Instagram!