
Are you looking for a fun and easy craft idea to do with kids this spring season? This Cotton Ball Daisy Flower Craft is perfect!
Using simple materials like extra large cotton balls, school glue, and a dot marker, you can create a cheerful daisy flower that’s both creative and mess-free. It’s a great activity for little hands and a wonderful way to brighten up any day. Let’s get started!
Craft Supplies:
- White Cotton Balls
- Cardstock Paper {we used a light shade of green}
- Dot Marker (yellow or your preferred color for the flower center)
- Green Marker
- Glue (preferably Elmer’s School Glue)
RELATED —> Cotton Ball Bunny Cupcake
Directions:
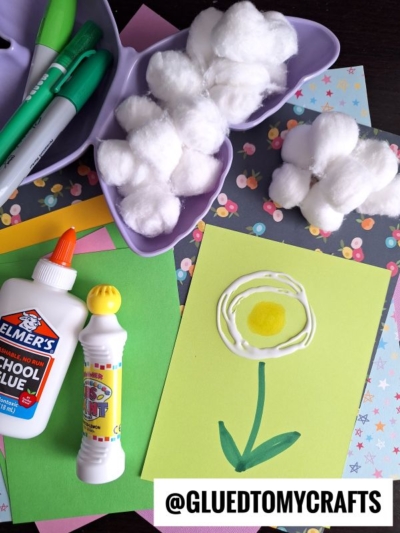
- Prepare Your Base: Start with a piece of cardstock paper as your base. This will serve as the background for your daisy flower.
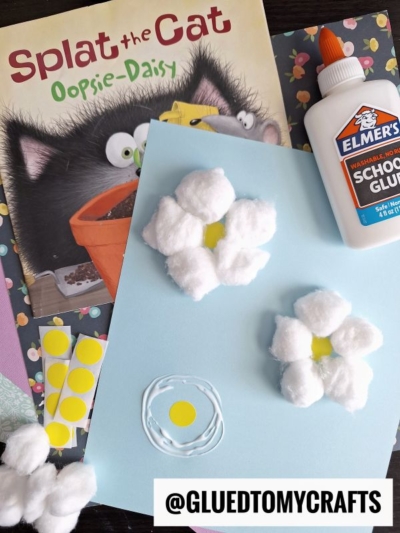
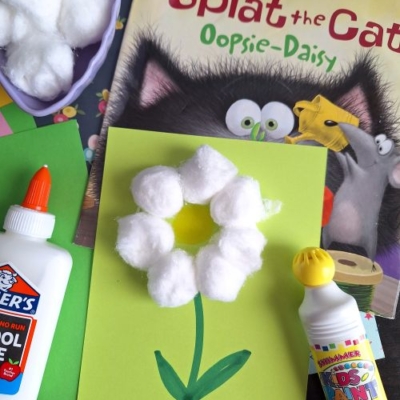
- Create the Flower Center: Use a yellow dot marker to make a bold circle in the center of the paper. This will be the center of your daisy.
- Add the Petals: Surround the dot marker circle with white cotton balls to form the petals. Arrange them in a circular pattern, ensuring they touch the edge of the dot marker circle. Once you’re happy with the placement, glue each cotton ball in place.
- Draw the Stem and Leaves: Use a green marker to draw a stem extending downward from the flower center. Add two leaves on either side of the stem for a realistic touch.
- Let It Dry: Allow the glue to dry completely before moving or displaying your craft.
RELATED —> Crepe Paper & Fingerprint Daisy Spring Paint Brush Craft

And there you have it – a beautiful Cotton Ball Daisy Flower made with just a few simple supplies! This craft is not only fun but also a great way to spark creativity and spend quality time together this spring season!
Don’t forget to display your masterpiece proudly or gift it to someone special. Happy crafting, my friends!

Cotton Ball Daisy Flower Craft Idea
Learn to make a cotton ball daisy craft with easy materials. Enjoy crafting with cotton balls and cardstock for fun decoration.
Here’s your checklist of supplies to bring this craft to life:
- Green Marker
- School Glue
Prepare your creative haven by laying down a protective cover before the crafting magic begins!
Directions:
- Prepare Your Base: Start with a piece of cardstock paper as your base. This will serve as the background for your daisy flower.
- Create the Flower Center: Use a yellow dot marker to make a bold circle in the center of the paper. This will be the center of your daisy.
- Add the Petals: Surround the dot marker circle with white cotton balls to form the petals. Arrange them in a circular pattern, ensuring they touch the edge of the dot marker circle. Once you're happy with the placement, glue each cotton ball in place.
- Draw the Stem and Leaves: Use a green marker to draw a stem extending downward from the flower center. Add two leaves on either side of the stem for a realistic touch.
- Let It Dry: Allow the glue to dry completely before moving or displaying your craft.
CLICK HERE TO PRINT THE DIRECTIONS FOR THIS CRAFT
If you've enjoyed our content or have any thoughts to share, we'd love to hear from you! Mention @gluedtomycrafts or tag #gluedtomycrafts on Instagram!