Is there anything better than seeing the first few flowers bloom after a long winter? Spring is officially in the air, and we are celebrating with a craft that is bursting with creativity.
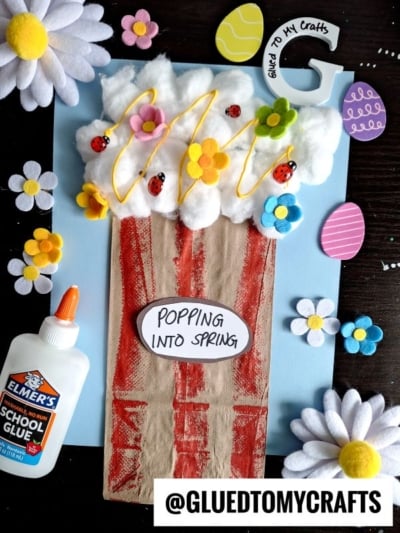
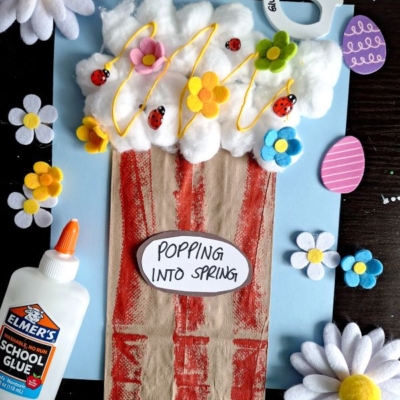
If you are looking for a simple, low-mess activity to welcome the warmer weather, this “Popping Into Spring” art project is the perfect solution. It takes a classic movie snack—popcorn—and gives it a fresh, floral twist.
This craft is excellent for helping young children develop fine motor skills. Between grasping cotton balls, squeezing glue bottles, and placing small stickers, little hands get a great workout while having fun. Whether you are a teacher planning a classroom theme or a parent looking for a rainy day activity, this popcorn bag craft is sure to be a hit. Let’s get popping!
Supplies You Will Need
Before you get started, gather these simple materials. You likely have most of them in your craft bin already!
- Cardstock Paper: We used a sheet of light blue cardstock for the background to represent the spring sky. You will also need white cardstock for the slogan tag.
- Brown Kraft Paper or Lunch Bag: You can use a lunch bag or use a sheet of brown construction paper.
- Cotton Balls: A handful of white cotton balls will act as your fluffy popcorn.
- Red Paint or Marker: To create the classic stripes on the popcorn bag.
- School Glue: Liquid glue (like Elmer’s) works best for securing the cotton balls.
- Spring Embellishments: Small felt flowers, ladybug stickers, or butterfly cutouts.
- Yellow Puffy Paint (Optional): This adds a fun texture that looks like “butter” or decorative ribbon.
Step-by-Step Directions
This project is designed to be easy and quick, allowing kids to focus on the fun part: decorating!
1. Create the Popcorn Bag
Use your red paint or a thick red marker to draw vertical stripes down the front of the paper bag. Leave some space in the middle if you want to glue your “Popping Into Spring” label there later. Let the paint dry completely.
2. Set the Scene
Glue your painted brown bag onto the bottom center of your blue cardstock background. Make sure you leave plenty of room at the top for the overflowing popcorn!
3. Add the Popcorn
This is the favorite step for most kids. Squeeze a generous amount of liquid school glue just above the opening of the brown bag and spilling slightly over the top edge of the bag itself.
Take your cotton balls and press them firmly into the glue. You want it to look like the bag is overflowing, so don’t be afraid to stack them up high!
4. Decorate for Spring
Now, turn that ordinary popcorn into a spring celebration. Place small drops of glue in between the cotton balls and attach your spring embellishments.
We used colorful felt flowers and tiny ladybugs to make the popcorn look like a blooming garden. You can nestle them right into the “fluff” of the cotton balls.
5. Add the Finishing Touches
For an extra pop of color, use yellow puffy paint to draw squiggly lines over the cotton balls and flowers. This mimics the look of butter on popcorn but adds a fun, artistic flair to the design.
Finally, write “Popping Into Spring” on a small oval piece of white paper (or print one out) and glue it to the front of your popcorn bag.
RELATED —> Tissue Paper Poppin’ Into Spring Craft
![]()
When the glue is dry, these masterpieces are ready to be displayed on the fridge or the classroom bulletin board. This project is a wonderful reminder that spring is a time for growth, color, and a little bit of silliness.
We hope this craft brings a little sunshine into your day. Grab your glue and get creative!

Popping Into Spring: Easy Cotton Ball Popcorn Craft
Here’s your checklist of supplies to bring this craft to life:
- Construction Paper
- White Cotton Balls
- Brown Paper Bag
- Embellishments
Prepare your creative haven by laying down a protective cover before the crafting magic begins!
Directions:
- Use your red paint or a thick red marker to draw vertical stripes down the front of the paper bag. Leave some space in the middle if you want to glue your "Popping Into Spring" label there later. Let the paint dry completely.
- Glue your painted brown bag onto the bottom center of your blue cardstock background. Make sure you leave plenty of room at the top for the overflowing popcorn!
- This is the favorite step for most kids. Squeeze a generous amount of liquid school glue just above the opening of the brown bag and spilling slightly over the top edge of the bag itself.
- Take your cotton balls and press them firmly into the glue. You want it to look like the bag is overflowing, so don't be afraid to stack them up high!
- Now, turn that ordinary popcorn into a spring celebration. Place small drops of glue in between the cotton balls and attach your spring embellishments.
- We used colorful felt flowers and tiny ladybugs to make the popcorn look like a blooming garden. You can nestle them right into the "fluff" of the cotton balls.
- For an extra pop of color, use yellow puffy paint to draw squiggly lines over the cotton balls and flowers. This mimics the look of butter on popcorn but adds a fun, artistic flair to the design.
- Finally, write "Popping Into Spring" on a small oval piece of white paper (or print one out) and glue it to the front of your popcorn bag.
Grab our favorite books via our Amazon affiliate link! In our Amazon storefront you will find books, toys and craft supplies we absolutely love using for our Glued To My Crafts tutorials!