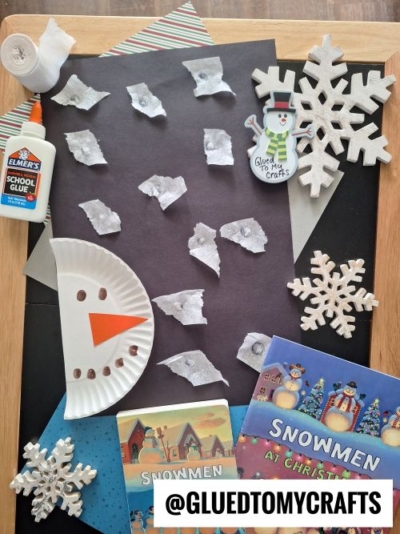
Snow is falling, the cocoa is warm, and the kids are already asking what’s next. This torn crepe paper snow day craft for kids is a simple, cheerful project that turns a paper plate and a few scraps of streamer into a snowman peeking out at a flurry of falling snow.
It takes about 20–30 minutes and uses supplies you probably already have. It’s also great for little hands. Tearing paper and squeezing glue build fine motor skills, and there’s no “wrong” way to make it snow. That makes it a sweet fit for preschoolers, kindergartners, and early elementary kids at home or in the classroom.
Here at Glued To My Crafts, we love projects like this one: low prep, low mess, and big smiles. Let’s get crafting!
Craft Supplies:
- 1 white paper plate (large or small)
- 1 sheet of dark gray or black construction paper
- White crepe paper (a party streamer roll works perfectly)
- Elmer’s School Glue
- A small scrap of orange construction paper
- A brown marker
- Scissors (for grown-up helpers or kids using safety scissors)
Directions:
Step 1: Cut the paper plate in half
Fold the paper plate in half and cut along the fold. You’ll only need one half for your snowman, so save the other for a second craft or a sibling.
Why this matters: The half-plate shape makes it look like your snowman is peeking into the scene from the edge. It’s adorable and full of personality.
Step 2: Decorate the snowman’s face
Use the brown marker to draw two dots for eyes. Then make a curved row of five or so small dots for a happy coal smile. Cut a small triangle from the orange paper and glue it in the middle of the face as a carrot nose, with the point facing toward the straight edge… or wherever your child thinks it looks best!
Step 3: Tear small pieces of crepe paper
Unroll a bit of the white streamer and let kids tear it into small pieces, about the size of a postage stamp. Aim for 10–15 pieces. Uneven, crinkly edges are perfect. They make the snow look soft and fluffy.
Step 4: Glue the falling snow onto the dark paper
Lay the dark gray or black paper flat. Add a small dab of glue, then press a piece of crepe paper on top. Here’s our favorite trick: add one more tiny dot of glue right in the center of each snowflake. Repeat until the “sky” is full of snow, leaving some open space in a lower corner for your snowman.
Step 5: Assemble your snow day scene
Glue the decorated paper plate half into the bottom-left corner of the dark paper. Line the straight edge up with the side of the page so the round face peeks into the snowy sky. Press gently, then let the whole scene dry flat for about 30 minutes.
Pair It With a Snowy Story:
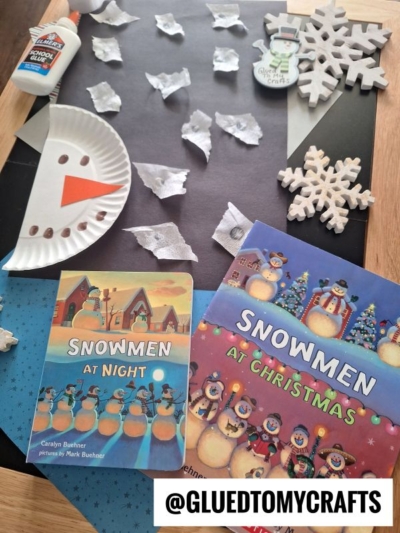
Turn your craft time into a cozy story time! This project goes hand in hand with two classic picture books by Caralyn Buehner, with pictures by Mark Buehner:
- Snowmen at Night: Ever wonder what snowmen do while we’re asleep? This playful story imagines their secret nighttime adventures, perfect for your dark, snowy craft scene.
- Snowmen at Christmas: A festive look at how snowmen celebrate the holidays, full of twinkling lights and cheerful snow friends.
Read the book first, then invite kids to make their own snowman. Afterward, ask them to tell you what their snowman gets up to when no one is watching. You’ll be amazed at the stories they come up with!
RELATED —> Reindeer Playing In The Snow Craft Idea For Kids
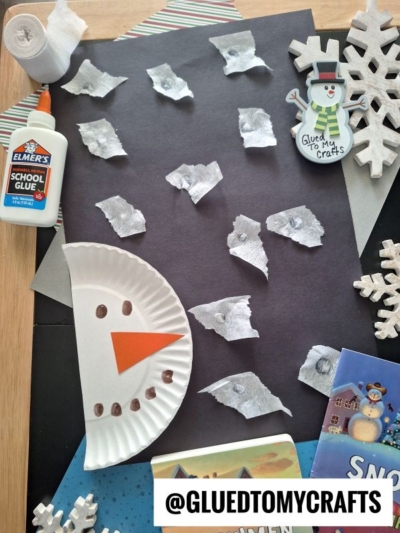
Give your finished craft one last check: Is the glue dry? Is every snowflake stuck down? Does your snowman have the happiest smile ever? Then it’s ready to proudly display on the fridge, a window, or the classroom wall.
Save this tutorial for your next snow day, and share it with a fellow parent or teacher who loves easy winter crafts. For more simple, kid-friendly projects, follow along at @GLUEDTOMYCRAFTS. Happy crafting, my friends! ☃️
