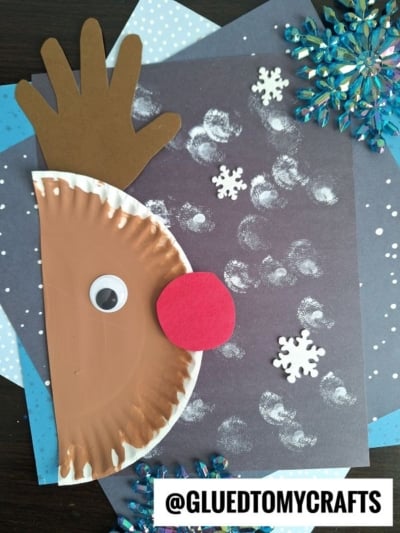
Snowflakes are falling, cocoa is warming on the stove, and little hands want to create something. This Paper Plate Reindeer In The Snow craft is the perfect cozy-season project!
It uses simple supplies you probably already have at home or in the classroom. A painted paper plate becomes a sweet reindeer face. A traced handprint turns into a set of antlers. A cotton ball dipped in white paint creates a flurry of snow. The best part is that every reindeer turns out a little different, because every handprint is one of a kind.
This craft works well for preschoolers, kindergartners, and early elementary kids. It also makes a lovely keepsake to pull out year after year. Let’s get gluing!
Craft Supplies:
- 1 white paper plate {large or small}
- Brown paint
- Brown construction paper
- Red paper circle (for that famous shiny nose!)
- 1 large googly eye
- White paint
- Cotton ball or pom-pom
- Blue or dark gray construction paper
- Glue
- Scissors
- Paintbrush
- Pencil
- Small dish or cupcake liner for the white paint
- Optional: foam snowflake stickers for extra winter sparkle
Tip: Lay down some newspaper or a craft mat before you start. Little painters can get enthusiastic!
Directions:
Step 1: Cut and Paint the Paper Plate
Start by cutting your paper plate in half. You’ll only need one half for your reindeer, so save the other half for a second craft (or a second reindeer friend!).
Next, paint the plate half brown. You can paint right to the edge for a cozy all-brown look. You can also leave the ridged rim white for a fun frosty border. Both look adorable!
Set the plate aside to dry completely before moving on.
Step 2: Make Handprint Antlers
This is where the magic happens! Have your child place one hand flat on the brown construction paper with fingers spread wide. Trace around the hand with a pencil.
Carefully cut out the handprint. The fingers become the branches of your reindeer’s antler. How cute is that?
Variation: Want two antlers instead? Trace both hands, or cut two simple Y-shaped antlers from the brown paper. This is a great option for kids who are practicing their cutting skills.
Step 3: Assemble the Reindeer Face
Once the paint is dry, it’s time to bring your reindeer to life!
- Glue on the antler. Attach the handprint to the back of the plate along the top curved edge, so the fingers stick up like antlers.
- Add the eye. Glue the googly eye near the upper middle of the plate. One big eye gives your reindeer a sweet side-view look.
- Give it a nose. Glue the red paper circle at the front end of the plate. Now you’ve got your very own Rudolph!
Step 4: Create the Snowy Background
Grab your blue or dark gray construction paper. Blue gives you a bright winter day, while dark gray feels like a snowy night. Pick your favorite!
Glue your reindeer onto the left side of the paper, lining the flat edge of the plate up with the paper’s edge. This leaves plenty of open sky for snow.
Now for the snow! Pour a little white paint into a small dish or cupcake liner. Dip your cotton ball or pom-pom into the paint, then gently stamp it all over the paper. Big dots, small dots, lots of dots. There’s no wrong way to make it snow!
Want even more winter fun? Glue a few paper or foam snowflakes around the scene for a touch of extra sparkle.
Let everything dry, and your reindeer is ready to show off!
RELATED —> Paper Plate Reindeer with Scarf Craft Idea
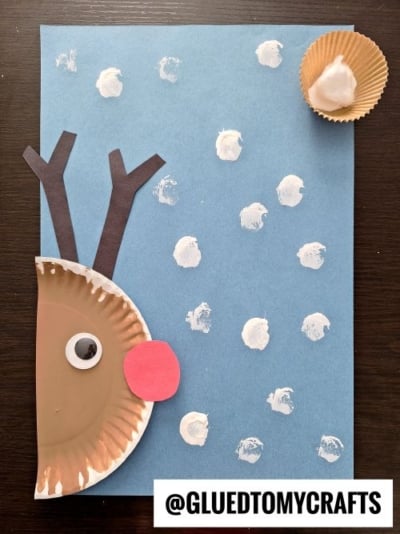
And there you have it, a darling Paper Plate Reindeer prancing through a winter wonderland! This craft makes a sweet classroom display, a festive fridge decoration, or a heartfelt gift for grandparents.
We absolutely love seeing your creations come to life. Snap a photo of your reindeer and tag us at @GLUEDTOMYCRAFTS so we can cheer you on!
Happy crafting, and stay glued to the fun! ❄️🦌
