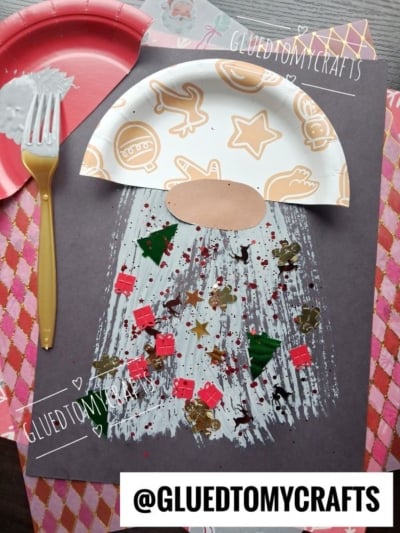
There’s something about a cheerful little gnome that makes the holidays feel extra cozy. This fork painted Christmas gnome is one of our favorite seasonal crafts here at Glued To My Crafts. It’s simple and festive, and it uses things you probably already have in your kitchen and craft bin.
The secret ingredient? A plain plastic fork! Kids drag it through paint to create a fluffy, textured beard that looks amazing with almost no effort. Then they get to pile on sparkly sequins, and that’s always the best part. It’s a lovely activity for a classroom party, a snowy afternoon at home, or a holiday playdate. Every gnome turns out a little different, which makes each one special!
Craft Supplies:
Gather these supplies before you begin:
- Black construction paper (one sheet per gnome)
- A small paper plate (holiday designs work beautifully)
- Light brown or tan construction paper for the nose
- White or light grey acrylic paint
- A plastic fork
- Christmas-themed sequins or chunky glitter
- A glue stick or craft glue
- Scissors
- A paper plate or tray to use as a paint palette
Directions:
1. Cut the Paper Plate Into a Hat Shape
Cut your paper plate in half. Use the top half as your gnome’s hat. Set it aside for now.
2. Cut an Oval Nose From Tan Paper
Cut a small oval from the light brown or tan construction paper. Aim for something about the size of a large grape, wider than it is tall. A chunky, round nose gives your gnome lots of personality, so don’t worry about making it perfect.
3. Fork-Paint the Beard
Squeeze a small puddle of white or light grey paint onto your palette. Lay the dark construction paper flat in front of you, and leave a few inches of empty space at the top for the hat.
Dip the tines of the fork into the paint. Starting just below where the hat will sit, press the fork down and pull it straight toward you in long vertical strokes. Repeat, working side by side, so the beard is wide at the top and tapers to a point at the bottom. The fork tines leave thin, wispy lines that look just like real beard hair.
Overlapping strokes add even more fluff, so encourage kids to keep going until the beard looks full and fuzzy.
4. Decorate the Beard With Festive Sequins
Now for the sparkle! While the paint is still wet, sprinkle and press your sequins and confetti onto the beard. The wet paint works like glue for lightweight pieces.
For heavier charms, or if the paint has started to dry, add a small dot of craft glue underneath each piece. Let the beard dry completely before moving on. This usually takes about 20 to 30 minutes.
5. Assemble Your Gnome
Once the beard is dry, glue the paper plate hat across the top of the paper. Let the bottom edge of the hat overlap the top of the beard slightly. Finally, glue the tan oval nose right at the center of the hat’s bottom edge so it peeks out above the beard.
Step back and admire your adorable, sparkly gnome!
RELATED —> Paint Splat Gnome Craft Idea
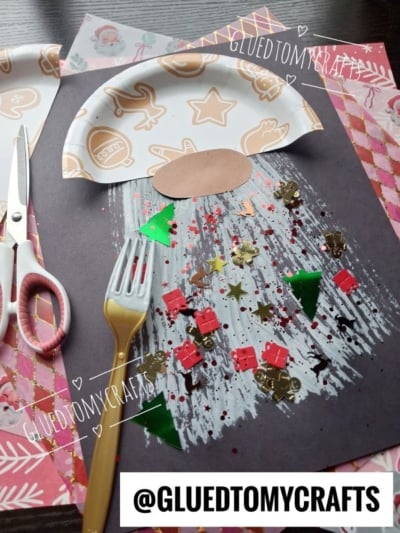

This fork painted Christmas gnome is proof that the best holiday crafts don’t need fancy supplies. They just need a little paint, a lot of sparkle, and plenty of imagination. Hang your gnomes on the fridge, tape them to a classroom window, or tuck one into a card for Grandma.
We’d love to see your little ones’ creations! Snap a photo and tag us at @GLUEDTOMYCRAFTS so we can cheer on your festive gnome family. Happy crafting, and merry Christmas from all of us at Glued To My Crafts!
