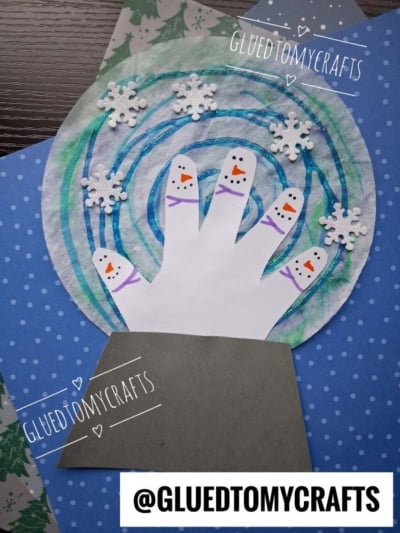
Today’s coffee filter snow globe craft itself is wonderfully simple – just a few basic supplies, a little imagination, and your child’s hand. Each finger becomes its own cheerful snowman, giving kids a chance to get creative and put their own personality into every tiny face. There’s something magical about turning something as ordinary as a coffee filter into a whimsical winter scene that your child helped bring to life.
This project is perfect for a quiet winter afternoon indoors – cozy, low-pressure, and genuinely fun for a wide range of ages. Preschoolers can take the lead on painting and decorating, while older kids love adding personality to each tiny snowman face. It’s the kind of craft that doesn’t require a special occasion or a trip to the craft store. Just a little time, a few basic supplies, and a willingness to get a little messy together. And when it’s done, you’ll have more than just a pretty piece of art – you’ll have a handmade keepsake that marks exactly who your child was this winter.
Now grab your supplies and let’s make something worth remembering!
Craft Supplies:
Gather these supplies before you begin:
- 1 large coffee filter (the round, basket-style kind works best)
- Watercolor paints in teal, green, and purple {winter colors!}
- A paintbrush and a small cup of water
- Glitter glue
- White paper (cardstock works great if you have it)
- Grey construction paper
- White foam or felt snowflake cutouts
- Black marker
- Orange marker
- Purple marker
- Pencil
- Scissors (kid-safe scissors for little hands)
- Glue (a glue stick or white school glue)
Helpful extras: a plastic tablecloth or newspaper to protect your work surface, paper towels, and a smock or old T-shirt. Watercolors and glitter love to travel!
Directions:
Step 1: Paint the Coffee Filter
Flatten your coffee filter on a covered surface. Smooth out the ruffled edges as best you can. A few wrinkles are fine and actually add texture.
Dip your brush in water first, then into the watercolors. Let your child dab and swish the color across the filter. Here’s the fun part. Coffee filters soak up paint fast, so the colors will bleed and blend together on their own. Encourage kids to watch the colors spread and mix. It’s like a little science experiment!
Set the filter aside to dry completely. This usually takes about 20 to 30 minutes. You can speed things up with a hair dryer on the low setting.
Step 2: Add Glittery Swirls
Once the filter is dry, it’s time for some sparkle.
Using glitter glue, draw swirls across the painted circle. Start near the center and loop outward in a spiral, or let kids make their own curly patterns all over. These swirls look like snow and wind twirling inside the globe.
Don’t worry about making them perfect. Wobbly swirls have tons of charm.
Tip: Glitter glue needs time to dry, often an hour or more. This is a great moment to move on to the handprint while you wait.
Step 3: Trace and Cut Out the Handprint
Place your child’s hand flat on the white paper with fingers spread slightly apart. Trace around the hand with a pencil, including a little bit of the wrist.
Younger kids may giggle and wiggle during this step, so a little patience goes a long way. If the first try looks more like a mitten than a hand, just flip the paper and trace again!
Carefully cut out the handprint. Grown-ups may want to handle the tricky spaces between the fingers, while older kids can try cutting on their own.
Step 4: Turn Each Finger Into a Snowman
Now for the most adorable part. Each finger becomes its own little snowman.
Near the tip of each finger, add these details:
- Eyes: Use the black marker to draw two small dots.
- Carrot nose: Draw a tiny orange triangle just below the eyes, pointing out to the side.
- Smile: Make a curved row of small black dots under the nose.
- Scarf: Just below each face, draw a line straight across the finger. Add a short slanted line hanging down from one end to look like the tail of a wrapped scarf.
Step 5: Cut Out the Snow Globe Base
Every snow globe needs a stand. Grab your grey construction paper and cut out a trapezoid shape. That’s a shape with a wider bottom and a narrower top, like a little pedestal.
Aim for a base that’s about one-third the width of your coffee filter. You can lightly sketch the shape in pencil first to make cutting easier.
Tip: For an extra touch, kids can write their name and the year on the base with a marker. It turns the craft into a dated keepsake.
Step 6: Assemble Your Snow Globe
Once the glitter swirls are fully dry, it’s time to put everything together.
- Lay down the globe. Place the painted coffee filter on your table or glue it onto a sheet of cardstock for extra sturdiness.
- Add the snowflakes. Glue the white foam or felt snowflakes around the globe. Scatter them along the edges and among the glitter swirls so it looks like snow is falling.
- Place the snowmen. Glue the handprint onto the coffee filter, positioning it so the fingers point up into the globe and the wrist sits near the bottom edge.
- Attach the base. Glue the grey trapezoid at the bottom of the circle, overlapping the wrist of the handprint. The narrow end should touch the globe, and the wider end should extend past the edge.
Press everything down gently and let the glue dry.
And there you have it: a snow globe full of happy little snowmen!
RELATED —> Coffee Filter Gnome Puppet Craft Idea
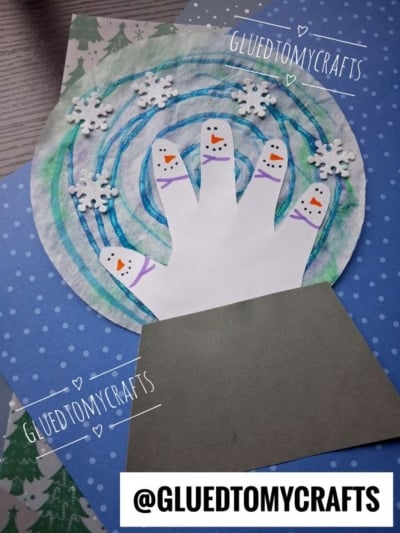
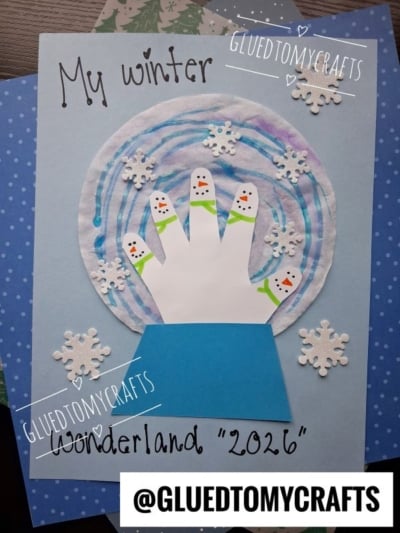

Winter has a way of flying by. One moment you’re bundling up for the first cold snap, and the next, the season is gone. This craft is a simple, joyful way to slow things down and spend real time with your child – no screens, no rushing, just the two of you making something together.
What makes it extra special is the handprint at the heart of it. Those tiny fingers won’t stay small forever, and tracing them into a piece of art is one of the sweetest ways to capture this exact moment in time. Years from now, you’ll pull this out and instantly remember how little they were – and how much they loved making it with you.
These coffee filter snowmen snow globe pieces also make heartfelt gifts for grandparents, aunts, uncles, and teachers. Tuck one into a holiday card, and you’ve got a present that will be treasured long after the snow melts. On that note, WE hope you inspired to recreate this craft idea today!
Happy crafting, and enjoy every sparkly, snowy moment together!
