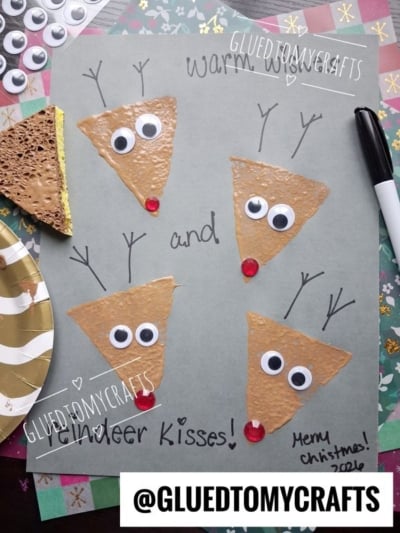
Few things say “the holidays are here” quite like little hands covered in paint and a table full of googly eyes. This sponge painted reindeer craft is one of our favorite easy Christmas projects. It takes just a handful of supplies, works for toddlers and big kids alike, and turns into a sweet handmade card that grandparents, teachers, and friends will treasure.
Each reindeer starts as a simple sponge-stamped triangle. Then you add antlers, wiggly eyes, and a bright red nose fit for Rudolph himself. The best part is that no two reindeer ever look the same, and that’s exactly what makes them so charming.
Whether you’re planning a cozy afternoon at home, a classroom holiday party, or a rainy-day activity, this craft brings plenty of festive fun without a lot of fuss.
Craft Supplies:
Gather these supplies before you start so the fun can keep rolling:
- Cardstock paper {your base}
- A kitchen sponge or craft sponge
- Golden-brown paint (washable tempera or acrylic works well)
- Black marker or pen
- Googly eyes (small or medium size)
- Red circular gems
- School glue
- Scissors
Helpful extras: a paper plate for paint, a smock or old T-shirt, baby wipes, and some newspaper to protect your table.
Directions:
Step 1: Set Up Your Craft Space
Cover your table with newspaper or a plastic tablecloth. Pour a small puddle of golden-brown paint onto a paper plate. Pop a smock on your little artist, and keep wipes close by for quick cleanups.
Step 2: Cut Your Sponge Into a Triangle
Use scissors to cut your sponge into a triangle about 2 to 3 inches wide. This shape will become your reindeer’s head. Grown-ups should handle this step for younger kids.
Tip: Cut two or three triangles in slightly different sizes. Kids love making a “family” of big and little reindeer.
Step 3: Stamp Your Reindeer Heads
Have your child dip the sponge triangle into the paint, then gently press it onto the cardstock. The wide side should face up and the point should face down, just like a reindeer’s face.
Stamp three to four reindeer in a zigzag pattern. Try one near the top left, one in the middle right, and one toward the bottom left. This leaves room for your message later and keeps the design balanced and playful.
Tip: Remind kids to press gently and lift straight up. A light touch creates that lovely speckled sponge texture.
Step 4: Let It Dry
Give the paint about 15 to 20 minutes to dry completely. This is a great time for a snack break or a quick holiday song.
Step 5: Draw the Antlers
Once the paint is dry, grab the black marker. Draw two antlers at the top of each triangle. Start with a line going up from each top corner, then add three little branches at the tip of each one.
Younger kids may need a little help here. Older kids can get creative with curly, extra-tall, or even lopsided antlers. Silly antlers are totally welcome!
Step 6: Add the Googly Eyes
Put a small dot of glue near the top of each triangle, then press on two googly eyes. Kids love this part, and the eyes instantly bring each reindeer to life.
Step 7: Give Each Reindeer a Red Nose
Glue a red paper circle or a red pom-pom onto the bottom tip of each triangle. Now every reindeer has its very own Rudolph nose!
Tip: Pom-poms add fun texture, but paper circles lay flatter. Choose paper if you plan to mail your card.
Step 8: Add a Festive Message
Sweet and simple
- Oh deer, Christmas is here!
- Merry Christmas, deer friend!
- Have a very merry Christmas!
- Sending reindeer hugs this Christmas!
- Hope your Christmas is full of cheer!
Punny and playful
- Oh deer! It’s Christmas time!
- Have a deer little Christmas!
- Wishing you a deer-ly loved Christmas!
- You make the holidays deer-lightful!
- Hope your Christmas is fa-la-la-lovely!
Best for younger kids
- Merry Christmas!
- Love, joy, and reindeer!
- Ho ho ho!
- Have fun this Christmas!
- Warm wishes and reindeer kisses!
Great if they’re making cards for family
- Merry Christmas, Grandma and Grandpa!
- Made with love this Christmas
- A little holiday cheer from me to you
- Wishing you love, joy, and Christmas magic
- Hope your day is merry and bright
Step 9: Let It Dry Completely Before Displaying or Gifting
Once you’re happy with your finished reindeer card, set it aside in a safe spot and let everything dry completely — glue, paint, and all. This usually takes about 30 minutes to an hour, depending on how generously the glue was applied.
Once it’s fully dry, it’s ready to display on the fridge, tuck inside an envelope, or hand over as a heartfelt homemade gift. Your little artist can present it with pride knowing every bit of it was made by their very own hands.
RELATED —> Paper Bowl Reindeer Craft Idea For Christmas
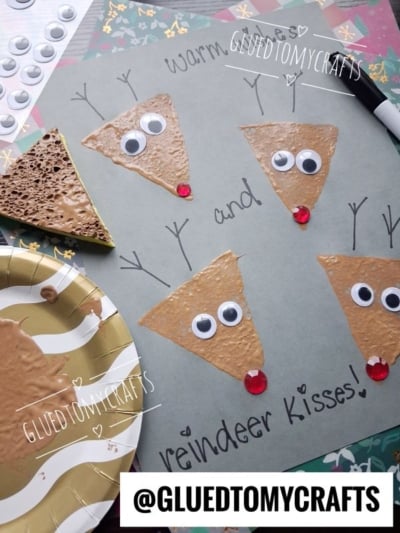
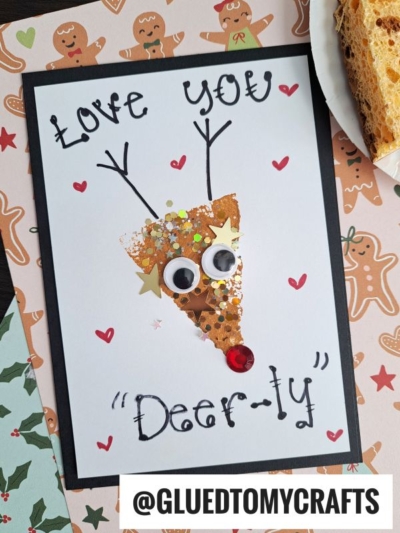

This sponge painted reindeer craft is all about joy, not perfection. A smudged nose or wobbly antler simply adds personality. The memories you make together around the craft table matter far more than how the final card looks. So grab your sponges, clear off the table, and let the creativity run wild.
From our craft table to yours, have a very merry, glue-covered, glitter-sprinkled Christmas! Oh deer, the holidays are here! 🦌❤️⭐
