
Summer days bring plenty of sunshine, but they also bring long afternoons where kids need something creative to do. If you want a hands-on activity that engages their imagination, this sponge painted fish craft is the perfect solution.
Sponge painting gives children a unique tactile experience. It moves away from standard paintbrushes and lets them explore texture, color mixing, and basic stamping techniques. Plus, it requires very little setup and uses common household items you probably already have lying around.
Materials You Need
You do not need to make a special trip to the craft store for this project. Grab these basic supplies from your art closet and kitchen:
- Bright blue cardstock: This serves as your ocean background. Cardstock holds up better than regular paper when using wet paint.
- A kitchen sponge: A standard rectangular kitchen sponge works perfectly. You can cut it into a circle or leave it as is.
- Washable paints: Choose bright, tropical colors like pink, yellow, and orange.
- A paper plate: This makes the perfect disposable palette for your paint.
- Googly eyes: Large googly eyes give the fish a fun, cartoonish personality.
- A black marker: You will use this to draw fins, tails, and ocean waves.
- Glue: A basic glue stick or school glue to attach the eyes.
- Scissors: For cutting the sponge and making any paper details.
Step-by-Step Sponge Painted Fish Tutorial
Ready to make some underwater magic? Follow these simple instructions to create your ocean scene.
1. Prepare Your Ocean Canvas
Start by giving your child a sheet of bright blue cardstock. Grab your black marker and draw a few wavy lines across the paper. These lines represent the ocean currents. You can do this step for younger toddlers, or let older kids draw the waves themselves.
2. Set Up the Paint Station
Squirt your washable paints onto the paper plate. You can keep the colors separate, or place them close together so they mix slightly when the sponge hits them. Mixing yellow and pink creates a beautiful, mottled texture on the final craft.
3. Cut and Prep the Sponge
Take your kitchen sponge and cut it into a circular shape. This circle will become the body of your fish. If you want to make different sizes of fish, cut a few different sponges.
4. Stamp the Fish Bodies
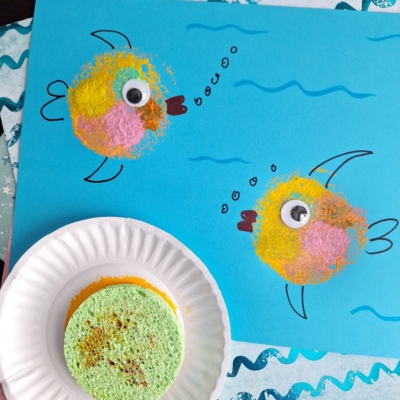
Show your child how to dip the sponge into the paint on the paper plate. Remind them to dab it gently so it does not soak up too much paint. Have them press the painted sponge firmly onto the blue cardstock. Lift the sponge straight up to reveal a perfectly textured, colorful circle. Repeat this step to add a second fish to the ocean canvas.
5. Let the Paint Dry
Because sponges create a thick, textured layer of paint, you need to let the artwork dry completely before moving on to the final details. Place the cardstock in a sunny spot for about twenty minutes.
6. Add the Fun Details
Once the paint is dry, it is time to bring the fish to life. Glue one large googly eye near the front of each painted circle. Next, grab your black marker. Draw a little curved line for the mouth. Add top and bottom fins, a triangle tail at the back, and a few small circle bubbles floating up toward the surface.
RELATED —> Sponge Painted Pizza Card Craft Idea For Kids
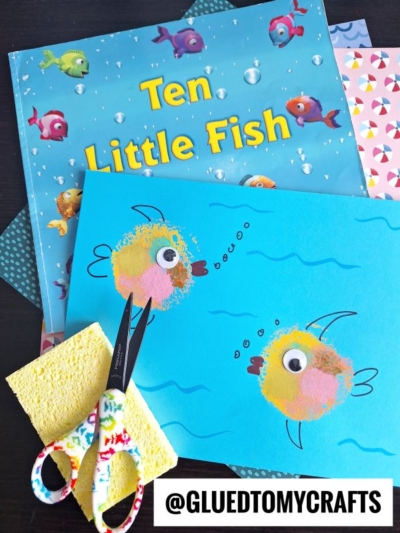
If you want to stretch this activity further, pair it with a great children’s book. Reading a story before crafting sets the stage and gets kids excited about what they are going to make.
“Ten Little Fish” is a fantastic choice for this project. Read the book together, point out the colorful fish on the pages, and challenge your kids to recreate their favorite characters using their sponges and paint. Connecting literature to art helps reinforce reading comprehension and sparks visual creativity.
On that note, gather your supplies, set up your paper plate palettes, and let your kids stamp their way to a beautiful ocean scene. We hope you enjoy making this sponge painted fish craft as much as we do. Happy crafting, my friends!

Sponge Painted Fish Craft for Summer
Here’s your checklist of supplies to bring this craft to life:
- Cardstock Paper
- Craft Paint
- Wiggle Eyes
- Embellishments
Prepare your creative haven by laying down a protective cover before the crafting magic begins!
Directions:
- Start by giving your child a sheet of bright blue cardstock. Grab your black marker and draw a few wavy lines across the paper. These lines represent the ocean currents. You can do this step for younger toddlers, or let older kids draw the waves themselves.
- Squirt your washable paints onto the paper plate. You can keep the colors separate, or place them close together so they mix slightly when the sponge hits them. Mixing yellow and pink creates a beautiful, mottled texture on the final craft.
- Take your kitchen sponge and cut it into a circular shape. This circle will become the body of your fish. If you want to make different sizes of fish, cut a few different sponges.
- Show your child how to dip the sponge into the paint on the paper plate. Remind them to dab it gently so it does not soak up too much paint. Have them press the painted sponge firmly onto the blue cardstock. Lift the sponge straight up to reveal a perfectly textured, colorful circle. Repeat this step to add a second fish to the ocean canvas.
- Because sponges create a thick, textured layer of paint, you need to let the artwork dry completely before moving on to the final details. Place the cardstock in a sunny spot for about twenty minutes.
- Once the paint is dry, it is time to bring the fish to life. Glue one large googly eye near the front of each painted circle. Next, grab your black marker. Draw a little curved line for the mouth. Add top and bottom fins, a triangle tail at the back, and a few small circle bubbles floating up toward the surface.
CLICK HERE TO PRINT THE DIRECTIONS FOR THIS CRAFT