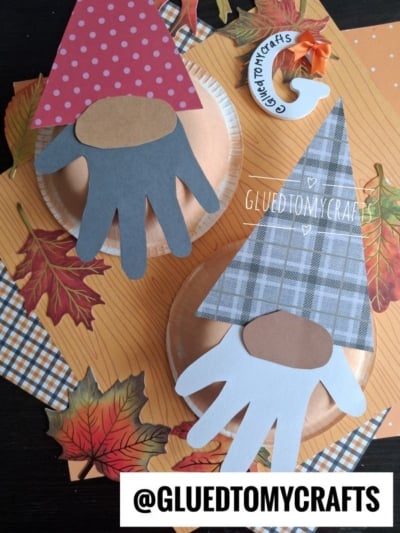
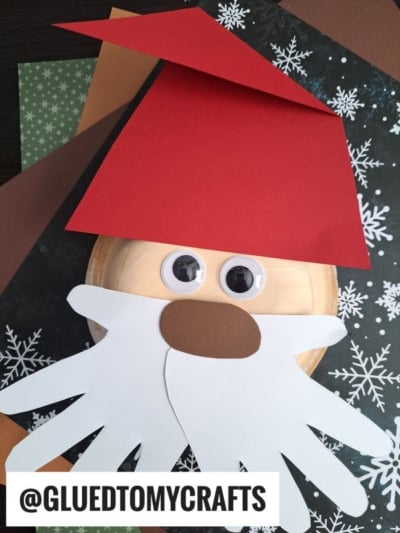
There’s something magical about fall. The leaves turn golden, the air gets crisp, and cozy crafting season officially begins! If you’re looking for a simple, adorable project to make with the little ones, you’ve found it. These paper bowl and handprint gnomes are quick to assemble, budget-friendly, and full of charm.
The best part? Each child’s handprint becomes the gnome’s fluffy beard, which means every gnome turns out one-of-a-kind. This craft is perfect for a rainy afternoon at home, a classroom activity, or a fun seasonal project at daycare. Grab your supplies and let’s make some whimsical little friends together.
Craft Supplies:
Gather these simple supplies before you start. Most of them are probably already sitting in your craft drawer.
- 1 paper bowl – this becomes the gnome’s face
- Skin-tone craft paint – to paint the bowl
- Foam paint brush
- Scrapbook paper – for the tall, pointy hat
- Light brown paper – for the oval-shaped nose
- White or gray colored paper – for the handprint beard
- Glue – a glue stick or white school glue both work great
- Scissors – kid-safe scissors for the little ones
- Pencil – for tracing the handprint
Directions:
Follow these easy steps and you’ll have a finished gnome in no time.
- Turn your paper bowl upside down so the flat bottom faces you. This rounded shape will be the gnome’s face and body. Go ahead and paint the bowl completely with your craft paint. Set aside to let it dry completely.
- Cut a tall triangle out of your colored construction paper. The wider the base, the better it will sit on top of the bowl. Patterned paper, like polka dots or plaid, adds extra personality here. Set the hat aside for now.
- Have your child place their hand flat on the patterned or colored paper, fingers spread slightly apart. Trace around it with a pencil, then carefully cut out the handprint. The fingers will become the wispy strands of the gnome’s beard.
- Snip a small oval from your light brown paper. This will be the gnome’s round little nose, and it’s the piece that ties the whole face together.
- Now for the fun part! Glue the handprint beard onto the front of the painted bowl, with the palm near the top and the fingers pointing down. Then glue the pointy hat so it overlaps the top edge of the bowl and the top of the beard. Finally, place the brown oval nose right where the hat and beard meet.
- Glue on a tiny bow, some buttons, or seasonal stickers. Let everything dry completely, and your handprint gnome is ready to display!
RELATED —> Paper Bowl Witch Craft For Kids
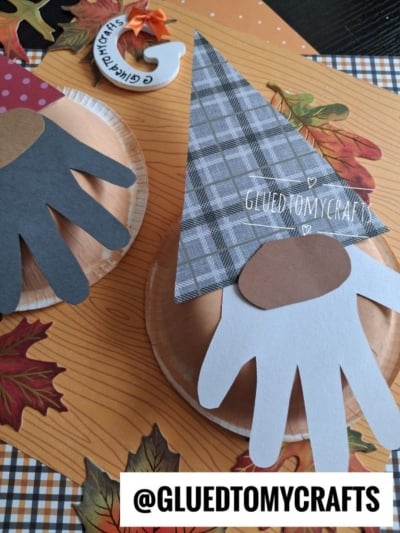
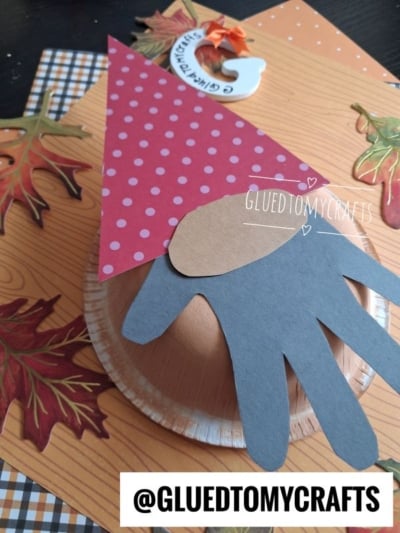
And there you have it: a batch of cheerful handprint gnomes ready to brighten up any shelf, window, or classroom wall. This craft is proof that a few simple supplies and a little imagination can go a long way. It captures those tiny handprints in the sweetest way, and you’ll treasure the keepsake long after the leaves have fallen.
We’d love to see how your gnomes turned out! Snap a photo of your creations and share them with us. Happy crafting, my friends!

Paper Bowl Gnome Craft Idea For Kids
Make an easy fall gnome kids craft using a paper bowl and handprint beard! A fun, budget-friendly handprint craft for parents and teachers. Learn how.
Here’s your checklist of supplies to bring this craft to life:
- 1 White Paper Bowl
- Craft Paint
- Cardstock Paper
- 1 Scissors
- 1 School Glue
Prepare your creative haven by laying down a protective cover before the crafting magic begins!
Directions:
- Turn your paper bowl upside down so the flat bottom faces you. This rounded shape will be the gnome's face and body. Go ahead and paint the bowl completely with your craft paint. Set aside to let it dry completely.
- Cut a tall triangle out of your colored construction paper. The wider the base, the better it will sit on top of the bowl. Patterned paper, like polka dots or plaid, adds extra personality here. Set the hat aside for now.
- Have your child place their hand flat on the patterned or colored paper, fingers spread slightly apart. Trace around it with a pencil, then carefully cut out the handprint. The fingers will become the wispy strands of the gnome's beard.
- Snip a small oval from your light brown paper. This will be the gnome's round little nose, and it's the piece that ties the whole face together.
- Now for the fun part! Glue the handprint beard onto the front of the painted bowl, with the palm near the top and the fingers pointing down. Then glue the pointy hat so it overlaps the top edge of the bowl and the top of the beard. Finally, place the brown oval nose right where the hat and beard meet.
- Glue on a tiny bow, some buttons, or seasonal stickers. Let everything dry completely, and your handprint gnome is ready to display!



Grab our favorite books via our Amazon affiliate link! In our Amazon storefront you will find books, toys and craft supplies we absolutely love using for our Glued To My Crafts tutorials!
If you've enjoyed our content or have any thoughts to share, we'd love to hear from you! Mention @gluedtomycrafts or tag #gluedtomycrafts on Instagram!