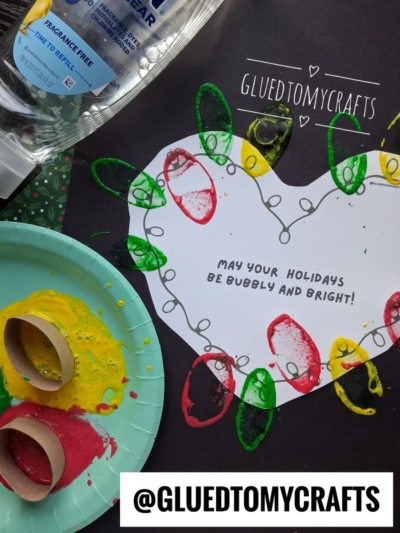
Some holiday crafts are worth repeating every year, and this one makes it easy. With a few paper rolls, some paint, and a squirt of dish soap, kids can make a string of glowing Christmas lights that look fun and festive.
The idea is simple. You add dish soap to the paint, and it turns a little foamy and glossy. When kids stamp their bulbs, the prints come out with a bubbly texture that looks like twinkling lights. That’s why the free printable says “May Your Holidays Be Bubbly and Bright!” It’s a cheerful pun and a keepsake in one.
This project works well at the kitchen table, in a classroom, or at a holiday party. It’s quick to set up and easy to clean up, and every finished piece looks a little different.
Craft Supplies:
- Free Bubbly and Bright Printable – on box.com – password is GLUEDTOMYCRAFTS2026
- White Cardstock Paper
- Large Black Construction Paper
- Paper Plate (for holding your paint)
- Dish Soap
- Craft Paint
- Toilet Paper Roll
- Scissors
Optional extras: paint smocks, a plastic tablecloth, baby wipes, and extra paint colors like blue, pink, or orange for a multicolor light strand.
Directions:
- Download the free heart template and print it on white paper or white cardstock. Cardstock is sturdier and holds up better under wet paint. Regular printer paper works fine too.
- Cut along the outer edge of the heart. Older kids can do this on their own. For younger children, cut the hearts ahead of time so the fun part starts right away. Don’t worry about perfect edges. A slightly wobbly heart adds handmade charm.
- Place the heart in the center of a large sheet of black construction paper and glue it down. Press firmly from the center outward to smooth out any bubbles or lifted edges. The black background is what makes this craft pop. Once the bulbs are stamped, the bright colors look like real lights glowing against a night sky.
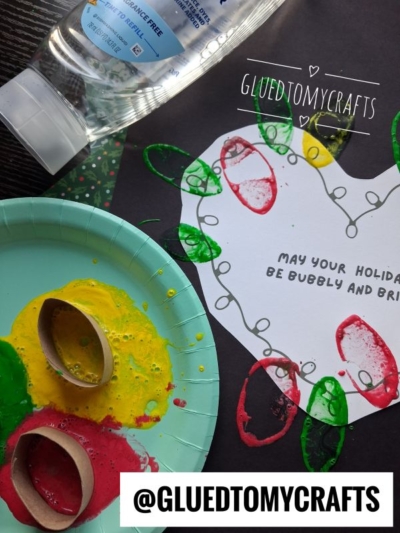
- Squeeze small puddles of red, green, and yellow tempera paint onto the paper plate, keeping the colors separate. Add a small squirt of dish soap to each puddle, about 1 teaspoon per tablespoon of paint. Then stir gently with a craft stick or the end of a paintbrush. You’ll see the paint turn glossy and a bit frothy. That’s what you want! Those tiny bubbles give each stamped bulb its “bubbly” texture.
- Tip: Don’t add too much soap. If the paint gets runny, your bulb prints may lose their shape. Add a bit more paint to thicken it back up.
- Take a toilet paper roll and gently pinch one side of the opening to form a point. Then softly round out the opposite side. You’ll end up with an oval or teardrop shape, just like a classic Christmas light bulb. Make one stamp for each paint color so the colors stay bright and don’t turn muddy.
- Tip: If your tubes feel too long for small hands, cut them in half. Shorter stamps are easier to grip and control.
- Here comes the best part! Dip the edge of a tube stamp into the paint, then press it onto the paper. Line up the bulbs along the light string outline on the printed heart, so each bulb sits at a socket on the strand. Mix up the colors as you go: red, green, yellow, and repeat. Or let kids pick their own patterns.
- Once the heart is filled, keep going! Stamp extra bulbs on the black construction paper around the heart. This makes it look like the lights are spilling out and glowing beyond the card.
- Let the artwork dry flat for at least an hour before hanging or displaying it.
RELATED —> Dish Soap Stamped Snowman Craft Idea
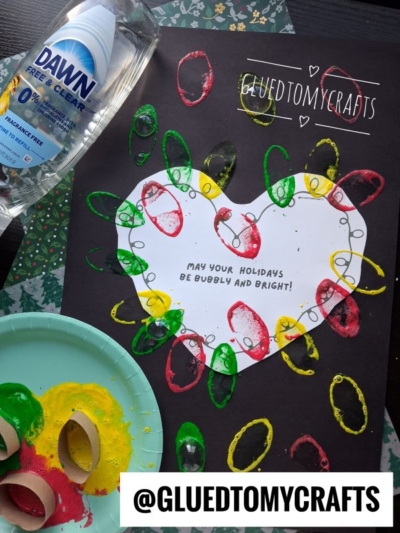
There’s nothing quite like seeing kids light up while their Christmas lights take shape. Every bulb, smudge, and bubble makes each piece one of a kind.
We’d love to see what your little crafters make! Snap a photo of their finished bubble artwork and share it on social media. Tag @gluedtomycrafts so we can cheer them on.
From our crafty corner to yours, may your holidays be bubbly and bright! 🎄✨