Create a magical torn paper snow globe with simple materials. Follow our easy steps for a fun crafting experience.

Winter is a wonderful time for cozy indoor activities, and what better way to spend a chilly afternoon than by creating something magical together?
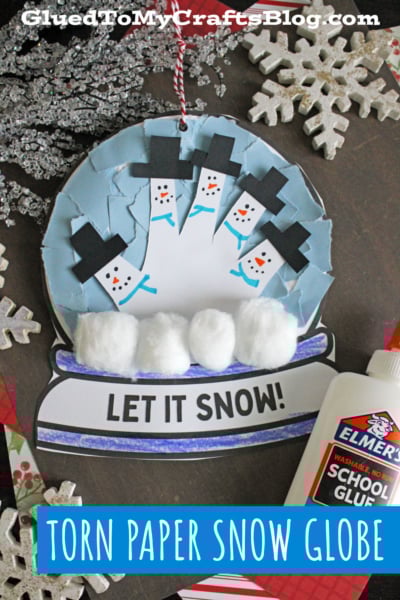
This torn paper snow globe craft is a fantastic project for kids that combines creativity, sensory play, and a personal touch to create a beautiful piece of winter decor.
It’s simple enough for little hands but engaging for older kids too, making it an ideal family or classroom activity.

This project uses basic craft supplies and features a charming handprint snowman right in the center of the globe. It’s a perfect way to capture a memory of how small your child’s hands once were. Let’s gather our supplies and make a winter wonderland masterpiece!
Craft Supplies:
Before you start, collect these simple materials. Most of these items are probably already in your craft bin.
- Light Blue Construction Paper
- White Cardstock Paper {two sheets!}
- Snow Globe Printable – from our landing page
- School Glue
- Crayons, Markers or Coloring Pencils
- Cotton Balls
- Embellishments
Directions:
Follow these easy steps to create your own unique torn paper snow globe.
- Begin by downloading and printing the free “Let it SNOW!” printable onto a sheet of white cardstock. Cardstock is sturdier and holds up well to glue and paint.
- Before you start assembling, invite your child to color the bottom stand of the snow globe. They can use crayons, markers, or colored pencils to add their own creative touch.
- Take a sheet of light blue construction paper and help your child tear it into small, coin-sized pieces. Tearing paper is great for developing fine motor skills! Once you have a nice pile, apply glue inside the circular part of the printable and let your child stick the blue pieces down, covering the entire area to create a sky.
- Now, it’s time for the main event! Trace your child’s hand on a separate piece of white paper and carefully cut it out. This handprint will become a family of five little snowmen.
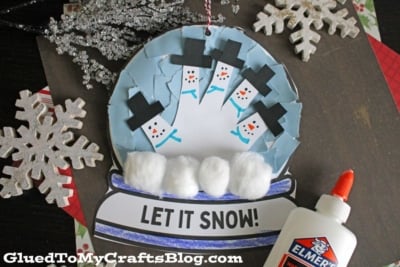
- Using markers, give each “finger” snowman its own personality. Draw on eyes, a carrot nose, a mouth, and tiny buttons. This is a great chance for kids to get creative.
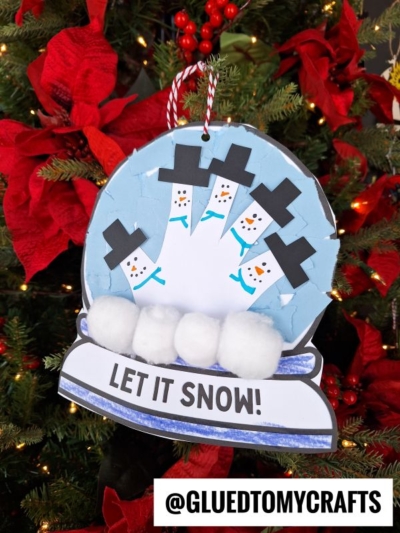
- Glue the decorated handprint cutout into the center of your blue paper sky, with the fingers pointing up. It will look like a group of snowmen standing in the middle of your globe.
- For a fluffy, three-dimensional effect, glue a line of cotton balls along the bottom of the globe, right where the snowmen’s bases are. This creates a soft, snowy landscape.
- Let your child’s imagination shine by adding other fun details. Sprinkle on some glitter for a magical shimmer or use a white paint pen to dot snowflakes in the sky.
- If you’d like to hang your creation, carefully cut out the entire snow globe shape. Use a hole punch to make a small hole at the top, thread a piece of string or ribbon through it, and tie a loop.
- Place your finished snow globe in a safe spot to dry completely. Once it’s ready, it makes a wonderful gift or a proud piece of holiday decor for your home!
RELATED —> Santa Snow Globe Ornament
Crafting is a wonderful way to connect as a family and make lasting memories. This torn paper snow globe is more than just a craft; it’s a snapshot of a moment in time, captured by your child’s own handprint.
We encourage you to hang these beautiful snow globes on the fridge, display them on a mantelpiece, or give them as heartfelt gifts to grandparents. And don’t forget to share your magical winter creations with friends and family! Snap a photo and post it on social media – be sure to tag us so we can celebrate your creativity too.
Nothing brings more joy than seeing families crafting, laughing, and making art together during the cozy winter months. Happy crafting, my friends!

Torn Paper Snow Globe Craft For Kids
Create a magical torn paper snow globe with simple materials. Follow our easy steps for a fun crafting experience.
Here’s your checklist of supplies to bring this craft to life:
- School Glue
Prepare your creative haven by laying down a protective cover before the crafting magic begins!
Directions:
- Begin by downloading and printing the free "Let it SNOW!" printable onto a sheet of white cardstock. Cardstock is sturdier and holds up well to glue and paint.
- Before you start assembling, invite your child to color the bottom stand of the snow globe. They can use crayons, markers, or colored pencils to add their own creative touch.
- Take a sheet of light blue construction paper and help your child tear it into small, coin-sized pieces. Tearing paper is great for developing fine motor skills! Once you have a nice pile, apply glue inside the circular part of the printable and let your child stick the blue pieces down, covering the entire area to create a sky.
- Now, it's time for the main event! Trace your child’s hand on a separate piece of white paper and carefully cut it out. This handprint will become a family of five little snowmen.
- Using markers, give each "finger" snowman its own personality. Draw on eyes, a carrot nose, a mouth, and tiny buttons. This is a great chance for kids to get creative.
- Glue the decorated handprint cutout into the center of your blue paper sky, with the fingers pointing up. It will look like a group of snowmen standing in the middle of your globe.
- For a fluffy, three-dimensional effect, glue a line of cotton balls along the bottom of the globe, right where the snowmen's bases are. This creates a soft, snowy landscape.
- Let your child’s imagination shine by adding other fun details. Sprinkle on some glitter for a magical shimmer or use a white paint pen to dot snowflakes in the sky.
- If you’d like to hang your creation, carefully cut out the entire snow globe shape. Use a hole punch to make a small hole at the top, thread a piece of string or ribbon through it, and tie a loop.
- Place your finished snow globe in a safe spot to dry completely. Once it’s ready, it makes a wonderful gift or a proud piece of holiday decor for your home!


NEED HELP DOWNLOADING OUR FREE PRINTABLES? PLEASE REFER TO OUR FAQ PAGE
If you've enjoyed our content or have any thoughts to share, we'd love to hear from you! Mention @gluedtomycrafts or tag #gluedtomycrafts on Instagram!