
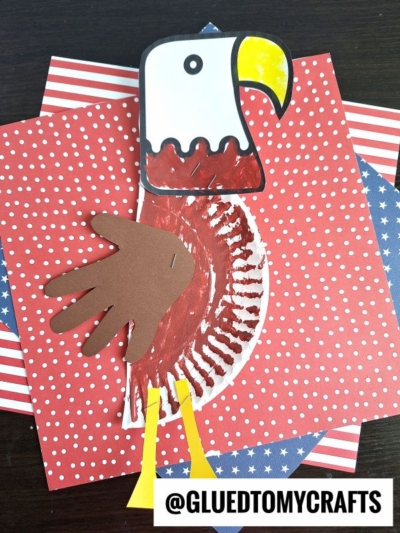
Are you looking for an engaging and crafty activity to do with your kids? Look no further! This adorable paper plate bald eagle is the perfect way to celebrate American patriotism with a creative twist. Plus, it’s also lots of fun for both parents and children alike!

This Paper Plate Eagle craft idea is sure to excite and motivate kids of all ages. With easy-to-find supplies like cardstock paper, scissors, glue, tempera paint and a large paper plate, you can bring this vibrant symbol of freedom and liberty to life within minutes!
Not only will the individual creating it have fun while making it, but they’ll also gain an appreciation of art as they express themselves through a unique creation!
With step by step instructions and a free provided included below, let’s get started on our patriotic bald eagle masterpieces together!
Happy crafting my friends! Don’t forget to share pictures with us afterwards. Come find us on Facebook or Instagram! #gluedtomycrafts
RELATED —> Popsicle Stick Bald Eagle

Finding ways to keep your students or children engaged in creative activities can be a challenge during the summer months. But with the right materials and an inspiring project, you can bring out their inner artist!
Craft Supplies:
- Large Paper Plate
- Paint Crayons
- Pencil
- Eagle Printable – on our landing page
- White Cardstock Paper {two sheets}
- Yellow Cardstock Paper
- Craft Scissors
- Large Wiggle Eyes
- Stapler
Directions:
- First cut your paper plate in half. Straight up the center to create TWO equal pieces.
- Set one half aside for your craft and save the other to repeat the craft later.
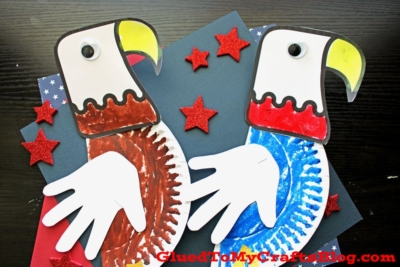
- Next up – use your tempera paint crayon to color the paper plate half. You can do brown or blue for a patriotic eagle.
- When done painting, set it aside to let it dry complete.
- Now grab your sheets of cardstock paper.
- Start with the printable. Color in ONE eagle head design however you like.
- When done, trim it out with scissors. Save the other half to repeat the craft.
- Now grab your second sheet of white cardstock paper, along with a pencil.
- Trace and trim out a handprint shape that will become the eagle’s wings.
- Out of the remaining yellow cardstock paper, trim out two stick legs.
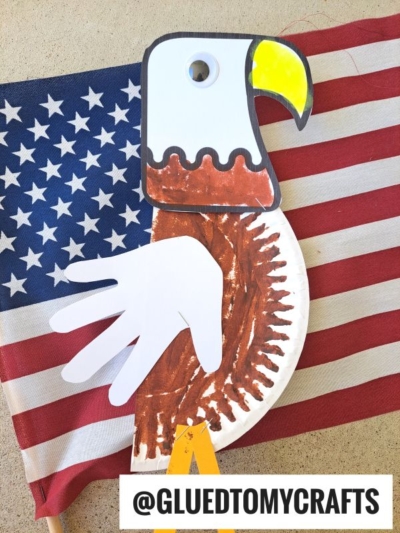
- Now we are heading towards the final steps! To finish off the Paper Plate Eagle – staple ALL the cardstock pieces in place on the paper plate. I would start with the head and work down.
- Finally – glue on a googly eye for him to see.
- Now display your eagle creation proudly for all to see!!!
RELATED —>Handprint Bald Eagle
At Glued To My Crafts we really enjoy sharing kid friendly craft tutorials on our website! It literally makes my crafty heart FLUTTER with so much excitement when I share them with our readers.
So on that note, be sure to check out our Gnome of the Brave, Paper Plate Uncle Sam and Popsicle Stick American Flag craft posts for even MORE crafty inspiration. All three of them are great patriotic crafts for the upcoming 4th of July holiday – hint hint!
And don’t forget to share pictures with us as well! You can tag us on your various social media sites, join our Facebook group to share pictures of your child’s finished bald eagle paper plate craft or use our special hashtag #gluedtomycrafts on Instagram for us to see from as well!
We really appreciate and LOVE seeing the inspiration come to life! Come on – make my day and share away with us!

Paper Plate Bald Eagle Craft Idea
Here’s your checklist of supplies to bring this craft to life:
- 1 Large Paper Plate
- PATRIOTIC PRINTABLE - LANDING PAGE
- Cardstock Paper white and yellow
- 2 Large Wiggle Eyes
Prepare your creative haven by laying down a protective cover before the crafting magic begins!
Directions:
- First cut your paper plate in half. Straight up the center to create TWO equal pieces.
- Set one half aside for your craft and save the other to repeat the craft later.
- Next up - use your tempera paint crayon to color the paper plate half. You can do brown or blue for a patriotic eagle.
- When done painting, set it aside to let it dry complete.
- Now grab your sheets of cardstock paper.
- Start with the printable. Color in ONE eagle head design however you like.
- When done, trim it out with scissors. Save the other half to repeat the craft.
- Now grab your second sheet of white cardstock paper, along with a pencil.
- Trace and trim out a handprint shape that will become the eagle's wings.
- Out of the remaining yellow cardstock paper, trim out two stick legs.
- Now we are heading towards the final steps! To finish off the Paper Plate Eagle - staple ALL the cardstock pieces in place on the paper plate. I would start with the head and work down.
- Finally - glue on a googly eye for him to see.
- Now display your eagle creation proudly for all to see!!!


NEED MORE HELP DOWNLOADING OUR FREE PRINTABLES? PLEASE REFER TO OUR FAQ PAGE