Halloween is such a fun time of year and one of our favorite things to do is decorate pumpkins!
I love the traditional carving pumpkins, but sometimes it’s fun to switch things up and try something new.
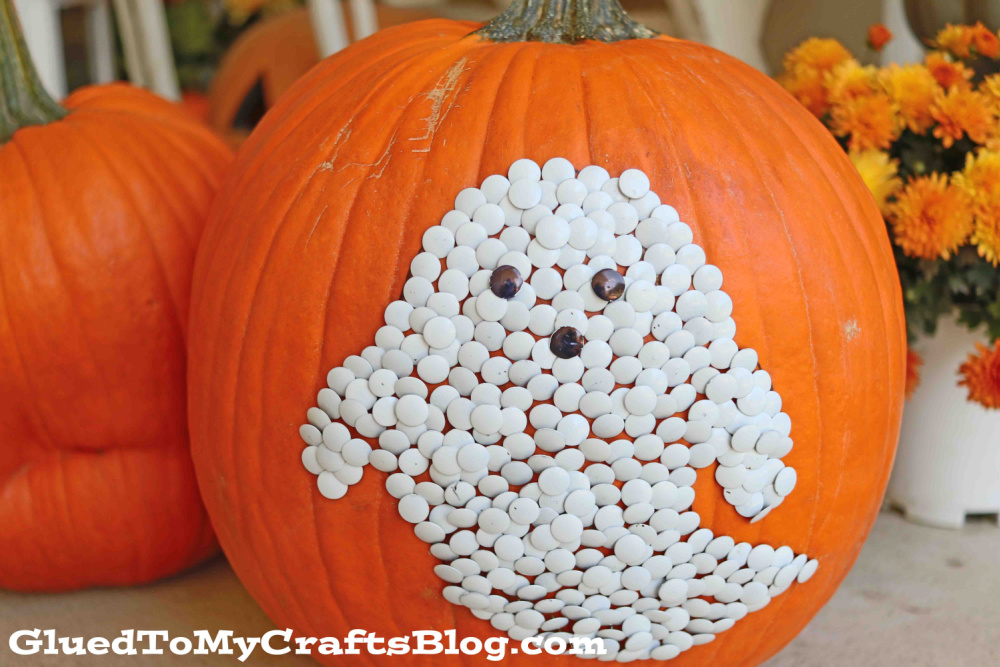
This year I decided to make a no carve thumb tack ghost pumpkin and he turned out so cute!

He’s perfect for sitting on the front porch or any Halloween decoration you want to add a little extra spookiness too. All you need is a large pumpkin, our free ghost template and white thumb tacks to bring him to life – super easy peasy!
Ghost are synonymous with Halloween, and what’s a better way to bring a little extra spooky to your doorstep than with a “No Carve Thumb Tack Ghost Pumpkin” craft idea that is inspired by us!
Our ghost pumpkin craft tutorial is easy super easy to recreate within an hour, especially since today I’ve included a FREE ghost template for you to download, trim out and use like a stencil! Other than that, all you need is a large, orange pumpkin, a black marker and a ton of white thumb tacks. That’s it!
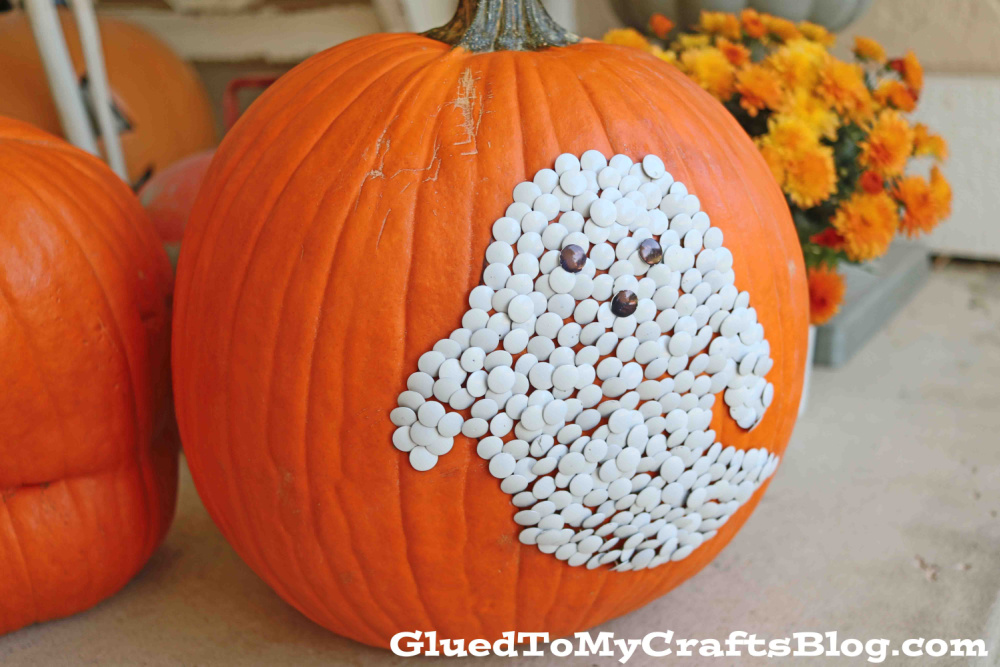
My last tid-bit is that it’s perfect for the front porch and/or your Halloween party, as a decoration that will last longer than the traditional art of carving. Just follow our simple tutorial below and you’ll have your very own Halloween decoration that is sure to impress whoever lay eyes on it.
Happy crafting, my friends! Don’t forget to follow us on Facebook so you never miss a new tutorial from us!
RELATED —> No Carve Pumpkin Ideas
This no carve pumpkin will last longer and look impressive too. So if you’re looking for an easy Halloween decoration idea, be sure to give this one a try!
Craft Supplies:
PASSWORD FOR FREE FILES – GLUEDTOMYCRAFTS2026
- Large, Orange Pumpkin
- Ghost Template {on box.com}
- White Cardstock Paper
- Scissors
- Black Sharpie Marker
- White Thumb Tacks {200-300 per pumpkin}
Directions:
- First things first – if you haven’t printed out our ghost printable out yet, go ahead and do that on a single sheet of white cardstock paper.
- Now grab your scissors and trim out the ghost shape.
- Discard excess paper.
- Next grab your pumpkin, the ghost cutout and your black marker.
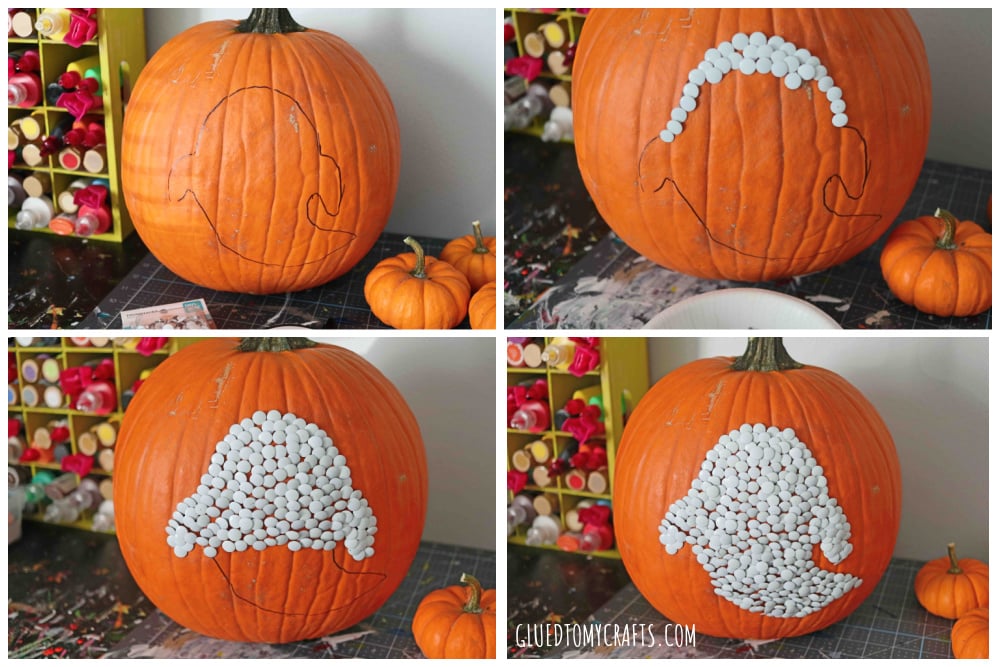
- Lay the ghost shape on your pumpkin wherever you want it} and trace around the design with the marker.
- When done, set aside the paper stencil to repeat the craft again on another pumpkin.
- Next up – the thumb tacks! I suggest putting the thumb tacks in a bowl and placing the pumpkin in between your legs for ease {I did mine while watching TV!}
- Now take the thumbtacks and one by one, press them inside the ghost design, right into the pumpkin, until it’s completely filled in with white. You will want to layer them next to each other, so no orange underneath comes through. I suggest starting from the top and going down until you reach the bottom. Then go back in and fill in any empty spots.
- Once you have ALL you thumb tacks in place, it’s time for the eyes & mouth of the ghost. Imagine where you want those to be on your ghost. Use the same marker from earlier to draw/color in TWO eyes and one mouth on three of your chosen thumbtacks.
- And that’s it! Now go straight to displaying your awesome pumpkin!
RELATED —> Thumbprint Pumpkin Patch

I hope you are inspired to recreate our no carve ghost pumpkin craft today! We also have our Mosaic Pumpkins tutorial for you to check out this fall season!
