With this simple DIY paper dinner plate kid craft tutorial, you can have children “plan their meal” while making their own version of what the “perfect plate of food” should hold!
No two pieces will be alike and that’s what makes this EXTRA FUN! Plus we are recycling those pesky sales flyers that will be filling up your mailbox soon, which makes this a VERY inexpensive craft too!
So what will be on your child’s plate? Will it be the traditional items like turkey and ham?? Maybe some favorite fruits and veggies? What will be important to them? Whatever they decide to place on it – we hope they have fun crafting it up!
Find the FULL step-by-step tutorial and free printable below & get ready to “fill those plates” with just some simple craft materials!!!
Happy crafting, my friends!!! Please don’t forget to share pictures of your dinner plate creations on our Facebook page wall afterwards, so we admire your awesome Thanksgiving pieces from a a far! I can’t wait to see what food you put on your plate!

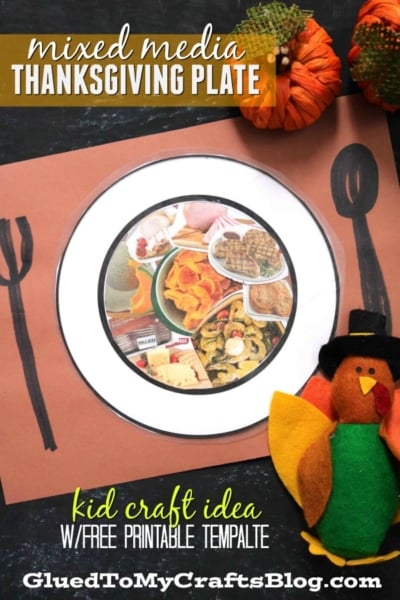
Recycle those paper store flyers and get those conversations started, with this “What Will Be On Your Thanksgiving Dinner Plate?” craft idea!
Craft Supplies:
- Thanksgiving Plate Printable {GRAB IT ON BOX.COM}
- White Cardstock Paper
- Scissors
- Clear Contact Paper
- Recycled Sales Flyers
- Adhesive
- Colored Cardstock Paper
- Sharpie Markers


Directions:
- First print out the FREE dinner plate template above. You will want one plate printable per kid & craft.
- Next grab your scissors. Trim out the plate from the printable, as well as the circular center from it. Discard excess paper.
- Now grab your clear contact paper. Cut out TWO pieces that are bigger than the dinner plate cutout.
- Remove the backing from one piece of contact paper. Lay it on a flat surface. Place the plate cutout, face down, on the contact paper.
- Next have children decorate the inside of their dinner plate however they like, with pictures from the various sales flyers. Remember – it’s whatever THEY want or like to eat!
- Once they are done “mixing” and making the perfect plate, grab the second piece of contact paper.
- Peel off the backing and place it on top of the other piece of contact paper, moving your hand around to “squish” everything together.
- To finish off the Mixed Media Thanksgiving Meal craft, use your scissors to trim out the plate/remove the excess contact paper, so you can attach it to the center of another single sheet of cardstock paper for the place mat. From there, grab your markers and draw on a fork and spoon, on each side of the plate.
- And that’s it! Display proudly for all to see!!!
RELATED —> Popsicle Stick Turkey

We LOVE sharing Thanksgiving themed kid craft ideas on Glued To My Crafts!
If you loved today’s thanksgiving dinner plate art project idea, be sure to also check out our popular Paper Plate Turkey and Turkey Ballerina craft posts for two more tutorials to tackle in the month of November!
