It's the simplest back to school kids craft idea EVER! Check out our Popsicle Stick Notepad Paper tutorial! It's super unique & fun!
It’s the simplest back to school craft idea inspired by notebook paper. YES you read that correctly – NOTEBOOK PAPER!
I took our basic popsicle stick shape {that we have used so many times on Glued To My Crafts now} and designed it to mimic lined notebook paper. I’m tickled pink on this one because it’s a FIRST SEEN HERE and completely original to our website!
Back-to-school season is just around the corner, and what better way to welcome it than with a fun and creative craft project? This tutorial will guide you through making a Popsicle Stick Notebook Paper Back to School Picture Frame. It’s a perfect activity for kids to get excited about the new school year and create something they can cherish throughout their academic adventures.
From gathering the necessary materials to the final touches, this blog covers everything you need to know to create these delightful picture frames. Whether you’re a parent, teacher, or just love crafting with kids, you’ll find valuable tips and easy-to-follow instructions here.
Craft Supplies:
- Jumbo Popsicle Sticks {nine per craft}
- Hot Glue Gun
- Paper Plate
- White Craft Paint
- Paint Brush
- Red/Blue Puffy Paint
- Mini Clothespin {one per craft}
- Wallet Sized Printed Picture
- White Cardstock Paper
- Pencil Printable – on our landing page
- Crayons
Directions:
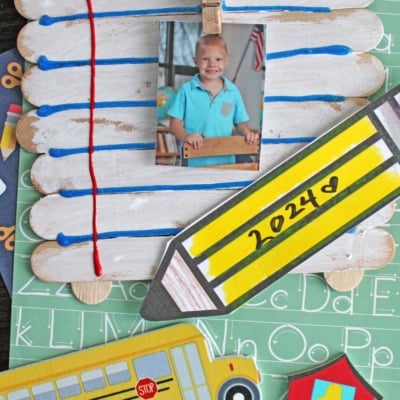
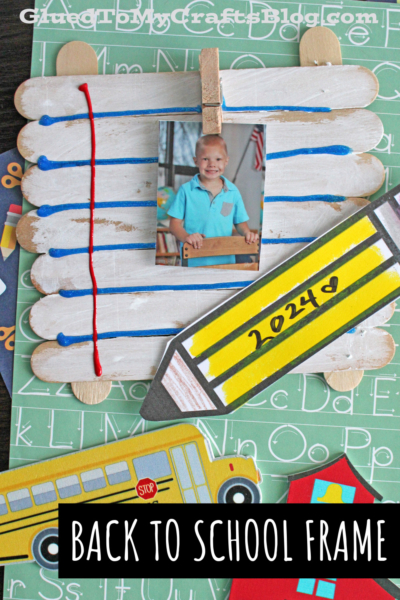
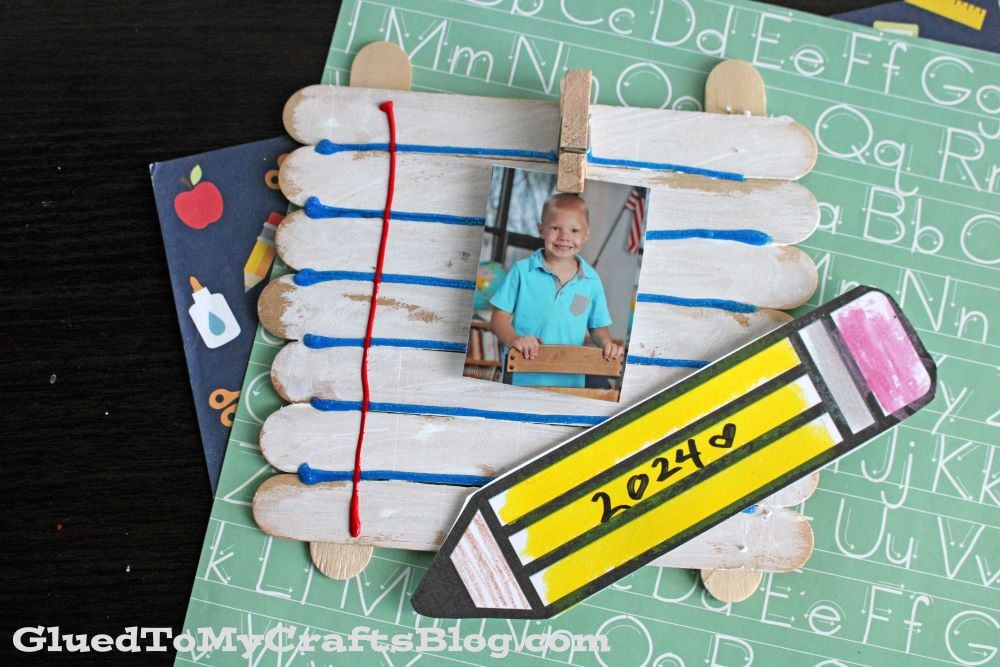
- For each “notebook paper craft frame” piece, you will need nine JUMBO popsicle sticks per picture frame.
- Lay out seven popsicle sticks {on your flat surface} next to each other, in a row.
- Now take the two remaining popsicle sticks and glue them the opposite direction to secure them like a fence and/or square shape.
- Next up – paint! Paint the newly made wood shape completely white.
- Now grab the puffy paint and several lines with the blue paint & one line with the red.
- Once done with the painting step, set it aside for a bit.
- While that is drying, go ahead and color/cut out one pencil design from the provided printable.
- To finish off the Popsicle Stick Back To School Picture Frame – hot glue the mini clothespin towards the top of the finished design. You will want the pinched end facing down.
- Follow that up by hot gluing on the pencil cutout as well.
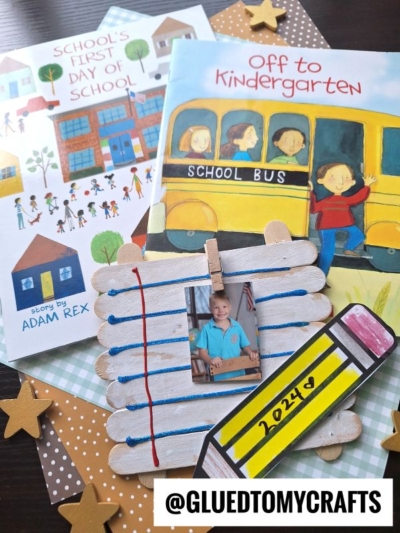
- Let it all dry completely. Then add your picture and display proudly!
- You can either prop it against something, hot glue ribbon to the back OR add magnets so you can place it on the fridge.
RELATED —> First Day of School Snack Idea
Whether you’re making a frame for yourself, your child, or as a gift, this project is sure to bring joy and satisfaction. Gather your materials, follow the simple steps, and get ready to create a beautiful keepsake that will be cherished for years to come.
And for more exciting craft ideas and tips, don’t forget to check out our other blog posts. We also have a great popsicle stick bus craft idea that is also super popular for the back to school season! Happy crafting, my friends!

Popsicle Stick Notebook Paper Back to School Picture Frame
It's the simplest back to school kids craft idea EVER! Check out our Popsicle Stick Notepad Paper tutorial! It's super unique & fun!
Here’s your checklist of supplies to bring this craft to life:
Prepare your creative haven by laying down a protective cover before the crafting magic begins!
Directions:
- For each "notebook paper craft frame" piece, you will need nine JUMBO popsicle sticks per picture frame.
- Lay out seven popsicle sticks {on your flat surface} next to each other, in a row.
- Now take the two remaining popsicle sticks and glue them the opposite direction to secure them like a fence and/or square shape.
- Next up - paint! Paint the newly made wood shape completely white.
- Now grab the puffy paint and several lines with the blue paint & one line with the red.
- Once done with the painting step, set it aside for a bit.
- While that is drying, go ahead and color/cut out one pencil design from the provided printable.
- To finish off the Popsicle Stick Back To School Picture Frame - hot glue the mini clothespin towards the top of the finished design. You will want the pinched end facing down.
- Follow that up by hot gluing on the pencil cutout as well.
- Let it all dry completely. Then add your picture and display proudly!
- You can either prop it against something, hot glue ribbon to the back OR add magnets so you can place it on the fridge.


NEED HELP DOWNLOADING OUR FREE PRINTABLES? PLEASE REFER TO OUR FAQ PAGE
If you've enjoyed our content or have any thoughts to share, we'd love to hear from you! Mention @gluedtomycrafts or tag #gluedtomycrafts on Instagram!