Create a cheerful Paper Plate Hamburger with this fun and creative summer craft! Perfect for kids, using simple materials to spark joy and imagination.

I’m rolling with the summer BBQ food theme on Glued To My Crafts and today I present to YOU our Paper Plate Hamburger kids craft idea!

Looking for a fun and creative craft project to entertain your kids or spark a homeschool art session? This paper plate hamburger craft is simple, affordable, and perfect for kids of all ages!
It’s a fantastic way to engage little ones while boosting their motor skills and creativity. Plus, it requires minimal supplies, most of which you probably already have at home.
From crafting the fluffy sesame-seed bun to the vibrant “toppings,” this step-by-step guide will walk you through creating your very own paper plate hamburger.

Need something to keep the little ones entertained? This paper plate hamburger craft is perfect for kids of all ages! Get creative and have some fun – It’s sure to bring a smile to your face.
CRAFT SUPPLIES:
Before you begin crafting, gather the following materials. Most of these items can be found at your local craft store or within your home craft bin.
- Large Paper Plate
- Craft Scissors
- Tan Craft Paint
- Foam Paint Brush
- Markers {red, green and yellow}
- White Puffy Paint
DIRECTIONS:
Get ready to turn ordinary paper plates into a masterpiece!
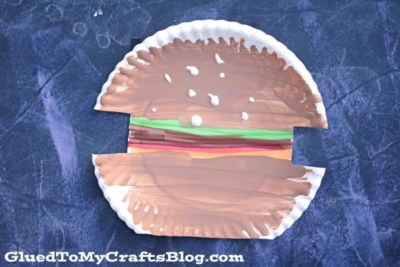
- Start by cutting two slits on the sides of a paper plate to create a more defined “hamburger” shape. The center will represent the meat and condiments, while the larger sections will form the bun.
- Trim a small section off the bottom of the plate to give it an authentic hamburger look.
- Grab your markers – use brown, yellow, red, green, and any other colors you need.
- In the center section of the plate, have the kids draw and color lines to represent the hamburger meat, lettuce, tomato, cheese, and other toppings.
- Now it’s time to work on the buns! Paint the remaining sections of the plate with brown paint to resemble the top and bottom of the hamburger bun.
- For a fun detail, add white “sesame seed” dots on the top bun. Puffy paint works great for this step!
- Let the craft dry completely before proudly displaying your finished paper plate cheeseburger.
- Don’t forget to snap a few photos of your masterpiece and share them with us on Facebook! We’d love to see your creations!
RELATED —> Handprint Campfire
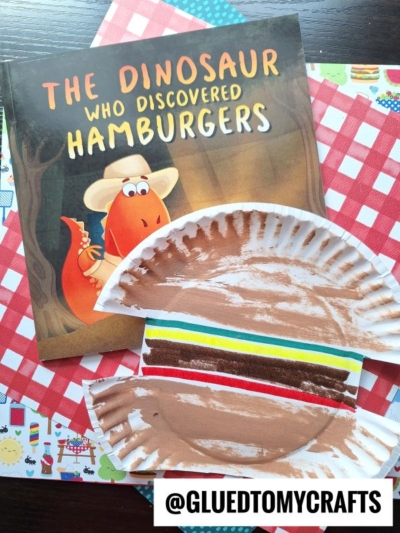
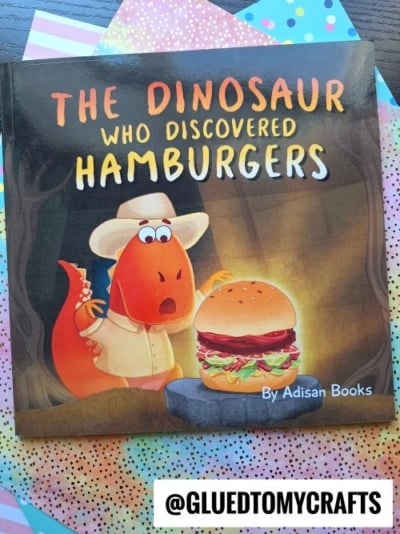
AFFILIATE LINK – PAIR OUR CRAFT IDEA WITH “THE DINOSAUR WHO DISCOVERED HAMBURGERS” BOOK
You can also add other elements or embellishments you see fit to this paper plate hamburger craft. You can add tissue paper, glitter or even wiggle eyes to make it a smiling hamburger friend! Just like the real deal – the choice is yours!
Love this paper plate cheeseburger craft idea? Be sure to also check out our Paper Plate Grill and Popsicle Stick Fries posts! Both of which “might” have inspired all this food madness on Glued To My Crafts as of late!
Happy crafting, my dear friends!

Paper Plate Hamburger Craft Idea
Create a cheerful Paper Plate Hamburger with this fun and creative summer craft! Perfect for kids, using simple materials to spark joy and imagination.
Here’s your checklist of supplies to bring this craft to life:
Prepare your creative haven by laying down a protective cover before the crafting magic begins!
Directions:
- Start by cutting two slits on the sides of a paper plate to create a more defined "hamburger" shape. The center will represent the meat and condiments, while the larger sections will form the bun.
- Trim a small section off the bottom of the plate to give it an authentic hamburger look.
- Grab your markers - use brown, yellow, red, green, and any other colors you need.
- In the center section of the plate, have the kids draw and color lines to represent the hamburger meat, lettuce, tomato, cheese, and other toppings.
- Now it's time to work on the buns! Paint the remaining sections of the plate with brown paint to resemble the top and bottom of the hamburger bun.
- For a fun detail, add white "sesame seed" dots on the top bun. Puffy paint works great for this step!
- Let the craft dry completely before proudly displaying your finished paper plate cheeseburger.

CLICK HERE TO PRINT THE DIRECTIONS FOR THIS CRAFT
If you've enjoyed our content or have any thoughts to share, we'd love to hear from you! Mention @gluedtomycrafts or tag #gluedtomycrafts on Instagram!