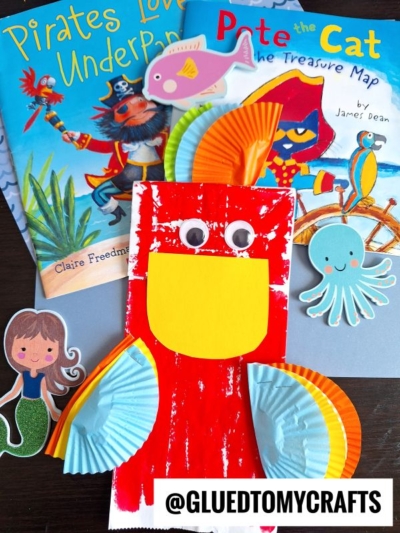
Not only is this Paper Bag Parrot craft super simple but it's really inexpensive to recreate too!

Keep the kids busy and entertained with this creative paper bag parrot craft project! With a few simple steps and materials, their imagination will soar high

Are you looking for a creative activity to keep the kids entertained this summer? This paper bag parrot craft idea is a fantastic way to spark creativity while teaching little ones about colors and animals.
Using simple materials you probably already have at home, this project is fun, educational, and easy to follow. Plus, kids can enjoy hours of imaginative play with their new parrot puppets once the crafting is done!

This new colorful craft is perfect for kids! They can make their very own paper bag rainbow colored parrot puppet with just a few simple supplies and steps!
Craft Supplies:
Before you begin, make sure you have the following supplies ready:
- Large White Paper Bag – 1 per craft
- Small Paper Plate
- Red Craft Paint
- Paint Brush
- Paper Plate
- Paper Scissors
- Yellow Cardstock Paper
- Black Cardstock Paper
- Colorful Cupcake Liners
- School Glue
- Hand Held Office Stapler
- Large Wiggle Eyes
Directions:
Now the fun begins! Follow these simple steps to make your very own paper bag parrot.
- First squirt some red paint on a paper plate.
- Lay your paper bag on a flat surface with the flap facing upwards.
- Now have children paint their paper bag completely red. This will be the body of their parrot.
- When done painting, set the paper bag aside to let it dry completely.
- While that is drying, have children pick out and flatten/fold in half 12 cupcake liners.
- Once done, go ahead and divide them into three piles.
- Staple each set together to look like feathers. Two of your sets will be the wings of the parrot, while the last set will be placed on the parrot’s head.
- Now grab your cardstock paper.
- Go ahead and cut out a triangular beak from the yellow cardstock as well. This piece will be used for the bird’s head.
- To finish off the Paper Bag & Cupcake Liner Parrot craft, simple glue/staple on the cardstock pieces, the wiggle eyes and the cupcake liner “feathers” in their appropriate places on the paper bag and finish off with any other embellishments you see fit {like beautiful glitter and rhinestones.}
- Then display/play with your parrot puppet proudly for ALL to see!!!
RELATED —> Cupcake Liner Fish
Don’t you just love our Paper Bag Cupcake Liner Parrot Puppet craft idea?! I sure hope so!
If you by chance are looking for a few more “tropical” crafts to conjure with your young crafter today, you should also check out our Paper Plate Parrot and Popsicle Stick Parrot craft ideas!
Both of which are super great to pair with today’s parrot paper bag puppet tutorial – hint hint!

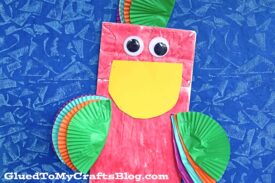
Paper Bag Parrot Craft Idea
Not only is this Paper Bag Parrot craft super simple but it's really inexpensive to recreate too!
Here’s your checklist of supplies to bring this craft to life:
Prepare your creative haven by laying down a protective cover before the crafting magic begins!
Directions:
- First squirt some red paint on a paper plate.
- Have children paint their paper bag completely red. This will be the body of their parrot.
- When done painting, set the paper bag aside to let it dry completely.
- While that is drying, have children pick out and flatten/fold in half 12 cupcake liners.
- Once done, go ahead and divide them into three piles.
- Staple each set together to look like feathers. Two of your sets will be the wings of the parrot, while the last set will be placed on the parrot’s head.
- Now grab your cardstock paper.
- Go ahead and cut out a triangular beak from the yellow cardstock as well.
- To finish off the Paper Bag Cupcake Liner Parrot craft, simple glue/staple on the cardstock pieces, the wiggle eyes and the cupcake liner “feathers” in their appropriate places on the paper bag and finish off with any other embellishments you see fit {like beautiful glitter and rhinestones.}
- Then display/play with your parrot puppet proudly for ALL to see!!!

CLICK HERE TO PRINT THE DIRECTIONS FOR THIS CRAFT
If you've enjoyed our content or have any thoughts to share, we'd love to hear from you! Mention @gluedtomycrafts or tag #gluedtomycrafts on Instagram!