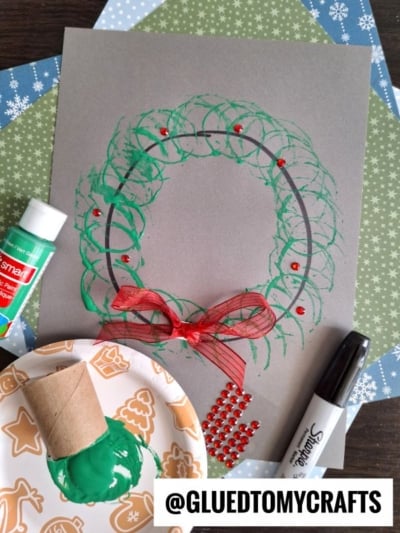
Some of the best holiday crafts start in the recycling bin. This toilet paper roll stamped Christmas wreath is proof. With one empty cardboard tube, a splash of green paint, and a few sparkly extras, kids can make a festive wreath that looks good enough to hang on the fridge, gift to Grandma, or tape to the classroom door.
We love this craft because it’s simple, cheap, and very hard to get “wrong.” Every stamp adds texture, so wobbly circles and uneven spacing only make the wreath look fuller and more like real pine. Toddlers enjoy the stamping. Older kids love adding the gems and the finishing touches. And grown-ups love that it takes about 20 minutes of hands-on time.
Whether you’re planning a cozy afternoon at home, a classroom holiday party, or a quick activity for a group of little ones, this wreath craft brings the Christmas cheer without the stress.
Craft Supplies:
Gather these supplies before you call the kids to the table. Having everything ready keeps the fun flowing.
- Construction paper – This is your canvas. You will want a dark color paper so the green really POPS!
- Sharpie permanent marker – A fine point works best for drawing the circle guide.
- Cardboard toilet paper roll – This becomes your stamp.
- Bright green paint – Washable tempera or kids’ acrylic paint both work well.
- Paper plate – For holding the paint. A festive holiday plate adds extra fun.
- Red rhinestone gems – These become the holly berries. Self-adhesive gems make things even easier.
- Gold fabric bow – The shiny finishing touch at the bottom of the wreath.
- Craft glue or a glue dot – For attaching the gems and bow (skip for gems if you use self-adhesive ones).
Directions:
Step 1: Draw the Wreath Circle Guide
Place the construction paper flat on the table. Use the Sharpie to draw a circle in the center of the page. This line acts as the guide for stamping.
For a neat circle, trace around a small bowl, a cereal bowl, or a plastic container lid. Leave a few inches of space around the edge of the paper so the stamps have room to spread out.
Step 2: Prepare Your Paint and Stamp
Squeeze a small puddle of bright green paint onto the paper plate. Spread it out a little with the end of the toilet paper roll so it forms a thin, even layer. A thin layer gives you crisp, clear circle prints. A thick blob tends to smudge.
If your toilet paper roll is squished or bent, gently reshape it into a round tube before you begin. You can also trim it shorter so small hands can grip it more easily.
Step 3: Dip the Toilet Roll in Green Paint
Have your child hold the tube upright and press one open end straight down into the paint. Lift it up and check the rim. You want the whole edge coated in green, but not dripping.
If it looks too wet, dab it once on a clean part of the plate before stamping.
Step 4: Stamp in a Circular Pattern to Form the Wreath
Now for the best part! Press the painted rim onto the Sharpie line. Lift it straight up to reveal a green circle. Move along the line and stamp again, letting each new circle overlap the one before it.
Keep going all the way around until the wreath is complete. Then add a second ring of stamps just inside or outside the line for a fuller, bushier look. The more the circles overlap, the more the wreath looks like real evergreen branches.
Dip the tube back in the paint every two or three stamps. When the prints start looking faint, it’s time for a refill.
Fun twist: Try mixing a little dark green or a touch of white into the paint for different shades of pine.
Step 5: Let It Dry
Set the painting somewhere flat and safe to dry. Most washable paints dry in about 20 to 30 minutes. If you’re short on time, a hair dryer on the cool setting can speed things up (with a grown-up holding it).
This is a great moment for a snack break, a quick holiday story, or cleaning up the paint station.
Step 6: Glue on the Red Rhinestone “Berries”
Once the paint is fully dry, it’s time to add some sparkle. Place small dots of glue around the wreath and press a red rhinestone onto each one. If you’re using self-adhesive gems, simply peel and stick.
Encourage kids to spread the berries all the way around. Clusters of two or three gems look especially sweet, like real holly berries. There’s no right number here. Some kids add five. Some add fifty!
Step 7: Attach the Bow at the Bottom
Finish your wreath with the star of the show: the bow. Add a generous dab of glue or a strong glue dot at the bottom center of the wreath, then press the bow firmly in place. Hold it for a few seconds so it sticks.
Let the glue set for a few minutes before moving the artwork and displaying it proudly for all to see!
RELATED —> Paper Plate Christmas Wreath Craft
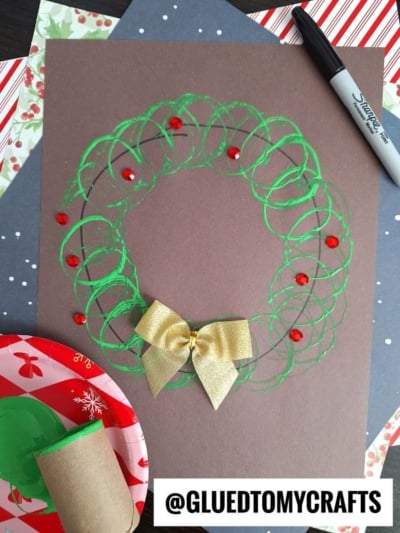
Every wreath your kids create will be one of a kind, and that’s what makes this craft so special. The slightly crooked circles, the extra handful of berries, the bow placed just so: those little details are what you’ll treasure years from now.
We’d love to see what your little crafters come up with! Snap a photo of their finished wreaths and share them with us. Tell us how you put your own spin on the design, whether it’s glitter, new colors, or a whole forest of mini wreaths.
Happy crafting, and may your holidays be filled with plenty of homemade cheer!
