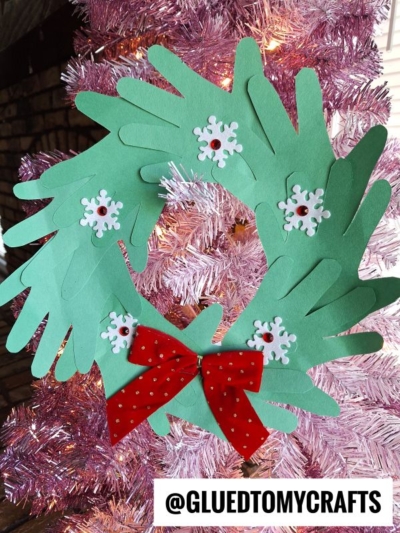
The holiday season brings a wonderful opportunity to slow down and create lasting memories with your family. Crafting together allows you to bond, laugh, and make beautiful decorations for your home.
If you want a joyful, budget-friendly activity to keep your children entertained, we have the perfect project for you. This paper plate and handprint Christmas wreath craft transforms simple household items into a charming holiday keepsake.
Materials You Need for Your Wreath
Gathering your supplies beforehand ensures a smooth and enjoyable crafting session for everyone involved. For this paper plate and handprint wreath, you will need the following items:
- Paper plates: A standard, flimsy paper plate works best for this. You will cut out the center to create the circular base of the wreath.
- Green cardstock or construction paper: You need several sheets of light or dark green paper to trace your child’s hands. Cardstock holds up better, but construction paper works perfectly fine too.
- A pencil or pen: You need this for tracing those adorable little hands.
- Kid-friendly scissors: Keep a pair of safety scissors nearby for the kids, and maybe a sharper pair for adults to cut the center out of the paper plate.
- Craft glue or a glue stick: A strong glue stick usually works best for paper-on-paper crafts because it dries quickly and minimizes mess.
- A red fabric bow: A pre-made red bow with polka dots or gold accents adds a classic Christmas touch to the bottom of the wreath.
- White paper snowflakes (optional): These add a beautiful, snowy contrast to the green handprints.
- Small rhinestones or beads (optional): Red gems look lovely glued into the center of the snowflakes to mimic holly berries.
Step-by-Step Wreath Instructions
Follow these simple steps to bring your paper plate handprint wreath to life. Take your time and enjoy the process of making art with your family.
Step 1: Prepare the Wreath Base
Take your standard paper plate and gently fold it in half. Use your scissors to cut a small slit in the center of the plate. Unfold the plate and use that slit as a starting point to cut out the entire inner circle.
You should be left with a paper ring that resembles a donut. This sturdy paper ring will serve as the structural base for your Christmas wreath. You can discard the inner circle or save it for another craft project later.
Step 2: Trace the Handprints
Grab your green cardstock and your pencil. Have your child place their hand flat on the paper, spreading their fingers out slightly. Carefully trace around their fingers and thumb.
You will need about ten to twelve handprints to fully cover a standard-sized paper plate ring. If you have multiple kids, you can mix and match their handprints for a lovely sibling wreath.
Step 3: Cut Out the Handprints
Once you have all the hands traced, it is time to cut them out. If your child is old enough to use safety scissors, encourage them to cut out their own handprints. This is excellent practice for their hand-eye coordination.
If you are crafting with very young toddlers, you will need to take over the cutting duties. Cut just inside the pencil lines so the graphite does not show on the final green leaves.
Step 4: Assemble the Wreath
Now, bring your paper plate ring and your stack of green handprints together. Apply a generous amount of glue to the palm area of the first handprint. Stick it onto the paper plate ring so the fingers point outward, away from the center.
Take the next handprint and glue it down so it slightly overlaps the first one. Continue gluing the handprints in a clockwise direction all the way around the ring. The overlapping fingers will create a beautiful, textured fringe that looks just like pine needles.
Step 5: Add the Festive Red Bow
Once the green handprints are securely attached and the glue has dried a bit, find the bottom center of your wreath. Take your festive red fabric bow and glue it directly onto the handprints.
Press down firmly for a few seconds to ensure the glue grips the fabric. The bright red bow provides a stunning visual contrast against the green paper leaves.
Step 6: Embellish with Snowflakes and Gems
To make your wreath truly stand out, add some extra holiday magic. Take your white paper snowflakes and glue them evenly around the wreath, spacing them out among the green fingers.
For an extra touch of sparkle, place a tiny dot of glue in the center of each snowflake. Press a small red rhinestone or bead into the glue. This simple addition mimics the look of winter berries and catches the light beautifully.
Let the entire project sit flat to dry completely before you attempt to hang it up.
RELATED —> Christmas Bow Photo Gift Tag Ornament
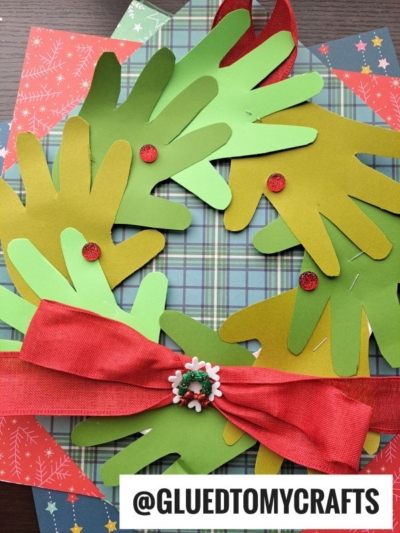
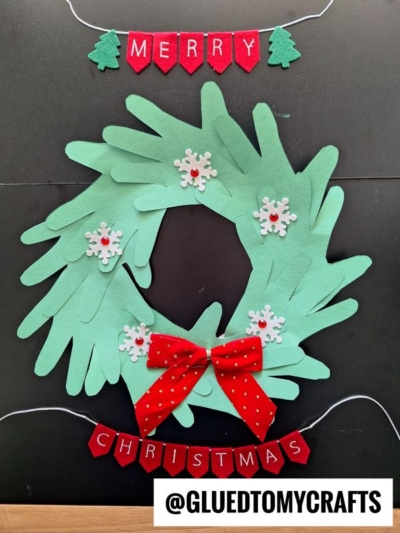
Crafting offers a wonderful way to slow down and connect during the frantic holiday season. This paper plate and handprint wreath craft requires minimal supplies but delivers maximum joy. By combining the simple structure of a paper plate with bright green paper, sparkling gems, and the personal touch of your child’s handprints, you create a decoration full of character and love.
Gather your supplies, clear off the kitchen table, and invite your family to make a whole collection of these sweet handprint wreaths. After you finish, consider looking up other fun paper plate crafts to keep the creative momentum going all winter long!

Easy Paper Plate Handprint Wreath Craft
Here’s your checklist of supplies to bring this craft to life:
- Large Paper Plate
- Cardstock Paper
- Embellishments
Prepare your creative haven by laying down a protective cover before the crafting magic begins!
Directions:
- Take your standard paper plate and gently fold it in half. Use your scissors to cut a small slit in the center of the plate. Unfold the plate and use that slit as a starting point to cut out the entire inner circle.
- You should be left with a paper ring that resembles a donut. This sturdy paper ring will serve as the structural base for your Christmas wreath. You can discard the inner circle or save it for another craft project later.
- Grab your green cardstock and your pencil. Have your child place their hand flat on the paper, spreading their fingers out slightly. Carefully trace around their fingers and thumb.
- You will need about ten to twelve handprints to fully cover a standard-sized paper plate ring. If you have multiple kids, you can mix and match their handprints for a lovely sibling wreath.
- Once you have all the hands traced, it is time to cut them out. If your child is old enough to use safety scissors, encourage them to cut out their own handprints. This is excellent practice for their hand-eye coordination.
- If you are crafting with very young toddlers, you will need to take over the cutting duties. Cut just inside the pencil lines so the graphite does not show on the final green leaves.
- Now, bring your paper plate ring and your stack of green handprints together. Apply a generous amount of glue to the palm area of the first handprint. Stick it onto the paper plate ring so the fingers point outward, away from the center.
- Take the next handprint and glue it down so it slightly overlaps the first one. Continue gluing the handprints in a clockwise direction all the way around the ring. The overlapping fingers will create a beautiful, textured fringe that looks just like pine needles.
- Once the green handprints are securely attached and the glue has dried a bit, find the bottom center of your wreath. Take your festive red fabric bow and glue it directly onto the handprints.
- Press down firmly for a few seconds to ensure the glue grips the fabric. The bright red bow provides a stunning visual contrast against the green paper leaves.
- To make your wreath truly stand out, add some extra holiday magic. Take your white paper snowflakes and glue them evenly around the wreath, spacing them out among the green fingers.
- For an extra touch of sparkle, place a tiny dot of glue in the center of each snowflake. Press a small red rhinestone or bead into the glue. This simple addition mimics the look of winter berries and catches the light beautifully.
- Let the entire project sit flat to dry completely before you attempt to hang it up.

Grab our favorite books via our Amazon affiliate link! In our Amazon storefront you will find books, toys and craft supplies we absolutely love using for our Glued To My Crafts tutorials!