
That rubber spatula in your kitchen drawer is about to become your favorite winter art tool. With one press into white paint, it makes the perfect fuzzy polar bear face. No stencils, no tracing, and no stress about drawing the “right” shape.
This spatula stamped polar bear craft is simple enough for preschoolers and fun enough for older kids, too. The flat silicone head gives you a soft, rounded square every time. The textured paint leaves behind little ridges that look just like thick winter fur.
Craft Supplies:
Gather everything before you start. Having supplies ready keeps kids engaged and cuts down on wandering mid-project.
- Gray construction paper (one sheet per child)
- White textured paint (thick tempera, acrylic, or puffy paint all work)
- Silicone spatula with a flat, rectangular head
- Brown/gray paper for the muzzle cutouts
- Black marker
- Glue (a glue stick for the muzzle, liquid glue for embellishments)
- Scissors
- Paper plate to hold the paint
Directions:
This craft makes two polar bears on one sheet, arranged diagonally. Kids can make just one big bear or a whole family. It’s their artwork, after all.
Step 1: Prepare Your Paint
Squeeze a generous puddle of white textured paint onto a paper plate. Spread it out with the spatula so it forms a thin, even layer about the size of the spatula head.
A thinner layer works better than a thick blob. Too much paint will squish out the sides and blur the shape.
Step 2: Stamp the Polar Bear Faces
Press the flat face of the spatula head into the paint. Lift it and check that the whole surface is coated.
Now press it firmly onto the gray construction paper, near the top-left corner. Hold for two or three seconds, then lift straight up. You should see a soft, rounded square with a lovely furry texture.
Reload the spatula with paint and stamp a second face toward the bottom-right corner. Leave space around each bear for ears and decorations.
Let the paint dry completely before moving on. Depending on how thick it is, this usually takes 20 to 30 minutes. This is a great time for a snack break or a winter story.
Step 3: Draw the Ears
Once the paint is dry, grab the black marker. Draw two small ears just above the top corners of each white face.
The ears can be simple open circles or rounded curves. They don’t need to touch the paint. A little gap between the ears and the head actually gives the bears a playful, cartoon look.
Step 4: Cut and Glue the Muzzles
Cut two small ovals from paper. Each one should be about half the width of the white face.
Younger kids may need an adult to draw the oval first so they can cut along the line. Older kids can freehand it. A slightly lopsided oval adds charm, so don’t worry about perfection.
Glue one oval onto the lower half of each polar bear face. A glue stick works best here because it won’t soak through or wrinkle the paper.
Step 5: Draw the Eyes
Use the black marker to draw two eyes on the upper part of each face, just above the muzzle. Solid black circles or small ovals both look adorable.
For extra sparkle, add a tiny white dot to each eye with a gel pen or a dab of white paint. This little highlight makes the bears look bright and full of life.
Step 6: Add the Nose and Anchor-Shaped Smile
On each brown muzzle, draw a rounded triangle near the top for the nose. Fill it in with black marker.
Next, draw the smile. Start with a short line going straight down from the bottom of the nose. Then add a curve on each side, sweeping up like the bottom of an anchor. This simple shape creates a sweet, happy face every time.
Step 7: Decorate with Stickers
Here’s where kids can really let their creativity shine. Fill the empty space around the bears with winter cheer and fun stickers.
Now your spatula stamped bears are complete!
RELATED —> Spatula Stamped Owl Craft Idea
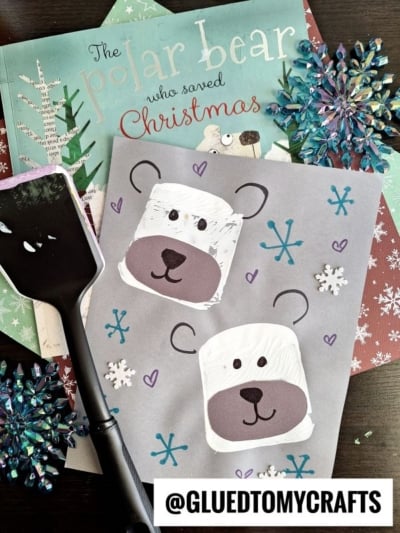
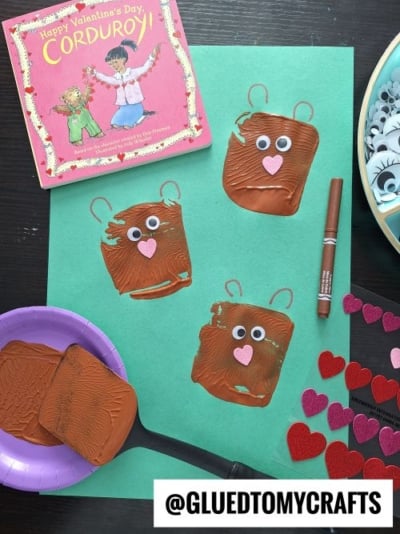
A simple kitchen spatula, a bit of white paint, and a few markers are all it takes to create a whole family of cuddly polar bears. This spatula stamped polar bear craft gives kids a confident start, plenty of room for creativity, and a finished piece they’ll be proud to hang up.
Pick a cozy afternoon this week, set out your supplies, and start stamping. Try different spatula sizes, invent new bear expressions, or add a snowy background scene. Every bear will be one of a kind, just like the kids who make them.
Happy crafting, and stay warm out there!
