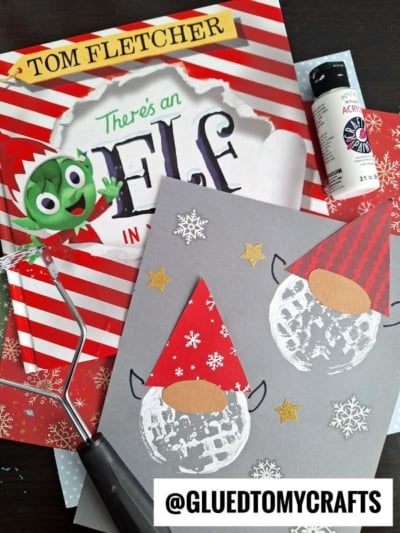
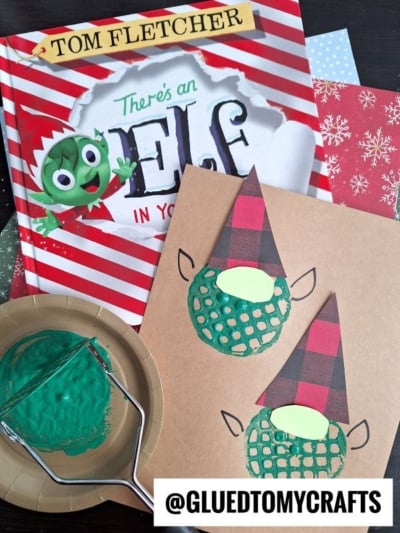
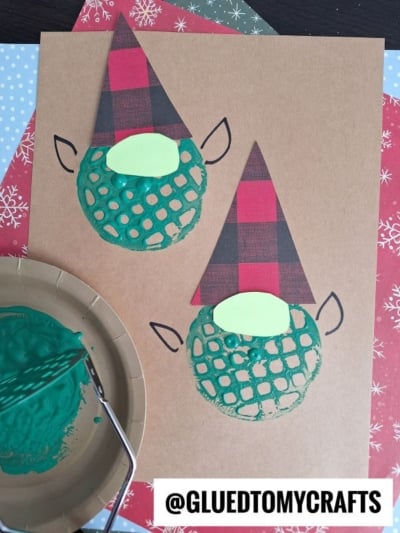
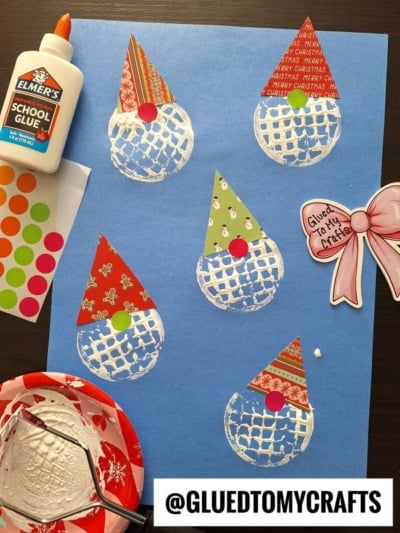
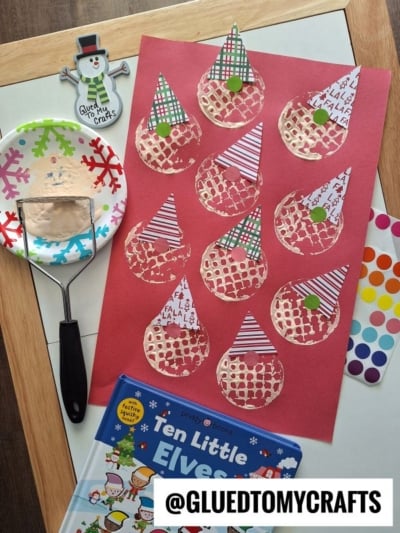
Some of the best Christmas crafts start in the kitchen drawer. This one uses a plain old potato masher, a squirt of paint, and a few paper scraps to make a cheeky little crew of elves. The grid on the masher leaves a fun, textured print that looks like a fuzzy face or a fluffy beard. Pop a pointy hat on top and you’ve got an elf with personality to spare.
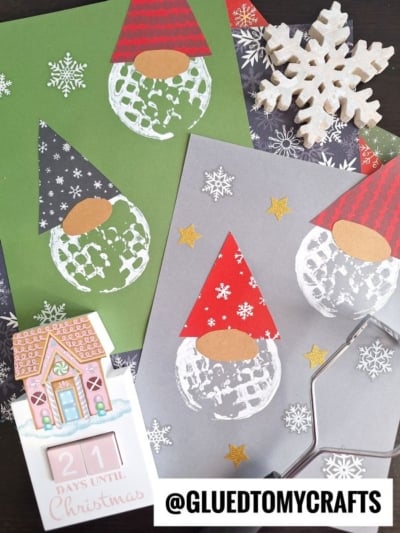
If you’ve seen those Scandinavian Christmas gnomes everywhere this season, you’ll spot the family resemblance right away. These elves are basically gnome cousins. Stamp them in white and they look even more like gnomes, beard and all. So whether your kids are team elf or team gnome, this craft has them covered.
It’s quick, low-mess (mostly!), and perfect for classrooms, playdates, or a cozy afternoon at home. Plus, it pairs beautifully with a holiday read-aloud like There’s an Elf in Your Book by Tom Fletcher.
Craft Supplies:
- Potato masher (the grid style works best)
- Acrylic paint in green or white
- Paper plate or shallow tray for paint
- Cardstock paper (you will want a dark color to make the craft paint pop from the paper)
- Patterned paper for hats (plaid, snowflakes, stripes, or anything festive)
- Kraft paper for noses
- Black marker
- Scissors
- Glue stick or craft glue
- Optional embellishments: glitter star stickers, snowflake stickers, sequins, or mini pom-poms
Quick color guide: Green paint gives you classic elf faces. White paint on grey cardstock creates snowy beards that look just like Christmas gnomes. Try both and see which your kids like best.
Directions:
Step 1: Cut Out the Paper Hats
Start with the hats so they’re ready to go once the paint dries.
Cut tall, skinny triangles from your patterned paper. Make the base of each triangle about as wide as your potato masher, or a touch wider. That way, the hat sits nicely on top of the stamped face.
Step 2: Stamp the Elf Face or Beard
Now for the fun part!
- Pour a small puddle of acrylic paint onto your paper plate. Spread it out a little so it’s wide enough for the masher.
- Press the potato masher into the paint. Lift it and check that the grid is evenly coated. Dab off any big blobs on a clean spot on the plate.
- Press the masher firmly onto your cardstock. Hold it still for a second, then lift straight up.
Leave plenty of space between prints if you’re making more than one elf. Two or three per sheet is a nice number.
Don’t worry if the print looks patchy. That texture is exactly what makes the elves look fuzzy and the gnome beards look fluffy.
Let the paint dry completely before moving on. Acrylic usually dries in 10 to 20 minutes. Read your holiday book while you wait!
Step 3: Add the Hat and Nose
Glue a paper hat on top of each stamped print. Overlap the bottom edge of the hat onto the top of the paint, so it looks like the hat is sitting low on the elf’s head.
Next, cut small ovals from kraft or pale yellow paper. These are the noses. Glue one just under the brim of each hat, right where the hat meets the stamped face.
That big round nose peeking out from under the hat is the signature look of both elves and gnomes. It’s amazing how much character one little oval adds.
Step 4: Draw the Pointed Ears
Grab your black marker. On each side of the stamped face, draw a pointed ear right on the cardstock. A simple sideways “V” or a curved point works great.
Encourage kids to experiment here. Long, sharp ears look extra elfish. Short, rounded ears lean more toward gnome. Some kids love giving each elf a different ear shape, and that’s half the fun.
Step 5: Decorate Your Elves
Time to make it festive! Add stickers around your elves, sprinkle on a few snowflake stickers, or stick a mini pom-pom on the tip of each hat.
Kids can also draw details with markers, like tiny boots, mittens, or a sprinkle of snow. Let them go wild. There’s no wrong way to dress up an elf.
RELATED —> Paper Plate Elf Craft Idea For Christmas
That’s all it takes to turn a kitchen tool into a holiday art station. Whether your little ones make a whole army of elves or a cozy cluster of Christmas gnomes, they’ll be proud to show off their creations.
We’d love to see what you make! Share your potato masher elves and gnomes and tag @gluedtomycrafts so we can cheer you on. Happy crafting, and may your holidays be full of paint, giggles, and a little bit of elf mischief!
