
That potato masher in your kitchen drawer has a secret talent: it makes a fantastic Christmas tree stamp. Dip it in green paint, press it onto paper, and you get a perfect circle with a crisscross pattern that looks a lot like fluffy pine branches. Kids love the surprise when they lift it up and see the print.
This craft works well at home, in a preschool classroom, or at a holiday playdate. It needs only a few simple supplies, takes about 20 minutes (plus drying time), and lets little ones practice counting, shape building, and fine motor skills while they create something festive. Best of all, every tree turns out a little different, so each child ends up with a one-of-a-kind keepsake.
Craft Supplies:
- Construction paper (any light color works)
- Green acrylic paint
- A potato masher (the round kind with a grid or wire pattern works best)
- A paper plate for the paint
- Colorful circle stickers to use as ornaments
- A glittery gold star sticker or cutout for the tree topper
- A brown marker for the trunk
Optional but helpful: a smock or old t-shirt, a plastic tablecloth, baby wipes, and paper towels.
Directions:
Step 1: Pour the Paint on the Plate
Squeeze a puddle of green paint onto the paper plate. Spread it out a bit with the back of a spoon or the masher itself so it forms a thin, even layer that’s wider than the masher’s head.
Tip: A thin layer is the key to a crisp print. Too much paint fills in the grid pattern and leaves a solid blob instead of that fun crisscross texture.
Step 2: Dip the Potato Masher
Have your child hold the masher by the handle and press the flat end straight down into the paint. Lift it up and check that the whole bottom is covered. If you see bare spots, give it another gentle press.
Tip: Little hands may find it easier to hold the handle with both hands. You can also guide their hands for the first stamp so they get the feel of it.
Step 3: Stamp the Tree in a Pyramid Shape
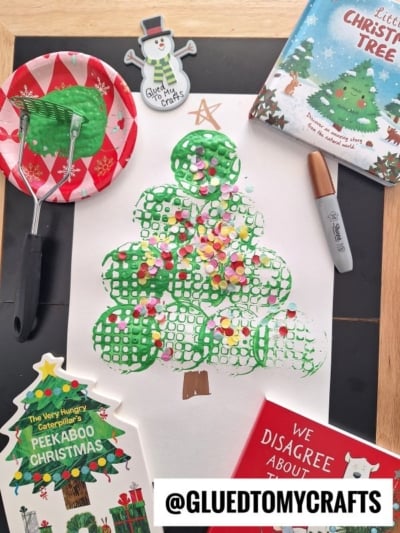
Now comes the best part! Your tree will be built from six green circles stacked in a pyramid:
- Bottom row: 3 circles. Start near the lower part of the paper. Press the masher down firmly, hold for a second, and lift straight up. Stamp two more circles right next to the first one, side by side.
- Middle row: 2 circles. Re-dip the masher and stamp two circles just above the bottom row, centered so they sit between the circles below.
- Top row: 1 circle. Re-dip once more and stamp a single circle at the very top, centered over the middle row.
Count out loud together as you go: “One, two, three… one, two… one!” It turns the craft into a mini math lesson without anyone noticing.
Tip: Re-dip the masher before each stamp for bold, bright prints. Lift it straight up rather than sliding it, so the pattern stays sharp.
Let the paint dry for 15 to 30 minutes before moving on. This keeps stickers from slipping and markers from smearing.
Step 4: Draw the Trunk
Once the paint is dry, grab the brown marker. Draw a small rectangle just below the center of the bottom row. Then fill it in with up-and-down lines to look like tree bark.
Tip: Younger kids can simply color in the rectangle. Older kids might enjoy adding wood grain lines or even a little pot or present at the base.
Step 5: Add the Sticker Ornaments
Hand over the colorful circle stickers and let your child decorate! Stick them all over the branches, one at a time.
Tip: Peeling stickers is wonderful fine motor practice. For tiny fingers, lift the edge of each sticker a little before handing it over.
Step 6: Place the Star on Top
Finish with the glittery gold star at the very top of the tree. This is the big moment, so let your child do the honors. Now step back and admire that sparkling masterpiece!
RELATED —> Spatula Stamped Holiday Presents Craft Idea For Christmas
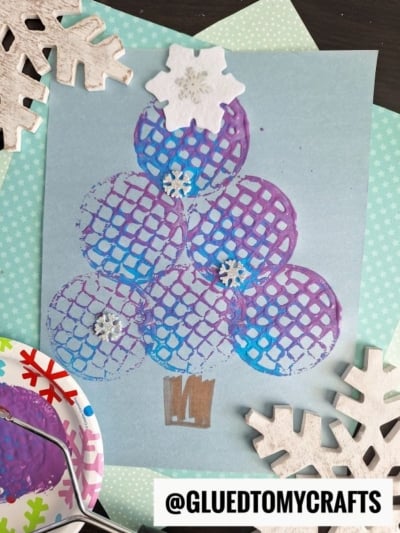
Once the trees are finished, hang them on the fridge, tape them to a classroom window, or tuck them into holiday cards for grandparents. Kids feel proud when their art is on display, and you’ll have a sweet memory of the season to look back on.
So pull that potato masher out of the drawer and let the holiday stamping begin. Happy crafting, my friends!
