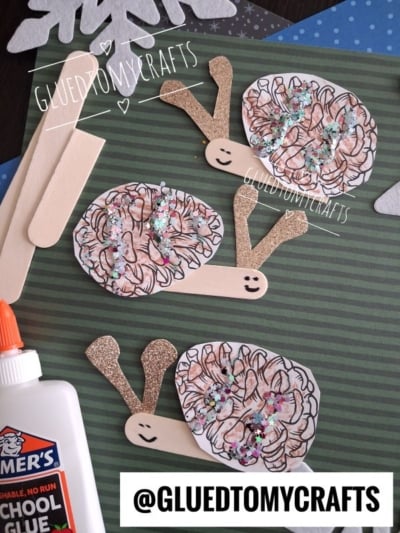
The air is crisp, the leaves are crunchy, and pinecones are popping up on every nature walk. This popsicle stick and pinecone snail craft is a cozy, sparkly project that kids of all ages can make, with plenty of room to add their own personal touch.
It’s an easy way to bring a little woodland magic indoors once the weather turns chilly. It works just as well at the kitchen table as it does in a busy classroom.
Snails and pinecones might seem like an unlikely pair, but they fit together beautifully. A pinecone’s swirling pattern looks a lot like a snail’s shell. Add a few shimmery lines of glitter, and you’ve got a frosty little friend that feels right at home from late fall through the snowy days of winter.
This craft is simple, budget-friendly, and great for classrooms, family craft nights, holiday parties, or a lazy indoor afternoon.
Craft Supplies:
Most of these materials are probably already in your craft bin. If not, you can find them at your local craft store:
- Jumbo Popsicle Sticks – cut in half (one half per snail)
- Cardstock Paper (printed with the pinecone printable)
- Pinecone Printable – password is GLUEDTOMYCRAFTS2026
- Elmer’s School Glue
- Chunky Iridescent Glitter
- Gold Glitter Cardstock (for the antennae)
- Black Marker
- Scissors
Please note that the pinecone printable is for personal use only. Feel free to print as many copies as you need for your family or classroom, but please don’t sell or redistribute the file. If you’d like to share the craft, send friends over to Glued To My Crafts so they can grab their own copy.
Before you begin: Lay down a protective cover or a craft tray. Chunky glitter loves to travel, and a tray makes cleanup much easier.
Directions:
Follow these simple steps to make your pinecone snail. Remember, there’s no wrong way to sparkle!
- Cut the sticks in half. Take your jumbo popsicle sticks and cut each one in half. You will need one half per snail.
- Draw the face. Grab your black marker and draw a sweet little smiley face on one rounded end of your jumbo popsicle stick half. Simple dot eyes and a curved smile work perfectly, and sleepy closed eyes look adorable too.
- Print the pinecone design. Print the pinecone printable onto cardstock so the shell stays sturdy.
- Cut out the shell. Trim around ONE of the pinecone circles. Little crafters may need a grown-up’s help with the curves.
- Add the glue lines. Squeeze thin lines of Elmer’s School Glue across the pinecone. Straight lines, wavy lines, or zigzags are all fair game!
- Sprinkle on the glitter. Shake the chunky iridescent glitter over the wet glue. Mix the pink, green, silver, and blue for a frosty rainbow effect.
- Tap off the extra. Gently tip the shell over your tray to remove any loose glitter. You should see bright, sparkly stripes right where the glue was. If you spot bare patches, add a dab more glue and glitter.
- Let it dry. Set the shell aside until the glue dries completely. This keeps the glitter from sliding when you glue the pieces together.
- Cut the antennae. Cut two small, skinny V-shapes or strips from the gold glitter cardstock.
- Attach the shell. Glue the pinecone shell along the top edge of the popsicle stick half, just behind the face. Leave enough room on the stick so the smile still shows.
- Add the antennae. Glue the gold antennae to the top of the snail’s head so they point up and out.
- Let everything set. Lay your snail flat until all the glue is dry. Once it’s dry, the shell and antennae should stay put when you pick it up.
RELATED —> Pinecone Santa Gnome Craft Idea
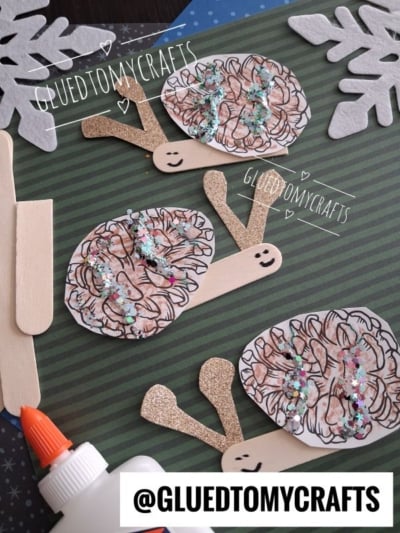
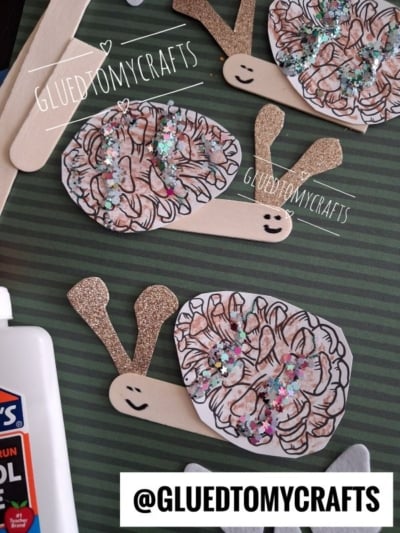
Now that you know how to make your own pinecone snail, gather your supplies, pour a mug of hot cocoa, and put on some cozy tunes. Pick a fun glitter combo for your next snail and start crafting!
We’d love to see your finished creations. Be sure to tag @gluedtomycrafts or use #gluedtomycrafts on Instagram so our crafting community can cheer you on. Happy crafting, and here’s to a sparkly, winter season. YOU SNAILED IT!