
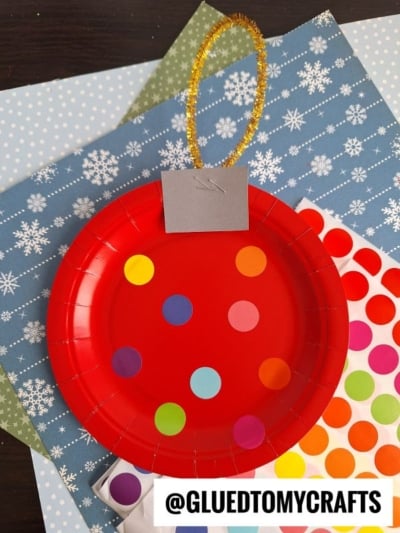
This paper plate dot sticker Christmas ornament is one of the easiest holiday crafts you’ll ever set up. You need a paper plate, a sheet of dot stickers, and about 15 minutes to make a giant, cheerful bauble your kids can hang on the tree.
We love this one because there’s no wrong way to do it. Toddlers can peel and stick to their heart’s content, and older kids can create patterns, rainbows, or color-coded designs. Along the way, little hands get a great fine motor workout and plenty of chances to practice naming colors.
Craft Supplies:
- Paper plates in fun colors (pastels are great for this craft!}
- Colorful circular dot stickers (the more colors, the better)
- Cardstock or glitter cardstock for the ornament cap
- Stapler or craft glue
- Something to hang it with: ribbon, baker’s twine, or a gold tinsel pipe cleaner
- Hole punch
- Scissors (adult use, or child-safe scissors for older kids)
Directions:
Step 1: Prepare the Paper Plate
Pick a plate color and flip it so the eating side faces up. That’s the side your child will decorate.
If you only have white plates, that’s okay! White makes the stickers pop, and kids can color the rim with markers first for extra flair.
Tip: Lay the plate on a flat surface or tape it lightly to the table so it doesn’t slide around while little ones work.
Step 2: Decorate With Dot Stickers
Hand over the sticker sheets and let your child cover the plate however they like. Scattered dots, neat rows, or a rainbow swirl all look adorable.
For toddlers, peel back the edges of a few stickers ahead of time. This makes them much easier to grab and keeps frustration low.
Make it a learning moment:
- Ask your child to name each color as they stick it down.
- Count the dots together when you’re done.
- Challenge older kids to make a repeating pattern, like red-green-red-green.
Step 3: Cut the Ornament Cap
Cut a small rectangle from your cardstock, about 2 inches wide and 1½ inches tall. This becomes the metal “top” of your bauble. Older kids can measure and cut this part themselves.
Step 4: Attach the Cap to the Plate
Line up the cardstock rectangle at the top center of the plate so about half of it overlaps the rim.
Choose your path:
- Using a stapler: Add one or two staples through the cap and the rim. An adult should handle this step. Two staples angled toward each other hold it extra snug.
- Using glue: Spread craft glue on the bottom half of the cap, press it onto the back of the rim, and hold for 30 seconds. Let it dry fully before hanging.
Step 5: Add the Hanger
Now give your ornament a way to hang. Pick the option that matches your supplies.
- Baker’s twine: Punch a hole in the center of the cap, near the top. Thread the twine through and tie the ends in a knot to form a loop. Red-and-white striped twine looks extra festive!
- Pipe cleaner: Bend it into a loop and slide both ends between the cap and the plate. Staple right over the ends to lock them in place.
- Ribbon: Fold a 6-inch piece into a loop and glue or tape the ends to the back of the cap.
Step 6: Hang It Up and Admire
Find a sturdy branch, a doorknob, or a classroom bulletin board and show it off. Flip it over first and write the child’s name and the year on the back.
RELATED —> Paper Plate Handprint Christmas Wreath
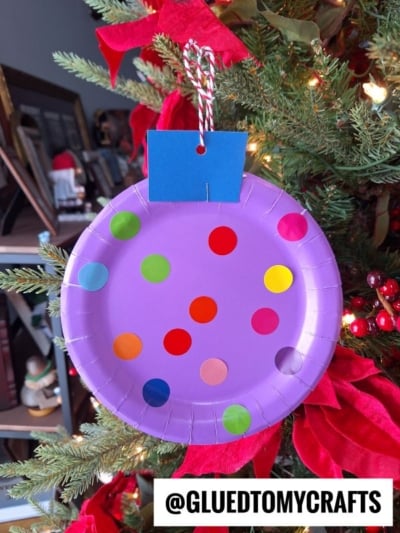
Don’t forget — these ornaments make incredibly sweet gifts. A handmade bauble from a child is the kind of thing grandparents, teachers, and family friends treasure far more than anything store-bought. Pair it with a handwritten note or a little photo of the artist, and you’ve got a holiday gift that costs almost nothing but means absolutely everything.
We’d love to see every single ornament your little ones create — no two are ever the same, and that’s exactly what makes them so special. Whether your toddler went wild with a rainbow explosion of dots or your older kid carefully arranged a perfect color pattern, every version of this craft deserves to be celebrated.
Snap a photo of your finished ornament and tag @GLUEDTOMYCRAFTS on social media. We can’t wait to see them! Happy crafting, my friends!
