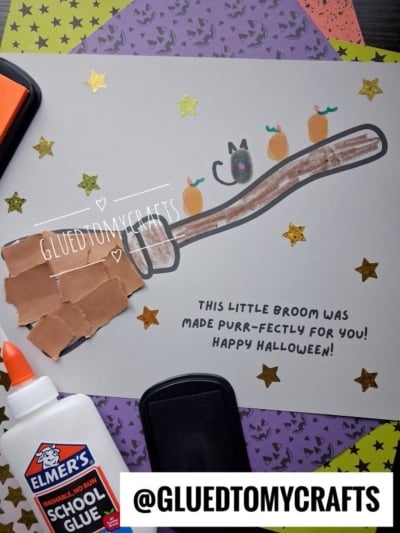
Halloween crafts don’t need to be complicated to be memorable. This torn paper witch broom with a thumbprint black cat is simple, hands-on, and full of personality. Kids tear paper for the bristles, press their own thumbprint to create a tiny black cat {& a few pumpkins too!} and add a few drawn details to bring it to life.
The best part is that every broom turns out a little different. One cat might look sleepy, another might look mischievous, and each one carries a real thumbprint from the child who made it. That personal touch makes this craft a perfect keepsake or Halloween card for someone special.
It works well at the kitchen table, in a busy classroom, or during a daycare craft session. You only need basic supplies, and most kids can finish it in 20 to 30 minutes.
Craft Supplies:
Gather these supplies before you begin:
- Printable broom template – password is GLUEDTOMYCRAFTS
- Gray cardstock paper
- Crayons
- Brown construction paper
- Black/orange washable ink pad
- Elmer’s washable school glue
- Glitter star stickers (optional)
- Markers
- Baby wipes or a damp paper towel, for cleaning inky thumbs
Helpful tip: Cardstock holds up better than regular printer paper. It won’t wrinkle or curl as much once the glue goes on.
Directions:
Step 1: Print the Broom Template
Print the broom template on cardstock paper. We did a light shade of gray but white would work too!
At this point in time, kids can use a brown crayon to color in the broom stick in their printable.
Step 2: Tear the Brown Paper into Smaller Pieces
Hand each child a sheet of brown construction paper. Show them how to tear the paper into smaller square pieces. Uneven, jagged edges are a good thing here. They give the bristles a rustic, witchy texture.
Step 3: Glue the Torn Paper onto the Bristles
Squeeze a layer of Elmer’s glue across the bristle area of the broom.
Next, press the torn paper pieces onto the glue. Overlap them so the bristles look full.
Step 4: Add a Thumbprint Black Cat on the Handle
Here comes everyone’s favorite part. Have your child press their thumb firmly onto the black ink pad. Then press it onto the broom handle, somewhere near the middle.
Hold the thumb in place for a second, then lift it straight up. This creates the cat’s body.
If your crafter wants a clearer cat, they can add a smaller fingerprint just above the thumbprint for a head. Both versions look adorable.
If desired, to fill up more space on the broom stick, have kids also add some thumbprint pumpkins right next to their cat.
Wipe their thumb clean right away to avoid inky smudges on the rest of the project.
Step 5: Add the Cat’s Details
Wait a minute or two for the ink to dry. Then use markers to turn the thumbprint into a black cat:
- Ears: Draw two small triangles on top with a black marker.
- Tail: Add a long, curly tail that swoops off the back of the body.
- Eyes: Use a green marker to dot two bright eyes.
- Nose: Add a tiny pink dot or triangle between the eyes.
Kids can add whiskers, a smile, or even a tiny witch hat if they want. Let them give their cat its own personality.
Step 6: Add Glitter Star Stickers (Optional)
Finish the scene with a few glitter star stickers scattered around the broom. They make it look like the cat is soaring through a starry Halloween night.
Step 7: Let It Dry
Set the craft flat to dry for at least 30 minutes. Then display it proudly for all to see!
RELATED —> Paper Plate Broom Craft Idea For Halloween
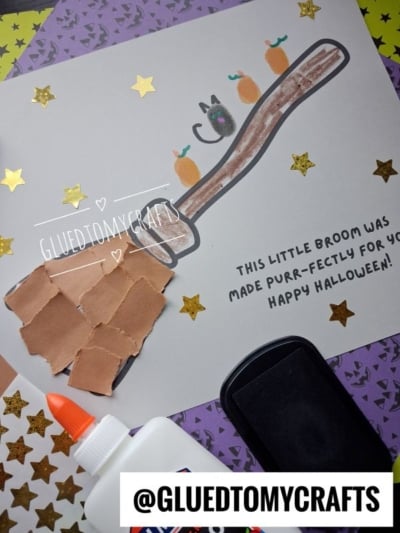
This torn paper witch broom brings together texture, color, and a little bit of Halloween magic. Kids get to tear, glue, press, and draw their way to a finished piece they’ll be proud to share.
So on that note, whether you make it at the kitchen table on a rainy October afternoon, in a buzzing classroom full of little witches, or as part of a Halloween party craft station, this project delivers the kind of simple, joyful creativity that kids remember. And for everyone who receives one, it’s a sweet reminder that the most purr-fect gifts are always the ones made from the heart. Happy crafting, my friends!
