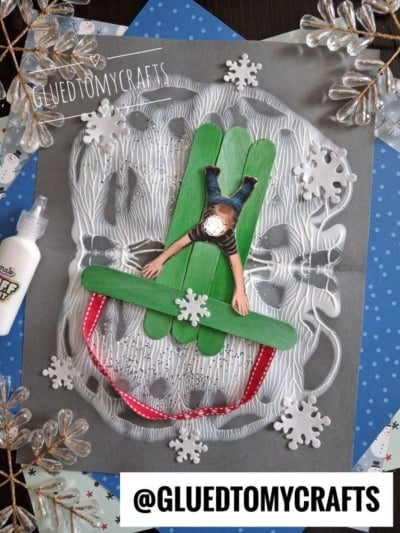
There’s something magical about the first big snowfall of the year. Cheeks get rosy, mittens go missing, and every hill in the neighborhood becomes a racetrack. We wanted to bottle up that feeling and turn it into a keepsake you can hang on the fridge for years.
This winter craft combines our famous paint splat technique with a sweet popsicle stick sleigh, and the rider is your child. Kids love seeing themselves zooming down a sparkly, snowy hill, and grown-ups love having a photo craft that captures how little they were that winter.
Craft Supplies:
- Cardstock paper {a dark gray or blue works perfectly!}
- White Tulip puffy paint
- Loose craft glitter
- Printed picture of your child
- Jumbo popsicle sticks {four per sleigh}
- Craft paint {any color!}
- Paint brush
- Hot glue gun {only for adults!}
- Craft ribbon
- Scissors
- Snowflake stickers
Snap the Perfect Sledding Photo:
- This is the secret to making the craft look like your little one is truly flying downhill. Have your child lie on their tummy on the floor with their arms stretched out to the sides, like they’re steering a sled. Stand over them and take the photo from directly above.
- Print the photo so your child’s body is about the same length as your sleigh deck, roughly 4 inches tall. If you’re doing this with a class, ask families to send in photos ahead of time, or plan a quick “photo day” before the craft.
Directions:
- First things first – grab a single sheet of gray or blue cardstock paper and the white puffy paint.
- Fold the paper in half {hamburger style.}
- Open it back up and squirt a few lines of white paint on ONE side.
- Fold it back up and “squish” the paint in between the paper to make a snowy scene.
- Open it back up to reveal the “paint splat” design.
- If desired, sprinkle loose craft glitter on top of the wet paint and set aside for now.
- While the splat dries, lay your jumbo craft sticks on a paper plate and paint them on one side. Let them dry for a few minutes.
- Once the sticks are dry, line up 3 of them side by side, vertically, with the edges touching. This forms the deck of your sleigh.
- Take the last remaining stick and glue it horizontally across the lower third of the deck. This is your steering bar, and it holds the deck sticks together. Press firmly and let the glue set.
- Cut off and glue one end of your craft ribbon to the left tip of the crossbar and the other end to the right tip. Let the ribbon hang down in a loose U-shape, just like a real sled pull rope.
- Carefully cut around your child’s photo. Tricky spots like fingers and hair can be tough for younger kids, so this is a great moment for a grown-up to jump in.
- Glue the photo cutout on top of the deck so your child looks like they’re lying on their tummy, zooming head-first down the hill. Their outstretched arms should reach toward the edges of the sleigh, as if they’re holding on tight.
- Once the paint splat is completely dry, glue the finished sleigh right in the middle of your snowy hill. Press gently so you don’t flatten those puffy ridges.
- Finish your scene with foam glitter snowflake stickers and any other embellishments you see fit.
- Then display it proudly for all to see!
RELATED —> Handprint Snowman Sleigh Keepsake
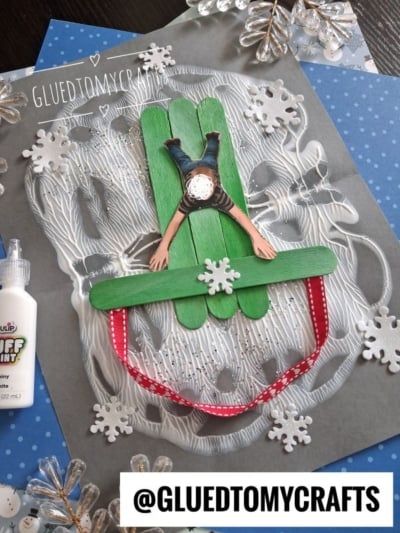
Years from now, this little sleigh will be so much more than craft sticks and puff paint. It’ll be a snapshot of a snowy afternoon, a giggle over glitter, and a sweet reminder of just how small those hands once were.
We’d love to see your sledders in action! Share your finished crafts and tag us @gluedtomycrafts so we can cheer on every snowy masterpiece. Happy crafting, friends, and may your winter be full of fresh powder and sparkly hills!