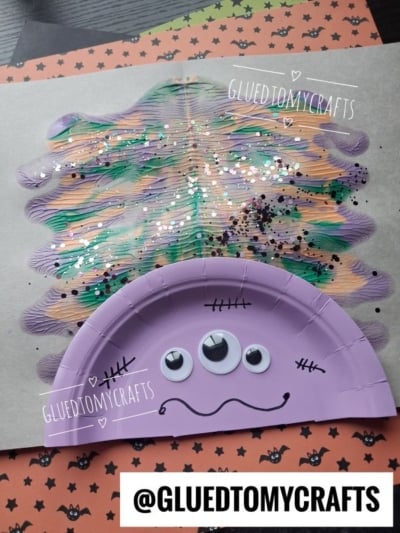
Get ready for the cutest, silliest monsters your craft table has ever seen! This paint splat and paper plate monster is one of those magical projects where the mess IS the fun. Kids squish paint, fold paper, and reveal a wild, symmetrical burst of “monster hair” that looks different every single time. No two monsters will ever match, and that’s exactly what makes this craft so special.
It’s perfect for little hands, forgiving for beginners, and it fills your home or classroom with spooky-cute Halloween charm. Whether you’re keeping a wiggly toddler busy on a rainy afternoon or setting up a station for a full classroom, this one is a guaranteed hit. Let’s make some monsters!
Craft Supplies:
Gather these simple supplies before you start. Most of them are probably already hiding in your craft drawer:
- Cardstock or construction paper {for your base}
- Small paper plates (one half piece per monster)
- Acrylic paint in fun Halloween colors – purple, green, orange, teal, and pink
- Googly eyes (grab a mix of sizes for extra personality)
- Black marker (a fine or medium tip works best)
- Glitter (for that spooky sparkle)
- Glue (a glue stick or liquid glue)
- Scissors
A quick tip before you dive in: cover your work surface with newspaper or a plastic tablecloth. This craft gets gloriously messy, and that’s half the fun.
Directions:
This is the part kids go wild for. Here’s how to create that gorgeous symmetrical splat:
- Fold your cardstock in half, then open it back up flat. This crease is your guide.
- On one side of the fold, squeeze or dab small blobs of paint. Mix and match your colors – try purple, green, and orange together, or go bold with teal and pink.
- Don’t overthink the placement! Random blobs make the best patterns.
- Fold the paper back over along the crease and gently press down. Let little hands smoosh, rub, and squish the paint from the center outward.
- Slowly peel the paper open to reveal the surprise. Ta-da! A perfectly symmetrical burst of monster hair.
Step 2: Add the Glitter
While the paint is still wet, it’s the perfect time to sparkle things up.
- Sprinkle glitter over the painted area right away – the wet paint acts like glue and holds it in place.
- Gently shake off the extra over a trash can.
- Set your painted paper aside to dry completely.
Step 3: Make the Paper Plate Face
While your monster hair dries, let’s build the face.
- Cut a small paper plate in half. You’ll only need one half per monster, so you can make two faces from a single plate. The straight edge will sit under the hair, and the curved edge becomes your monster’s chin.
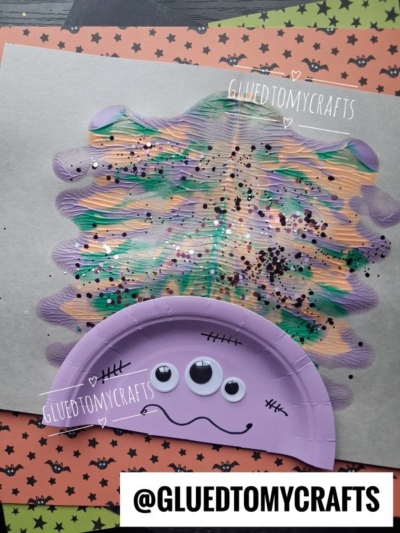
- Add the eyes. Glue on your googly eyes in a row across the center of the plate. Try one big eye in the middle with smaller ones on each side for a goofy look, or go with two mismatched eyes for a classic monster grin.
- Draw the mouth. With your black marker, draw a wavy, squiggly line near the bottom curve of the plate. Add little curls at the ends for a cheeky smirk.
- Add the stitched scars. Draw a few short straight lines, then cross each one with tiny hatch marks – like little stitches. Scatter two or three around the face for that friendly Frankenstein feel.
Encourage kids to make their monster smile, frown, or look totally surprised. There are no wrong faces here!
Step 4: Assemble Your Monster
Time to bring the pieces together.
- Make sure both the painted hair and the paper plate face are completely dry.
- Place the face over the bottom portion of the painted paper, with the straight edge tucked just under the colorful hair.
- Glue it down firmly, pressing along the edges.
- Let it set for a few minutes, and your monster is ready to show off!
And that’s it! Now prop your finished paint splat monster hair creation on a shelf, tape it to a window, or hang a whole monster gang along the wall for instant Halloween cheer.
RELATED —> Craft Stick Monsters For Halloween
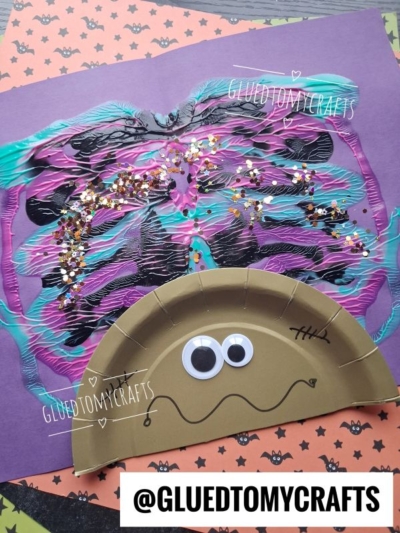
That’s it – a spooky-cute monster made from paint, paper, and pure imagination. The best part about this craft is that there’s no “right” way to do it. Every squish, splat, and squiggle turns into a one-of-a-kind creature with its own goofy charm.
So roll up those sleeves, embrace the mess, and watch your little ones beam with pride over their monster masterpieces. We’d love to see what you create – snap a photo and share your monsters with us. Happy crafting, and have a wonderfully spooky Halloween! 🎃
