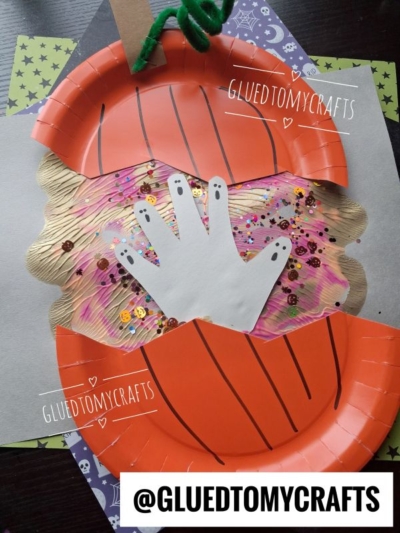
There’s something magical about a craft that hides a surprise inside. This paper plate exploding pumpkin craft does exactly that. On the outside, it looks like a friendly orange pumpkin. But crack it open and out pop five tiny handprint ghosts, floating on a swirl of shimmery paint and sparkly sequins. Boo!
This project is perfect for toddlers and young kids. It’s messy in all the right ways, packed with color, and it doubles as a keepsake you’ll want to hang on the fridge for years. Little hands get to paint, squish, sprinkle, and glue, which means plenty of happy sensory fun. Let’s make one together.
Craft Supplies:
Gather these supplies before you start. Most of them are craft box staples, so you may already have everything on hand.
- 1 Orange paper plate
- Gray cardstock (for the base)
- White cardstock or paper (for the handprint)
- A small strip of brown cardstock (for the stem)
- Metallic gold, pink and orange paint
- A green pipe cleaner (chenille stem)
- Halloween-themed sequins and glitter
- A black marker
- Scissors
- Glue or a stapler
- A pencil (for tracing)
Tip: Lay down newspaper or a wipeable mat first. The paint splat step gets wonderfully messy.
Directions:
Step 1: Decorate the Pumpkin
Grab your orange paper plate – no painting needed! Simply use your black marker to draw straight vertical lines across the front of the plate. These are the pumpkin’s ridges. Space them out a little unevenly for a natural, hand-drawn look. Kids love this part because there’s no wrong way to do it.
Step 2: Crack It Open
Here’s where the “exploding” magic begins. Cut the plate straight across the middle using a jagged, wavy line instead of a smooth one. Think zigzags and gentle bumps, like a crack splitting the pumpkin apart. You’ll end up with a top half and a bottom half. This grown-up step is best handled by an adult with sharp scissors.
Step 3: Add the Stem and Vine
Take your small strip of brown cardstock and glue it to the top edge of the upper pumpkin half. That’s your stem. Next, twist and curl a green pipe cleaner around a pencil to make a springy coil. Attach it right beside the stem with glue or a staple. Now your pumpkin has a cute little vine popping out the top.
Step 4: Make the Paint Splat
Set the pumpkin halves aside and grab your gray cardstock. Fold it in half and open it back up. Squirt your three colors of paint on one side and “squish” it back together. Gentle caress the paint inside. Unfold one more time to unveil the “splat” design.
Step 5: Sprinkle the Sparkle
While the paint is still wet, sprinkle your Halloween sequins and glitter right on top. Let your little one go wild here. The more sparkle, the better. Set the cardstock aside to dry.
Step 6: Create the Handprint Ghosts
Trace your child’s hand onto white paper with a pencil, then cut it out. Turn the handprint so the fingers point upward. Now, using your black marker, draw a face on each fingertip: two dots for eyes and an open oval for a mouth. You’ve just made five friendly little ghosts! Glue the handprint right in the center of your dried paint splat.
Step 7: Reveal the Surprise
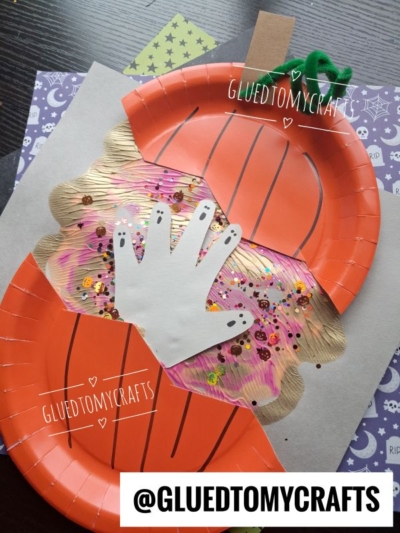
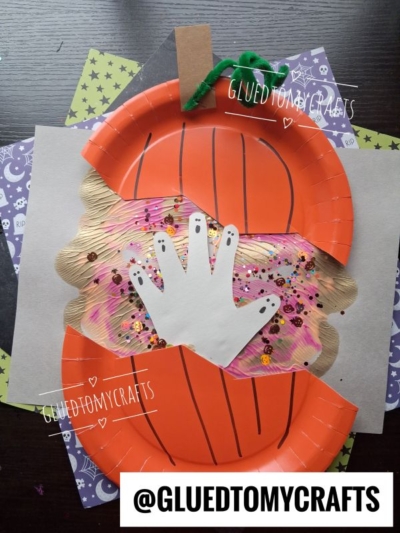
Time to bring it all together. Glue the top pumpkin half near the top of the gray cardstock, pointing up. Then glue the bottom half near the bottom, pointing down. Leave an open gap in the middle so the ghosts and glittery paint peek through. And there it is: a pumpkin that cracks open to reveal a squad of tiny ghosts. Surprise!
RELATED —> Paint Splat Monster Hair Craft
What makes this craft so special isn’t just how it looks when it’s finished – it’s the process. It’s the giggles when the glitter goes everywhere. It’s little fingers carefully drawing tiny ghost faces. It’s the proud look on your child’s face when they see their handprint transformed into something wonderfully spooky. Those are the moments that stick around long after Halloween is over.
So go ahead – clear the table, lay down that mat, and dive in. Don’t stress about perfect lines or neat edges. The best version of this craft is the one made with your kid, at your kitchen table, on a cozy fall afternoon. Hang it up somewhere special when you’re done, and don’t forget to write their name and the year on the back. Because one day, those little handprints won’t be so little anymore, and you’ll be so glad you saved this one.
Happy crafting, and happiest of Halloweens to you and your little ghosts! 🎃👻
