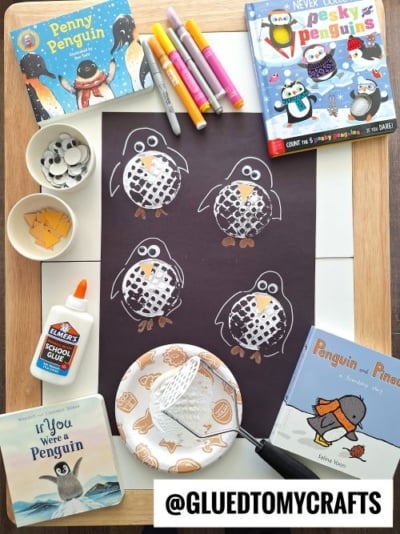
Who knew a kitchen tool could turn into an art supply? Grab a potato masher from the drawer, and you’ve got everything you need to make a whole waddle of adorable penguins. This craft uses the masher’s grid pattern to stamp fluffy white penguin bellies onto black paper. It’s simple, a little messy, and endlessly fun for little hands.
This activity works beautifully at home, in the classroom, or during a library story hour. Kids love watching a plain dollop of paint become a chubby penguin belly with just one press. Best of all, you can adjust it for any season, so the fun never really ends. Let’s dive in and make some penguins!
Craft Supplies:
Gather these supplies before you start. Most of them are probably already in your home or classroom:
- Black construction paper (this makes a bold background for the white bellies)
- White acrylic paint (washable school paint works too)
- A metal potato masher (the grid-style wire kind gives the best texture)
- Googly eyes (a mix of sizes adds personality)
- Orange or yellow paper triangles for beaks
- Elmer’s glue (school glue or Glue-All both work great)
- Markers (silver, gray, or metallic markers are perfect for details)
- A paper plate to hold the paint
That’s it! Set everything out on a covered table, and you’re ready to go.
Directions:
- Squeeze a generous dollop of white acrylic paint onto the paper plate. Spread it out slightly so it’s easy to dip into. Lay your black construction paper flat in front of your little artist.
- Press the flat, grid side of the potato masher gently into the paint. You want an even coat across the bottom, but not so much that it drips. A thin layer gives the cleanest stamp.
- Press the masher firmly onto the black paper, then lift straight up. Ta-da! You’ll see a textured white square that becomes the penguin’s fluffy belly. Repeat to make as many penguins as you like. Two, three, or a whole colony!
- Let each stamp dry for a few minutes before adding details.
- Using a silver or metallic marker, draw a simple penguin shape around each white stamp. A rounded head on top, two little wings on the sides, and small feet at the bottom. Don’t worry about perfection. Wonky penguins are the cutest kind.
- Add a dab of glue and press on two googly eyes near the top of each penguin. Then glue a small orange or yellow paper triangle just below the eyes for the beak. Suddenly, your penguin has personality!
- Give the glue a little time to set. Then hang your penguin masterpiece on the fridge, a classroom wall, or a reading nook. Every penguin will look slightly different, and that’s exactly what makes them special.
RELATED —> Potato Masher Stamped Panda Bear
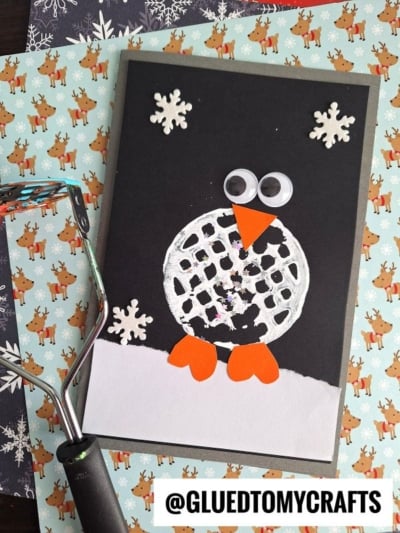
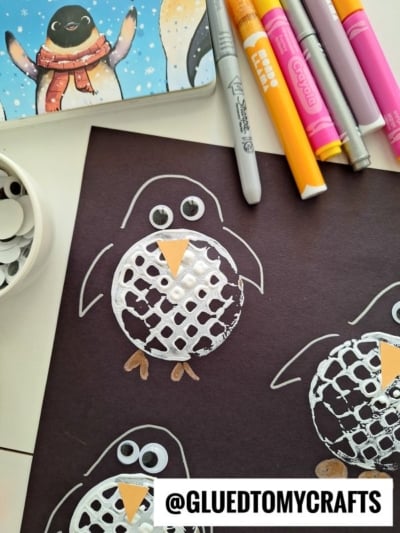
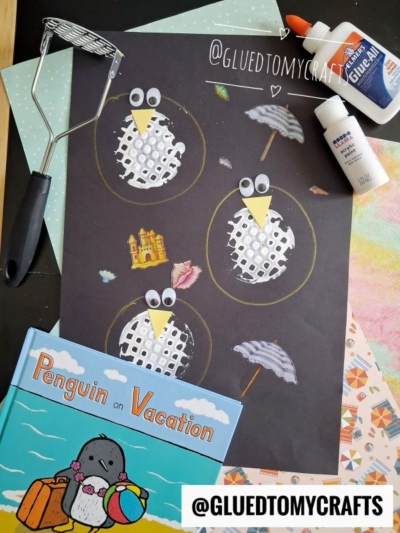
This potato masher penguin craft proves that you don’t need fancy supplies to make something wonderful. With a kitchen tool, a bit of paint, and a lot of imagination, kids can create a whole flock of friendly penguins. Whether you go with a frosty winter scene or a breezy beach getaway, this activity delivers giggles, creativity, and a keepsake worth saving.
So grab that masher, pick a favorite penguin book, and enjoy the crafty fun together. Happy stamping!

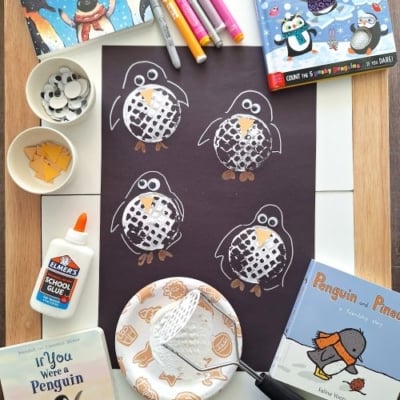
Potato Masher Stamped Penguin Craft Idea
Turn a potato masher into a penguin stamp! Kids press white paint on black paper for cute penguins—perfect for winter or summer. Try this easy craft!
Here’s your checklist of supplies to bring this craft to life:
- Cardstock Paper
- Craft Paint
- Embellishments
Prepare your creative haven by laying down a protective cover before the crafting magic begins!
Directions:
- Squeeze a generous dollop of white acrylic paint onto the paper plate. Spread it out slightly so it's easy to dip into. Lay your black construction paper flat in front of your little artist.
- Press the flat, grid side of the potato masher gently into the paint. You want an even coat across the bottom, but not so much that it drips. A thin layer gives the cleanest stamp.
- Press the masher firmly onto the black paper, then lift straight up. Ta-da! You'll see a textured white square that becomes the penguin's fluffy belly. Repeat to make as many penguins as you like. Two, three, or a whole colony!
- Let each stamp dry for a few minutes before adding details.
- Using a silver or metallic marker, draw a simple penguin shape around each white stamp. A rounded head on top, two little wings on the sides, and small feet at the bottom. Don't worry about perfection. Wonky penguins are the cutest kind.
- Add a dab of glue and press on two googly eyes near the top of each penguin. Then glue a small orange or yellow paper triangle just below the eyes for the beak. Suddenly, your penguin has personality!
- Give the glue a little time to set. Then hang your penguin masterpiece on the fridge, a classroom wall, or a reading nook. Every penguin will look slightly different, and that's exactly what makes them special.


Grab our favorite books via our Amazon affiliate link! In our Amazon storefront you will find books, toys and craft supplies we absolutely love using for our Glued To My Crafts tutorials!
If you've enjoyed our content or have any thoughts to share, we'd love to hear from you! Mention @gluedtomycrafts or tag #gluedtomycrafts on Instagram!