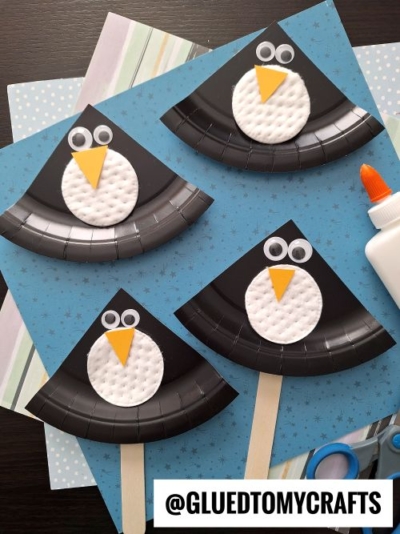
Get ready for a fun and simple craft that will bring a touch of winter magic into your home! This Paper Plate & Cotton Round Penguin Puppet is an adorable and easy project perfect for a chilly afternoon. It’s a fantastic activity for kids, combining simple materials with a whole lot of creativity. You can create a whole colony of these little penguins to play with, making for hours of imaginative fun. Let’s gather our supplies and waddle our way into this delightful craft!
Materials You’ll Need
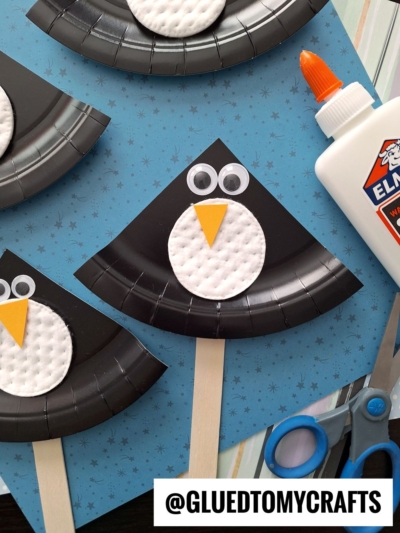
Before you begin, make sure you have all the necessary supplies. Most of these are common household or craft items, making this an accessible project for everyone.
- Large Black Paper Plates
- Large White Cotton Rounds
- Orange or Yellow Cardstock Paper
- Wiggle Eyes (Googly Eyes)
- Jumbo Craft Sticks (Popsicle Sticks)
- Craft Scissors
- School Glue or a Glue Stick
Step-by-Step Instructions
Follow these simple steps to create your very own penguin puppet. This is a great opportunity for kids to practice their cutting and gluing skills.
Step 1: Create the Penguin’s Body
Start by taking one black paper plate. Imagine it’s a pizza and you’re going to take out one slice. Carefully cut a triangular, pie-like piece out of the paper plate. This single cut will form the main body and head of your penguin. You should be left with a large piece that resembles a cone shape when you bring the cut edges together, but for now, keep it flat.
Step 2: Add the Fluffy Tummy
Now it’s time to give your penguin its classic white belly. Take one large white cotton round and apply a good amount of glue to one side. Press it firmly onto the center of your black paper plate piece. This fluffy cotton adds a wonderful texture to your craft.
Step 3: Give Your Penguin a Beak
Your penguin needs a beak to chirp! Using your orange or yellow cardstock, cut out a small, simple triangle shape. This will be the penguin’s beak. Put a small dot of glue on the back of the triangle and place it on top of the white cotton round, slightly overlapping it.
Step 4: Time to See!
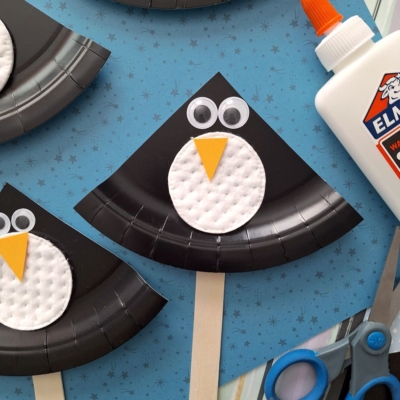
No penguin is complete without its eyes. Grab two wiggle eyes and glue them onto the black paper plate, just above the cotton round tummy and beak. You can place them close together or far apart to give your penguin a unique personality.
Step 5: Attach the Handle
To turn your craft into a puppet, you’ll need a handle. Flip your decorated paper plate over. Apply a generous line of glue to the top half of a jumbo craft stick. Press the craft stick firmly onto the back of the paper plate, with the bottom half extending out to serve as the handle. Allow the glue to dry completely to ensure it’s secure.
Step 6: Bring Your Puppet to Life!
Once the glue is dry, your paper plate penguin puppet is ready for action! You can make several penguins to create a puppet show, a winter-themed decoration, or just for fun imaginative play. Encourage kids to give their penguins names and personalities.
RELATED —> Cotton Round Bunny Craft Idea For Spring
Try This Fun Craft Today!
This penguin puppet craft is more than just an activity; it’s a chance to create memories and inspire creativity. It’s a simple, low-mess project that delivers an adorable result every time.
We would love to see your flock of feathered friends! Give this craft a try and share your finished penguin puppets with us. It’s a wonderful way to spend quality time together and create something special. Happy crafting, my friends!

Paper Plate Penguin & Cotton Round Craft Idea For Kids
Here’s your checklist of supplies to bring this craft to life:
- School Glue
Prepare your creative haven by laying down a protective cover before the crafting magic begins!
Directions:
- Start by taking one black paper plate. Imagine it's a pizza and you're going to take out one slice. Carefully cut a triangular, pie-like piece out of the paper plate. This single cut will form the main body and head of your penguin. You should be left with a large piece that resembles a cone shape when you bring the cut edges together, but for now, keep it flat.
- Now it's time to give your penguin its classic white belly. Take one large white cotton round and apply a good amount of glue to one side. Press it firmly onto the center of your black paper plate piece. This fluffy cotton adds a wonderful texture to your craft.
- Your penguin needs a beak to chirp! Using your orange or yellow cardstock, cut out a small, simple triangle shape. This will be the penguin's beak. Put a small dot of glue on the back of the triangle and place it on top of the white cotton round, slightly overlapping it.
- No penguin is complete without its eyes. Grab two wiggle eyes and glue them onto the black paper plate, just above the cotton round tummy and beak. You can place them close together or far apart to give your penguin a unique personality.
- To turn your craft into a puppet, you'll need a handle. Flip your decorated paper plate over. Apply a generous line of glue to the top half of a jumbo craft stick. Press the craft stick firmly onto the back of the paper plate, with the bottom half extending out to serve as the handle. Allow the glue to dry completely to ensure it's secure.
- Once the glue is dry, your paper plate penguin puppet is ready for action! You can make several penguins to create a puppet show, a winter-themed decoration, or just for fun imaginative play. Encourage kids to give their penguins names and personalities.
CLICK HERE TO PRINT THE DIRECTIONS FOR THIS CRAFT