Spring brings a fresh desire to create, but finding time for complex projects often feels impossible. You want an engaging activity for the kids, but you do not want to spend an hour setting it up or cleaning up a massive mess. That is where this incredibly simple cotton round bunny craft comes into play.
We will show you exactly how to turn basic bathroom staples into an adorable Easter activity. This tutorial provides a complete materials list, step-by-step instructions, and fun ideas to expand the activity for both home and classroom settings.
Materials You Need
You likely have most of these supplies hiding in your bathroom cabinets or craft bins right now. If not, a quick trip to a local dollar store will provide everything you need.
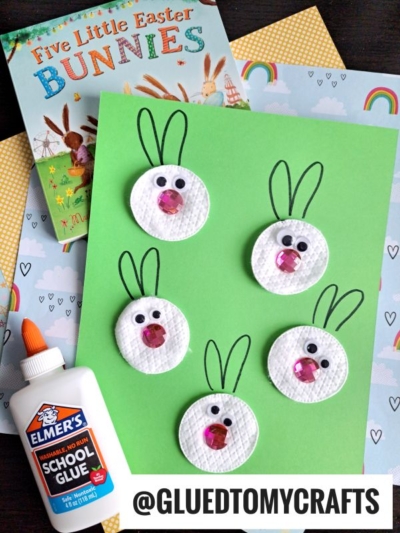
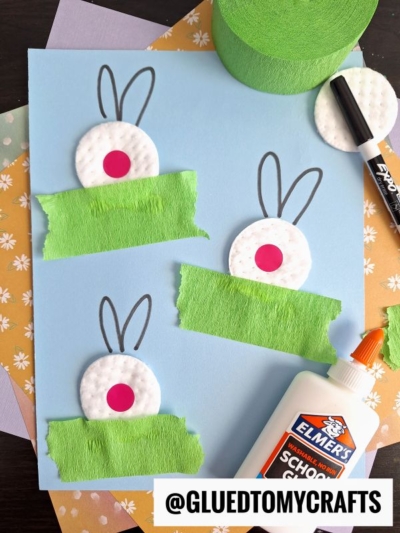
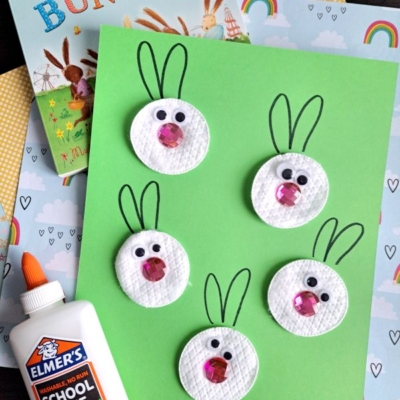
- White cotton rounds: The quilted variety adds a nice texture to the bunny faces.
- Green construction paper: This acts as the spring grass background.
- Washable school glue: A standard liquid glue, like Elmer’s, works best for attaching the materials.
- Small googly eyes: You need two for each bunny face you plan to make.
- Pink gemstones: These make shiny, adorable noses. You can easily substitute pink buttons, mini pom-poms, or even small circles of pink construction paper.
- Black marker: You will use this to draw the bunny ears directly onto the background paper.
Step-by-Step Instructions
This project moves quickly, making it ideal for children with shorter attention spans. Clear off a table, lay out your supplies, and let the creativity begin.
Step 1: Prepare the Background
Start with a full sheet of bright green construction paper. Place it flat on your workspace. The green paper represents a vibrant, grassy field where your little bunnies will hide and play.
Step 2: Glue the Bunny Faces
Take your white cotton rounds and apply a small circle of liquid glue to the back of each one. Press them firmly onto the green construction paper. If you are making multiple bunnies, space them out randomly across the page. Leaving some room above each cotton round is important because you will need space to draw the ears later.
Step 3: Add the Facial Features
Now it is time to give your bunnies some personality. Place two tiny dots of glue near the top of a cotton round and attach the googly eyes. Next, add one slightly larger dot of glue right in the center of the cotton round and press the pink gemstone nose into place. Repeat this process for every cotton round on your paper.
Step 4: Draw the Ears
Grab your black marker. Right above each cotton round, draw two long, oval-shaped bunny ears directly onto the green construction paper. You can make them stand straight up, or draw one flopping over for a bit of extra character. If the kids are old enough, let them draw the ears themselves!
Step 5: Let It Dry
Liquid glue needs a little time to set. Place the finished artwork in a safe, flat spot to dry completely. Once dry, you have a wonderful piece of seasonal art to hang on the refrigerator or classroom bulletin board.
Pair This Craft with Storytime
You can easily elevate this quick craft into a complete educational lesson by pairing it with a book. Reading a story beforehand gives children context and gets them excited about the animals they are about to create.
A fantastic choice for this specific activity is “Five Little Easter Bunnies.” Read the book together, pointing out the bunnies in the illustrations. Then, challenge your children to create exactly five bunny faces on their green paper to match the story. Combining literacy with hands-on art projects helps cement reading comprehension and makes the story memorable.
RELATED —> Cupcake Liner and Cotton Round Penguin Craft for Kids
Crafting together not only sparks creativity, but also creates special memories and joyful moments you’ll all cherish. Whether your bunnies end up on the fridge or become gifts for loved ones, you’ve turned simple materials into something magical together. Happy crafting and happy Easter!

Cotton Round Bunny Craft Idea For Spring
Here’s your checklist of supplies to bring this craft to life:
- Cardstock Paper
- Cotton Pads
- Wiggle Eyes
- Embellishments
- School Glue
Prepare your creative haven by laying down a protective cover before the crafting magic begins!
Directions:
- Start with a full sheet of bright green construction paper. Place it flat on your workspace. The green paper represents a vibrant, grassy field where your little bunnies will hide and play.
- Take your white cotton rounds and apply a small circle of liquid glue to the back of each one. Press them firmly onto the green construction paper. If you are making multiple bunnies, space them out randomly across the page. Leaving some room above each cotton round is important because you will need space to draw the ears later.
- Now it is time to give your bunnies some personality. Place two tiny dots of glue near the top of a cotton round and attach the googly eyes. Next, add one slightly larger dot of glue right in the center of the cotton round and press the pink gemstone nose into place. Repeat this process for every cotton round on your paper.
- Grab your black marker. Right above each cotton round, draw two long, oval-shaped bunny ears directly onto the green construction paper. You can make them stand straight up, or draw one flopping over for a bit of extra character. If the kids are old enough, let them draw the ears themselves!
- Liquid glue needs a little time to set. Place the finished artwork in a safe, flat spot to dry completely. Once dry, you have a wonderful piece of seasonal art to hang on the refrigerator or classroom bulletin board.
CLICK HERE TO PRINT THE DIRECTIONS FOR THIS CRAFT