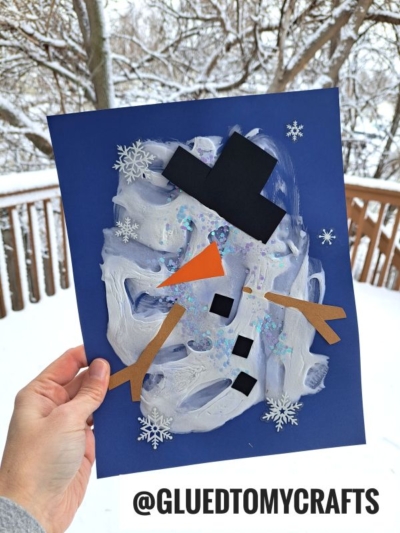
Craft a fun puffy paint melted snowman with your kids! This creative winter DIY project is perfect for little hands and adds frosty charm to crafting time.


Winter is the perfect time for cozy indoor activities, and what better way to keep the little ones entertained than with a fun, creative, and slightly messy craft idea? Enter the Puffy Paint Melted Snowman—a whimsical, hands-on project that’s as enjoyable to make as it is adorable to display.
This craft combines simple materials with creative flair, making it perfect for kids of all ages. Whether you’re looking for a weekend activity or a classroom art project, this puffy paint craft is sure to become a favorite winter tradition!


This puffy paint melted snowman craft is not only fun, but it’s also a creative and meaningful way to enjoy winter. It lets children explore (and giggle over) the idea of a melting snowman, all while testing their fine motor skills and imagination.
Craft Supplies:
The best part about this craft? It uses easy-to-find materials—most of which you probably already have at home.
- Blue Cardstock Paper
- Orange Cardstock Paper
- Black Cardstock Paper
- Shaving Cream
- School Glue
- Small Mixing Bowl
- Foam Paint Brush
- Pipe Cleaners
- Small Pom Poms
Pro Tip: If you’re working with a large group of kids, prepare a batch of puffy paint in advance to minimize waiting time. Separate the mixture into small cups for each child.
Directions:
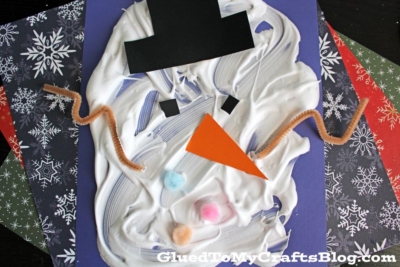
- First things first – making the puffy paint. Combine equal parts of white glue and shaving cream in a bowl. Stir gently until you achieve a fluffy, whipped texture. The mixture should hold its shape but still spread easily.
- Once you have the consistency and color you like, have children “paint” their melted snow all over the blue paper.
- After children are done with the puffy paint step, have them add their pipe cleaners arm and pom pom buttons on top of the wet mixture.
- At this point in time you should also cut out the remaining embellishments {hat, eyes and nose} and stick those on top of the wet paint as well.
- When done, set aside the melted snowman masterpieces to let them dry completely.
- Once your artwork is dry, display it proudly on the fridge, in a frame, or as seasonal décor. This melted snowman is a fun reminder of winter’s charm and creativity.
RELATED —> Paper Plate & Cotton Ball Melted Snowman
Want to keep the creative energy flowing? Check out more of our kid-friendly craft ideas for wintertime fun. From photo ornaments to popsicle stick sleds, there’s so much to explore! Happy crafting!

Puffy Paint Melted Snowman Craft Idea
Craft a fun puffy paint melted snowman with your kids! This creative winter DIY project is perfect for little hands and adds frosty charm to crafting time.
Here’s your checklist of supplies to bring this craft to life:
- Cardstock Paper black, blue and orange
- White Shaving Cream
- White School Glue
- 1 Pipe Cleaners
- Small Pom Poms
Prepare your creative haven by laying down a protective cover before the crafting magic begins!
Directions:
- First things first - making the puffy paint. Combine equal parts of white glue and shaving cream in a bowl. Stir gently until you achieve a fluffy, whipped texture. The mixture should hold its shape but still spread easily.
- Once you have the consistency and color you like, have children "paint" their melted snow all over the blue paper.
- After children are done with the puffy paint step, have them add their pipe cleaners arm and pom pom buttons on top of the wet mixture.
- At this point in time you should also cut out the remaining embellishments {hat, eyes and nose} and stick those on top of the wet paint as well.
- When done, set aside the melted snowman masterpieces to let them dry completely.
- Once your artwork is dry, display it proudly on the fridge, in a frame, or as seasonal décor. This melted snowman is a fun reminder of winter’s charm and creativity.

If you've enjoyed our content or have any thoughts to share, we'd love to hear from you! Mention @gluedtomycrafts or tag #gluedtomycrafts on Instagram!