Make your own bat decorations with pom poms and paint! Follow our step-by-step tutorial for a fun and creative Halloween project.
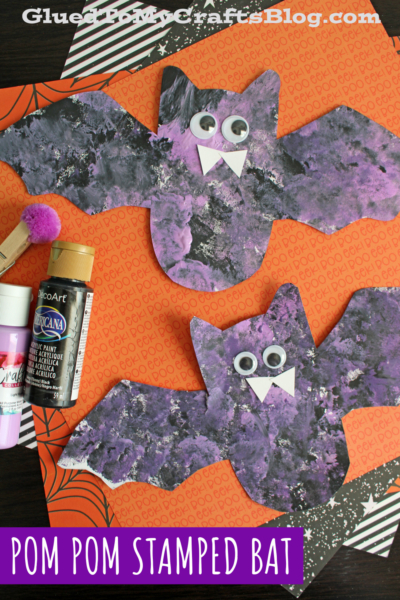
Create Spooky Fun with a Pom Pom Stamped Bat Halloween Craft
Halloween is around the corner, which means it’s time to bring out the spooky decorations! For families and kids alike, crafting is an exciting way to get into the Halloween spirit.
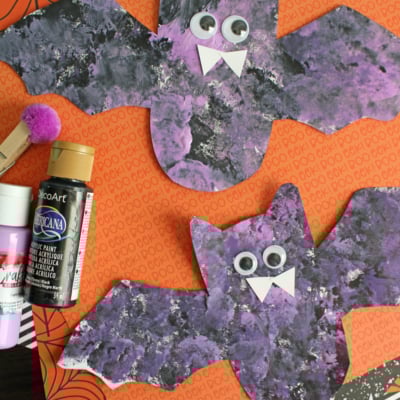
Today’s Pom Pom Stamped Bat craft tutorial is a fun, easy project that combines creativity with a touch of eerie delight. In this blog post, we’ll guide you through making your own adorable yet spooky bat decorations using simple materials that you probably already have at home.

Not only is this paint covered bat tutorial a fun project, but it’s also an excellent way for both kids and adults to get into the Halloween spirit.
Craft Supplies:
To make these delightful bats, you’ll need a few key items:
- BAT Template – on our Halloween landing page
- White Cardstock Paper
- Craft Paint {shades of black and purple for Halloween}
- Small Paper Plate
- Wooden Clothespin
- Large Sized Pom Pom
- Scissors
- Medium Sized Wiggle Eyes
- School Glue
For those who want to add a little extra pizazz to their bats, consider including:
- Loose Craft Glitter
- Glitter Glue
Directions:
- First print the blank bat template listed above in the supply list. My suggestion is on white paper but feel free to change that up. You only need ONE print per bat craft.
- Next grab your printable and flip it over on your working space, so the blank bat design is facing the table. THIS IS VERY IMPORTANT!
- Now grab your wood clothespin and pom pom.
- Pinch the pom pom inside the wood clothespin. This is now your paint brush for the craft.
- Next squirt the various colors of craft paint on the paper plate.
- Dip the pom pom paint brush in one of the paint colors, then on the printable anywhere you like {remember – this is all being done on the back side!} Unlike our previous tutorials, this time you can really go to town on your pom pom paint design. You just want “stamps” focused mainly in the middle of the paper.
- Repeat under you have the desired look you want.
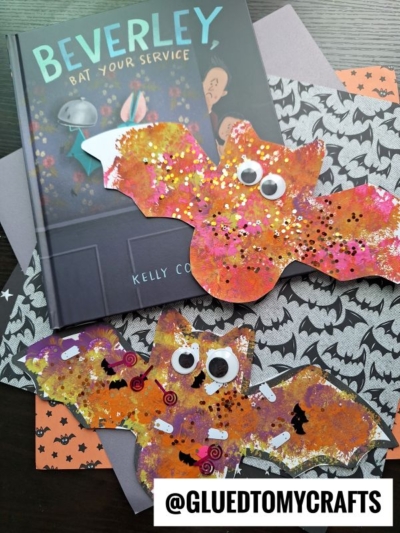
- If desired, go ahead and also sprinkle loose craft glitter on top of the wet paint.
- When done painting, set aside the paper piece for SEVERAL hours till the paint is completely dry.
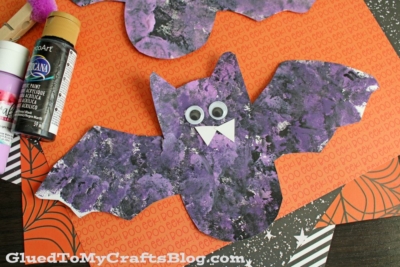
- To finish off the Pom Pom Stamped Bat craft, use scissors to trim out the design. Since you did the stamping on the back side of it, you will be able to flip over the paper and just follow the clean lines to cut out the bat shape.
- At this point in time you can add the wiggle eyes and if you still have some blank white space on the cutout, cut out two small triangles and glue them on for the fangs. Otherwise, grab a small piece of white paper for those.
- And that’s it! Now display your pieces proudly for all to see! You can easily hole punch a hole and hang them with string OR just tape to add them to walls, windows etc. Have fun with it!
RELATED —> Handprint BATTY Keepsake
Our latest and greatest “Pom Pom Stamped Halloween Bat” craft is a delightful and accessible project for families looking to engage in Halloween festivities. By following these simple steps and tips, you’ll have unique decorations and lasting memories. Crafting fosters creativity, promotes learning, and brings people together in a shared experience.
Now that you’re equipped with this fun craft idea, gather your materials and start creating your own colony of bats. And don’t forget to share your completed creations with us! We’d love to see how you’ve brought your bats to life.
For more spooky craft ideas and inspiration, stay tuned to our blog for upcoming Halloween activities and guides. Happy stamping, and may your Halloween be filled with joy, creativity, and a touch of spookiness!

Pom Pom Stamped Bat Craft Idea For Halloween
Make your own bat decorations with pom poms and paint! Follow our step-by-step tutorial for a fun and creative Halloween project.
Here’s your checklist of supplies to bring this craft to life:
Prepare your creative haven by laying down a protective cover before the crafting magic begins!
Directions:
- First print the blank bat template listed above in the supply list. My suggestion is on white paper but feel free to change that up. You only need ONE print per bat craft.
- Next grab your printable and flip it over on your working space, so the blank bat design is facing the table. THIS IS VERY IMPORTANT!
- Now grab your wood clothespin and pom pom.
- Pinch the pom pom inside the wood clothespin. This is now your paint brush for the craft.
- Next squirt the various colors of craft paint on the paper plate.
- Dip the pom pom paint brush in one of the paint colors, then on the printable anywhere you like {remember - this is all being done on the back side!} Unlike our previous tutorials, this time you can really go to town on your pom pom paint design. You just want "stamps" focused mainly in the middle of the paper.
- Repeat under you have the desired look you want.
- If desired, go ahead and also sprinkle loose craft glitter on top of the wet paint.
- When done painting, set aside the paper piece for SEVERAL hours till the paint is completely dry.
- To finish off the Pom Pom Stamped Bat craft, use scissors to trim out the design. Since you did the stamping on the back side of it, you will be able to flip over the paper and just follow the clean lines to cut out the bat shape.
- At this point in time you can add the wiggle eyes and if you still have some blank white space on the cutout, cut out two small triangles and glue them on for the fangs. Otherwise, grab a small piece of white paper for those.
- And that's it! Now display your pieces proudly for all to see! You can easily hole punch a hole and hang them with string OR just tape to add them to walls, windows etc. Have fun with it!


NEED HELP DOWNLOADING OUR FREE PRINTABLES? PLEASE REFER TO OUR FAQ PAGE
If you've enjoyed our content or have any thoughts to share, we'd love to hear from you! Mention @gluedtomycrafts or tag #gluedtomycrafts on Instagram!