Keep your little ones entertained this winter with a paper plate craft! Let your imagination take flight and have fun creating this adorable hatching penguin.

Keep your little ones entertained this winter with a penguin-themed paper plate craft! Let your imagination take flight and have fun creating this adorable hatching penguin.

🐧 Create Winter Magic with a Paper Plate Hatching Penguin Craft! ❄️
Looking for a fun and engaging winter craft for kids? This Paper Plate Hatching Penguin Craft is the perfect way to spark creativity and keep little hands busy during the chilly season!
Using simple supplies like paper plates, crayons, and our free penguin printable, your kids can create an adorable baby penguin peeking out of its egg.
Whether it’s for a classroom activity, a snowy day at home, or just some seasonal fun, this craft is easy to make and full of charm. Follow our step-by-step guide and let the crafting fun begin!

Craft time with the kids! Get your paper plates and get ready to make a hatching penguin this winter. The perfect craft for those chilly days in!
Craft Supplies:
- Large Paper Plate
- Scissors
- Stapler
- White Cardstock Paper
- Penguin Printable – on our landing page
- Crayons, Markers, Pencils
Directions:
- First things first – print out the FREE penguin chick printable above. You only need to print one baby chick per craft, on a single sheet of white cardstock paper.
- Next go ahead and have children color in the penguin in their printable. Fun fact – baby penguins are usually gray at birth.
- When done, help them trim out their decorated penguin shape and set it aside till you are ready for it.
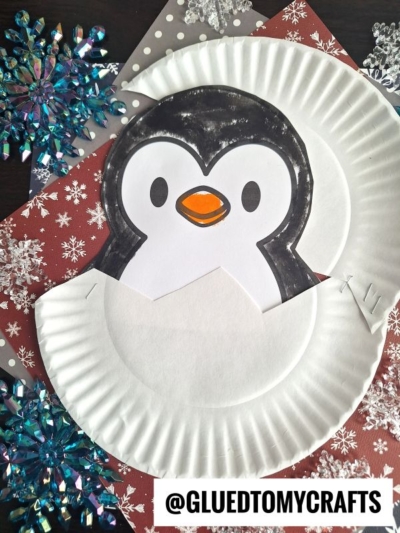
- Next up, grab ONE large paper plate per chick craft. Go ahead and cut it in half, to resemble a cracked egg.
- Staple the two paper plate pieces back together to look like it’s a “hatching” egg.
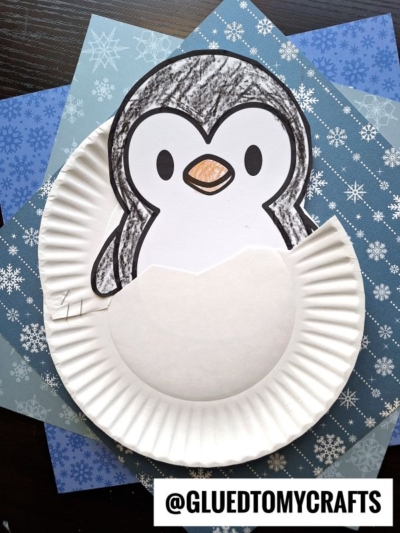
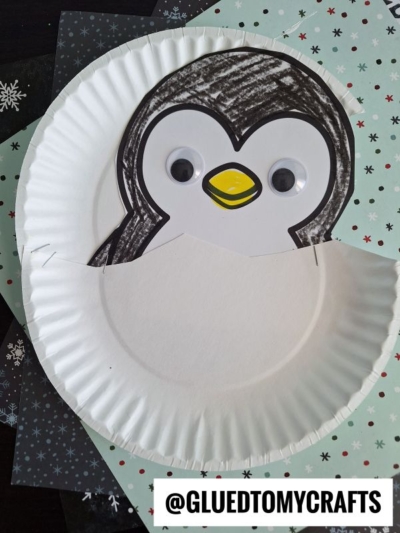
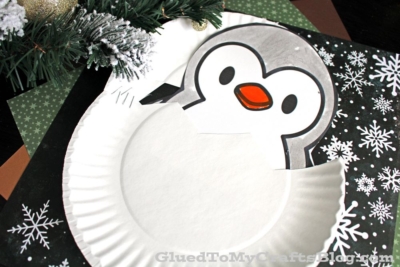
- Follow that up by stapling in the paper penguin, to the back of the paper plate pieces. Your new friend should look like it’s peeking out of the cracked egg now.
- And that’s it! Add other embellishments you see fit before displaying your Hatching Baby Penguin Chick proudly for ALL to see!
RELATED —> Handprint Penguin & Igloo
Love this winter craft idea from us? Then before you go, be sure to also check out our Penguin Ornament, Paint Splat Penguin and Cotton Ball Penguin tutorials as well! Maybe even pair them with a winter lesson plan or with some children’s books for easy story time fun!
Happy crafting, my friends! Don’t forget to share pictures with us on our Facebook page wall. We LOVE seeing the inspiration come to life!
RELATED —> Penguin Star Craft

Paper Plate Hatching Penguin Craft
Keep your little ones entertained this winter with a paper plate craft! Let your imagination take flight and have fun creating this adorable hatching penguin.
Here’s your checklist of supplies to bring this craft to life:
Prepare your creative haven by laying down a protective cover before the crafting magic begins!
Directions:
- First things first - print out the FREE penguin chick printable above. You only need to print one baby chick per craft, on a single sheet of white cardstock paper.
- Next go ahead and have children color in the penguin in their printable. Fun fact - baby penguins are usually gray at birth.
- When done, help them trim out their decorated penguin shape and set it aside till you are ready for it.
- Next up, grab ONE large paper plate per chick craft. Go ahead and cut it in half, to resemble a cracked egg.
- Staple the two paper plate pieces back together to look like it's a "hatching" egg.
- Follow that up by stapling in the paper penguin, to the back of the paper plate pieces. Your new friend should look like it's peeking out of the cracked egg now.
- And that's it! Add other embellishments you see fit before displaying your Hatching Baby Penguin Chick proudly for ALL to see!


NEED MORE HELP DOWNLOADING OUR FREE PRINTABLES? PLEASE REFER TO OUR FAQ PAGE
If you've enjoyed our content or have any thoughts to share, we'd love to hear from you! Mention @gluedtomycrafts or tag #gluedtomycrafts on Instagram!