This paper raccoon craft is so simple to do and will turn out adorable. A great way to work on fine motor skills in kids!

Our adorable paper handprint raccoon friend is the perfect craft project to recreate ANY day of the year!
Today’s latest paper kids craft idea from Glued To My Crafts is super easy and doubles as a sweet Chester keepsake idea that you could pair along with the book “The Kissing Hand.“
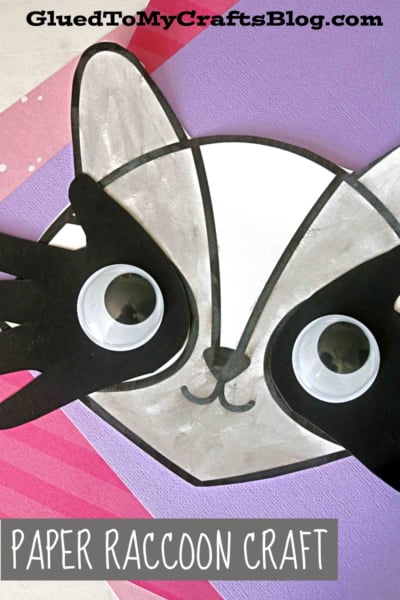
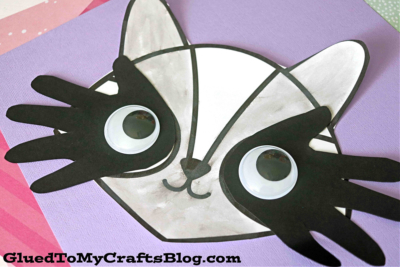
My personal favorite element of this raccoon craft is the fact that my paper raccoon friend has TWO handprint cutouts for his “black mask “. I mean – hello?! It doesn’t get any cuter than that!
Now friends – it’s time to cozy up inside and make plans to recreate this idea with your preschooler today. Remember – adults are ALWAYS welcomed to join in on the fun as well! So on that note, find all the details in our simple to follow tutorial below! Happy crafting, my friends!

This handprint raccoon craft is so simple to do and will turn out adorable. A great way to work on fine motor skills in kids!
Craft Supplies:
- White Cardstock Paper
- Black Cardstock Paper
- Raccoon Printable – on our landing page
- Crayons or Markers
- Craft Scissors
- Glue Stick
- Extra Large Googly Eyes
Directions:
- First things first – print out ONE raccoon head printable per craft you want to make today.
- Now go ahead and color in the design with your choice of craft medium.
- When ready, trim out the decorated raccoon shape and discard the remaining paper.
- Next up – the handprint “mask.” Out of the black cardstock paper, trace your child’s hands TWICE on it.
- Now trim out the two handprint designs.
- The last step for this paper raccoon craft will be to glue the two handprint cutouts {one on each side of his head, where the eyes are} in place.
- Follow that up by adding on the two large wiggle eyes.
- Add any other embellishments you see fit and display him proudly for ALL to see!
- It’s your time to shine! Don’t forget to snap a few pictures of your paper and handprint cutout raccoon friend to share with us! #gluedtomycrafts
- Pair your finished craft with our —> Cheerio Corn on the Cob Craft Idea
MAKE IT YOUR OWN TODAY – turn your finished piece into a raccoon puppet by hot gluing a jumbo popsicle stick to the back and holding it with your hand!

We have the BEST kids craft tutorials on the internet {if I do say so myself!}
So on that note, next stop is to check out our Popsicle Stick Farm Trucks, Paper Bag Zebra and Craft Stick Hedgehog craft posts that hundreds of people have been recreating this year!
All of which are instant creativity at your fingerprints and would pair nicely with today’s raccoon handprint paper craft idea!

Paper Raccoon Craft Idea For Kids
This paper raccoon craft is so simple to do and will turn out adorable. A great way to work on fine motor skills in kids!
Here’s your checklist of supplies to bring this craft to life:
- Cardstock Paper
- Raccoon Printable - Landing Page
- 2 Extra Large Googly Eyes
Prepare your creative haven by laying down a protective cover before the crafting magic begins!
Directions:
- First things first - print out ONE raccoon head printable per craft you want to make today.
- Now go ahead and color in the design with your choice of craft medium.
- When ready, trim out the decorated raccoon shape and discard the remaining paper.
- Next up - the handprint "mask." Out of the black cardstock paper, trace your child's hands TWICE on it.
- Now trim out the two handprint designs.
- The last step for this paper raccoon craft will be to glue the two handprint cutouts {one on each side of his head, where the eyes are} in place.
- Follow that up by adding on the two large wiggle eyes.
- Add any other embellishments you see fit and display him proudly for ALL to see!


NEED MORE HELP DOWNLOADING OUR FREE PRINTABLES? PLEASE REFER TO OUR FAQ PAGE
If you've enjoyed our content or have any thoughts to share, we'd love to hear from you! Mention @gluedtomycrafts or tag #gluedtomycrafts on Instagram!