Are you looking for a craft project that will engage kids’ creativities and get them excited about making art? If so, look no further than paint splat sunsets on paper!

Are you looking for a vibrant and creative way to bring the beauty of sunsets indoors? Dive into the world of Paint Splat Sunsets – a fun, hands-on craft that’s perfect for kids and adults alike!
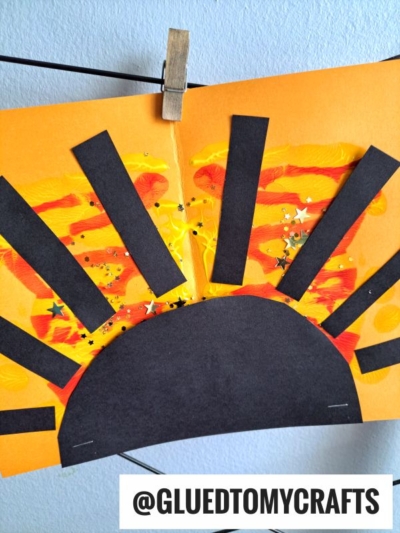
With just a few simple supplies like Tulip fabric paint, cardstock, and a sprinkle of glitter, you can create stunning marbled masterpieces that capture the magic of a summer evening sky.
This activity is not only easy to set up but also a fantastic way to explore colors, textures, and creativity.
Whether you’re crafting with little ones or enjoying some solo artistic time, these paint splatter sunsets are sure to brighten your day and your walls!

These marbled sunset masterpieces are made with a little bit of paint and a lot of creativity! This fun activity, suitable for all ages, provides children with the chance to explore colors and textures while creating something beautiful.
Craft Supplies:
- White Cardstock Paper
- Black Cardstock Paper
- Yellow Tulip Puffy Paint
- Red Tulip Puffy Paint
- Orange Tulip Puffy Paint
- Loose Craft Glitter
- Scissors
- School Glue
- Stapler
Directions:
- First things first – fold your white cardstock paper in half and open back up.
- Squirt a few lines of squiggles with your two-three shades of red/orange/yellow paint colors ON ONE SIDE before closing up the paper piece again.
- Once the paper is closed for the second time, gently take your hand and “caress” the paint around inside, so it makes a fun symmetrical “sky” print design on both sides of the paper {keep in mind – paint might ooze from the sides of the cardstock, so be sure to work in an area that can get dirty!
- Now you are ready to open it back up and see the BEGINNING of what your sunset scene will be. At this point in time, you can sprinkle some loose craft glitter on top of the wet paint.
- Next up, grab your black colored cardstock and your scissors.
- Cut out a half circle for the sun’s center and then several “rays.”
- Staple that piece to your paint covered cardstock piece.
- Once finished with your custom sunset masterpiece, set aside to let it dry completely, before displaying proudly!
RELATED —> My Sunshine Keepsake
And there you have it – your very own Paint Splat Sunset masterpiece! Whether you’re displaying it proudly on the fridge, gifting it to someone special, or simply enjoying the creative process, this craft is a wonderful reminder of how art can brighten our days. Don’t stop here—experiment with different colors, add your own unique touches, and let your imagination run wild.
If you loved this project, be sure to explore more fun and easy craft ideas on our blog. And don’t forget to share your creations with us – we’d love to see your artistic flair! Until next time, happy crafting and spreading those creative vibes!
FOLLOW US ON PINTEREST SO YOU NEVER MISS A NEW TUTORIAL FROM US!
