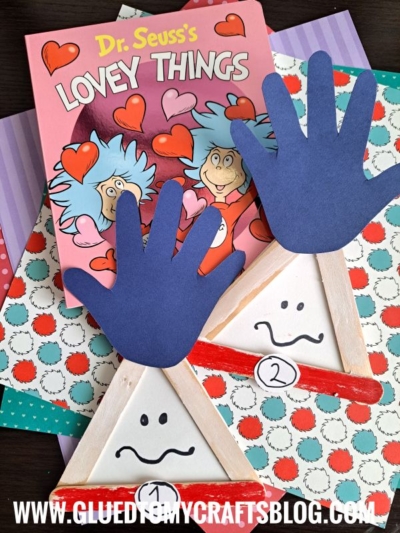
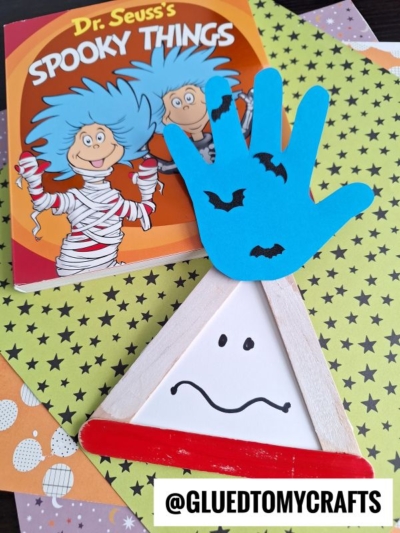
Our Thing 1 & 2 craft is perfect for pretend play, reading tools or keepsakes!


It’s Stacey from Glued To My Crafts coming by with ANOTHER kid friendly craft in honor of the upcoming BIG Dr. Seuss birthday celebration day!
Recently my son and I made these fun and recognizable Popsicle Stick Thing 1 & 2 pieces and I just couldn’t wait to share them with you all!

These mischievous Thing 1 and 2 craft stick pieces are simply perfect for pretend play pieces, reading tools while you read Cat In The Hat or just because moments!
Craft Supplies:
- Jumbo Popsicle Sticks – 3 per craft
- School Glue
- Red Craft Paint
- White Craft Paint
- Small Paper Plate
- Small Paint Brushes
- Paper Craft Scissors
- Blue Cardstock Paper
- White Cardstock Paper
- Paper Sharpie Markers
Directions:
- First things first – grab three popsicle sticks {three per “thing” craft} and glue them together to look like a triangle.
- Set aside to let it dry completely.
- Repeat for each “thing” piece you want to make today.
- Once the craft stick shape is dry, grab your two colors of craft paint and squirt some of a each, on the paper plate.
- Have children paint TWO sides of the popsicle stick triangle shape white, while the remaining side red. This will give your piece a more recognizable look.
- Again, set aside to let it dry.
- Now grab your white cardstock paper and scissors.
- Cut out a triangular piece for inside the popsicle stick design, as well as a small circle for the shirt emblem.
- Draw a face in the center of the triangle paper and write the words “Thing 1 or 2” on the paper circle, with the black marker.
- Set those two pieces aside.
- Next go ahead and grab your blue cardstock paper.
- Trace your child’s hand to make the wild hair.
- Trim out the traced design.
- To finish off the Popsicle Stick Things 1 & 2 – have children glue their paper pieces in place, as well as any other embellishments {like rhinestones and maybe some blue craft glitter} where they see fit.
- Once done, set aside to let it dry completely before displaying proudly!
RELATED —> Paper Bag Cat In The Hat Puppet
These Thing 1 and 2 craft stick pieces are simply perfect for pretend play pieces, reading tools while you read “The Cat in the Hat” aloud or even decorations for your child’s bedroom door! And the best part- they are oh so easy to make with just a few household supplies that you probably already have on hand!
So gather up the kiddos and let’s get started on this simple kid craft idea today! Happy crafting, my friends!

Popsicle Stick Thing 1 & 2 Craft
Our Thing 1 & 2 craft is perfect for pretend play, reading tools or keepsakes!
Here’s your checklist of supplies to bring this craft to life:
- School Glue
- 1 Scissors
Prepare your creative haven by laying down a protective cover before the crafting magic begins!
Directions:
- First things first - grab three popsicle sticks {three per "thing" craft} and glue them together to look like a triangle.
- Set aside to let it dry completely.
- Repeat for each "thing" piece you want to make today.
- Once the craft stick shape is dry, grab your two colors of craft paint and squirt some of a each, on the paper plate.
- Have children paint TWO sides of the popsicle stick triangle shape white, while the remaining side red. This will give your piece a more recognizable look.
- Again, set aside to let it dry.
- Now grab your white cardstock paper and scissors.
- Cut out a triangular piece for inside the popsicle stick design, as well as a small circle for the shirt emblem.
- Draw a face in the center of the triangle paper and write the words "Thing 1 or 2" on the paper circle, with the black marker.
- Set those two pieces aside.
- Next go ahead and grab your blue cardstock paper.
- Trace your child's hand to make the wild hair.
- Trim out the traced design.
- To finish off the Popsicle Stick Things 1 & 2 – have children glue their paper pieces in place, as well as any other embellishments {like rhinestones and maybe some blue craft glitter} where they see fit.
- Once done, set aside to let it dry completely before displaying proudly!


CLICK HERE TO PRINT THE DIRECTIONS FOR THIS CRAFT
If you've enjoyed our content or have any thoughts to share, we'd love to hear from you! Mention @gluedtomycrafts or tag #gluedtomycrafts on Instagram!