Winter brings cold weather, cozy afternoons, and the perfect excuse to gather around the kitchen table for some creative fun. When it is too chilly to build a real snowman outside, you can bring the winter magic indoors. Crafting with young children offers a wonderful way to spend time together while letting their imaginations run wild.
This potato masher stamped snowman craft is one of our favorite winter activities. It uses a common kitchen tool to create a delightful, textured painting. Kids love the unexpected surprise of using a potato masher as a paintbrush. It makes stamping easy for little hands and produces a fantastic grid pattern that gives the snowman character.
Materials You Need
You likely have most of these supplies hiding in your kitchen drawers or craft bins already. Here is everything you need to create this adorable winter scene:
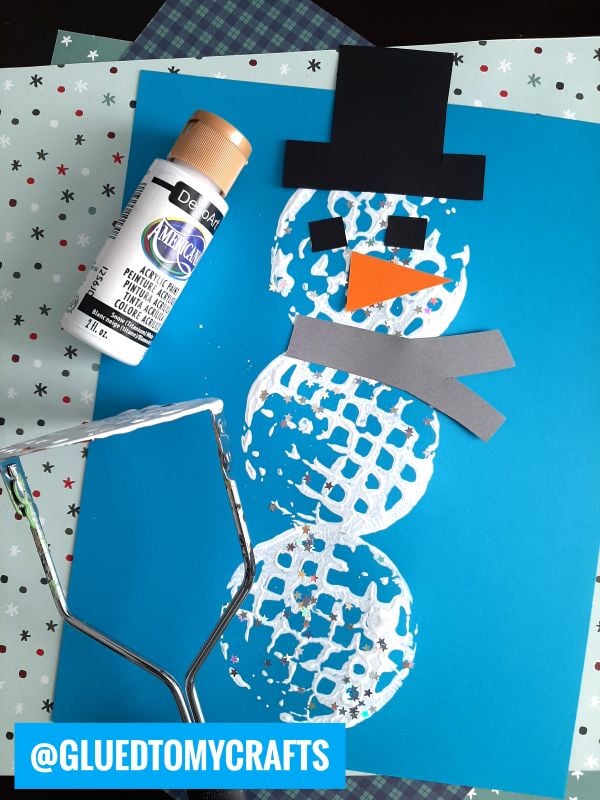
- A potato masher: A masher with a square grid pattern on the bottom works best for creating the snowman texture.
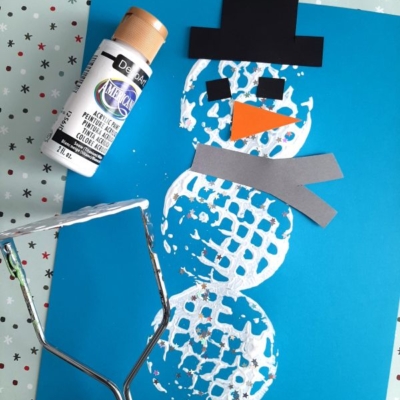
- White acrylic paint: We recommend a brand like DecoArt Americana in Snow (Titanium) White for a bright, solid color.
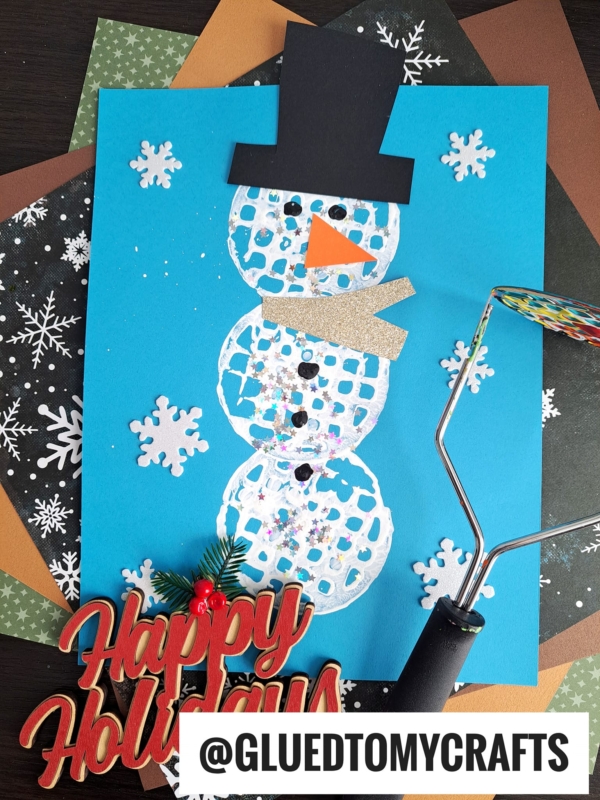
- Cardstock or heavy construction paper: A bright blue background makes the white snowman pop beautifully.
- Scrap paper for accessories: You will need black for the hat and eyes, orange for the carrot nose, and a color of your choice (like gray or red) for the scarf.
- Decorations: Multi-colored star-shaped glitter or regular craft glitter.
- Paper plate: Use this as a palette to spread out the white paint.
- Basic tools: Kid-safe scissors and a glue stick or school glue.
Step-by-Step Instructions
Follow these simple steps to help your children create their textured winter masterpiece.
Step 1: Prepare the Paint Station
- Start by protecting your work surface. Lay down some old newspaper or a plastic tablecloth. Squirt a generous amount of white acrylic paint onto your paper plate. You want an even puddle of paint that is wide enough to fit the bottom of the potato masher.
- Place your blue cardstock in the center of the workspace. If your child struggles with paper sliding around, use a small piece of painter’s tape to secure the cardstock to the table.
Step 2: Stamp the Snowman Body
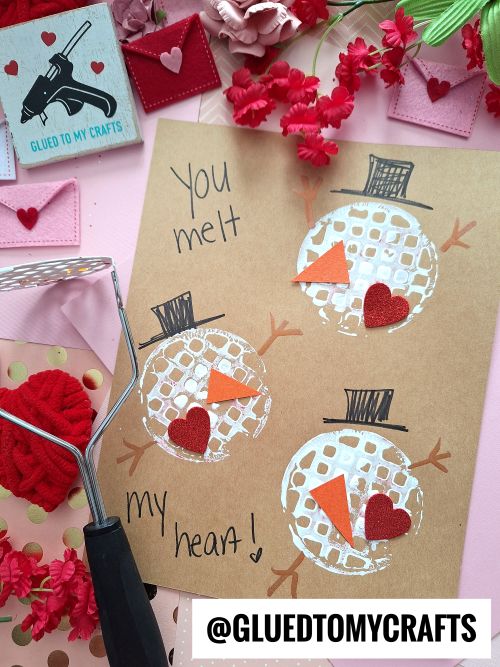
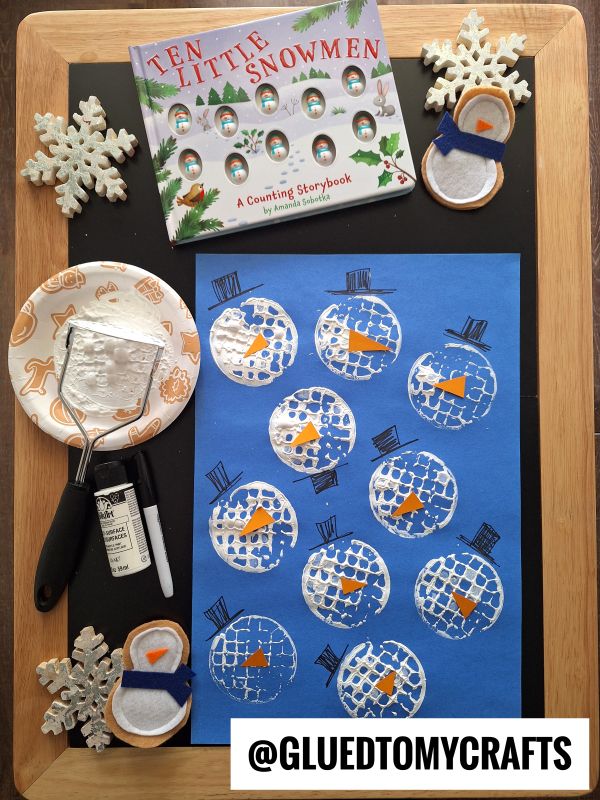
- Now comes the best part! Have your child grab the potato masher by the handle. Show them how to dip the flat grid part into the white paint on the paper plate. Ensure the bottom is evenly coated with paint, but not dripping.
- Guide them to stamp the masher onto the lower half of the blue cardstock. Press down firmly and lift straight up. This creates the bottom snowball. Repeat the process to stamp a second circle right above the first one, and a third circle on top. You now have a three-tiered snowman with a cool waffle texture!
Step 3: Add the Sparkle
- While the white paint is still wet, you have the perfect opportunity to add some winter magic. Sprinkle the star-shaped glitter directly over the stamped circles. Because the acrylic paint acts as an adhesive, the glitter will stick to the wet paint as it dries.
- This step adds a wonderful tactile element to the craft. Kids love pinching the glitter and watching it fall like real snow over their painting. Set the stamped paper aside to dry completely before moving on to the next steps.
Step 4: Create the Accessories
- While your snowman dries, pull out your scrap paper and scissors. This is a great time for older kids to practice their cutting skills. For younger kids, you can cut these pieces out beforehand.
- Cut out a classic top hat from the black paper. Next, cut two small black rectangles or circles for the eyes. Snip a long, thin orange triangle for the carrot nose. Finally, cut out a simple scarf shape from the gray or colored paper.
Step 5: Bring Your Snowman to Life
- Once the white paint is completely dry, it is time to assemble the snowman. Grab your glue stick.
- Glue the black top hat onto the top circle. Attach the black eyes and the orange carrot nose just below the hat. Finally, glue the scarf right between the top and middle stamped circles. Let the kids decide exactly where the accessories should go. Sometimes a crooked hat or a sideways nose gives the snowman the most charming personality!
RELATED —> Potato Masher Stamped Reindeer
This potato masher stamped snowman provides an engaging, sensory-rich art experience for children of all ages. You get to repurpose items from your kitchen, practice fine motor skills, and end up with a beautiful piece of seasonal art for the fridge.
We would absolutely love to see how your frosty creations turn out! Gather your supplies, get stamping, and share a picture of your kids’ artwork on social media. Tag your photos so we can admire all the unique, glittery snowmen your family brings to life this winter. Happy crafting, my friends!

Potato Masher Stamped Snowman Craft Idea
Keep kids busy this winter with a fun potato masher stamped snowman craft. Learn how to turn simple kitchen tools into beautiful seasonal art!
Here’s your checklist of supplies to bring this craft to life:
- Cardstock Paper
- Craft Paint
- Embellishments
Prepare your creative haven by laying down a protective cover before the crafting magic begins!
Directions:
- Start by protecting your work surface. Lay down some old newspaper or a plastic tablecloth. Squirt a generous amount of white acrylic paint onto your paper plate. You want an even puddle of paint that is wide enough to fit the bottom of the potato masher.
- Place your blue cardstock in the center of the workspace. If your child struggles with paper sliding around, use a small piece of painter's tape to secure the cardstock to the table.
- Now comes the best part! Have your child grab the potato masher by the handle. Show them how to dip the flat grid part into the white paint on the paper plate. Ensure the bottom is evenly coated with paint, but not dripping.
- Guide them to stamp the masher onto the lower half of the blue cardstock. Press down firmly and lift straight up. This creates the bottom snowball. Repeat the process to stamp a second circle right above the first one, and a third circle on top. You now have a three-tiered snowman with a cool waffle texture!
- While the white paint is still wet, you have the perfect opportunity to add some winter magic. Sprinkle the star-shaped glitter directly over the stamped circles. Because the acrylic paint acts as an adhesive, the glitter will stick to the wet paint as it dries.
- This step adds a wonderful tactile element to the craft. Kids love pinching the glitter and watching it fall like real snow over their painting. Set the stamped paper aside to dry completely before moving on to the next steps.
- While your snowman dries, pull out your scrap paper and scissors. This is a great time for older kids to practice their cutting skills. For younger kids, you can cut these pieces out beforehand.
- Cut out a classic top hat from the black paper. Next, cut two small black rectangles or circles for the eyes. Snip a long, thin orange triangle for the carrot nose. Finally, cut out a simple scarf shape from the gray or colored paper.
- Once the white paint is completely dry, it is time to assemble the snowman. Grab your glue stick.
- Glue the black top hat onto the top circle. Attach the black eyes and the orange carrot nose just below the hat. Finally, glue the scarf right between the top and middle stamped circles. Let the kids decide exactly where the accessories should go. Sometimes a crooked hat or a sideways nose gives the snowman the most charming personality!
CLICK HERE TO PRINT THE DIRECTIONS FOR THIS CRAFT
If you've enjoyed our content or have any thoughts to share, we'd love to hear from you! Mention @gluedtomycrafts or tag #gluedtomycrafts on Instagram!