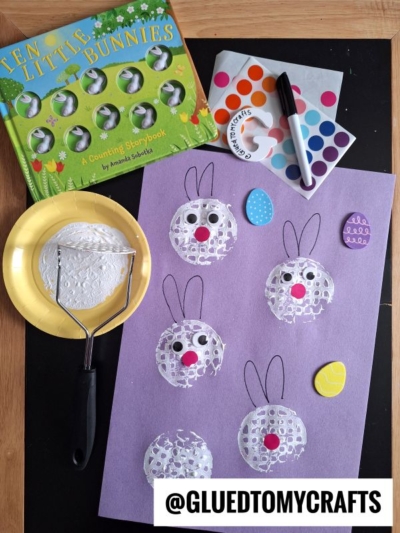
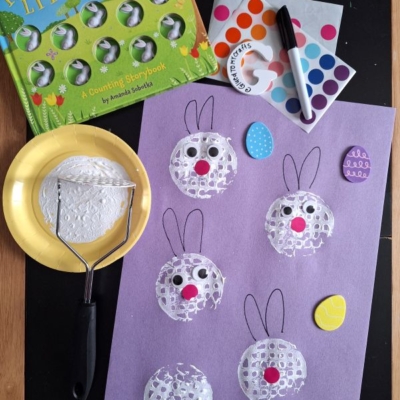
Spring is in the air, and what better way to celebrate than with a craft that is both simple and wonderfully fun? This Potato Masher Stamped Bunny Craft is the perfect activity to get little hands busy and creative. Using a common kitchen tool, you can create the most adorable bunny friends on paper.
Inspired by the delightful counting book “Ten Little Bunnies,” this project combines reading with a hands-on art experience. It’s an inexpensive and low-mess way to spend an afternoon, resulting in a cheerful piece of art you can proudly display. Let’s hop to it and gather our supplies!
Materials List:
- Potato Masher: A round metal masher works best for creating the bunny head shape.
- Washable Craft Paint: White is ideal for the bunny, but feel free to get creative with other pastel colors.
- Construction Paper: A dark color like purple, blue, or black will make the white bunnies pop.
- Paper Plate: To hold your paint.
- Wiggle Googly Eyes: For giving your bunnies some character.
- Pink Craft Foam or Paper: To create the bunny noses. Small pink circular stickers also work perfectly.
- Black Marker: A fine-tip or medium-tip marker is needed for drawing the ears and other details.
- Optional Decorations: Foam Easter egg shapes, glitter, or other spring-themed stickers to decorate your scene.
Step-by-Step Stamping Instructions
Now for the fun part! Follow these simple steps to create your field of adorable potato masher bunnies.
Step 1: Set Up Your Stamping Area
First, prepare your workspace. Lay down some newspaper or a craft mat to protect your table. Squeeze a generous amount of white craft paint onto a paper plate. Spread it out slightly so the surface of the potato masher can be evenly coated.
Step 2: Stamp Your Bunny Heads
Take your potato masher and dip it straight down into the white paint on the paper plate. Make sure the entire round surface is covered in a thin, even layer of paint.
Next, press the paint-covered masher firmly onto your sheet of construction paper. Lift it straight up to reveal a perfect circular stamp. This will be your bunny’s head and body! Repeat this process to create as many bunnies as you like. You can try to stamp ten bunnies to match the book, or simply fill your page.
Step 3: Bring Your Bunnies to Life
Once the white paint has dried completely, it’s time to add the details that transform your white circles into cute bunnies.
- Add the Ears: Using your black marker, draw two long bunny ears extending from the top of each white stamped circle. You can make them tall and straight, or give one a little flop for extra personality.
- Give Them Sight: Carefully glue two wiggle googly eyes onto the upper half of each white circle.
- Create the Nose: Cut a small triangle or circle from your pink craft foam and glue it just below the eyes. Alternatively, use a pink circular sticker for a quick and easy nose.
Step 4: Decorate the Scene
Your bunnies are complete, but now you can build a world for them. Use your optional decorations to add more flair to your artwork. Place foam Easter eggs around the bunnies, draw some green grass at the bottom of the page with a crayon or marker, or add some sparkly glitter for a magical touch. Let your child’s imagination guide the final decorations.
RELATED —> Potato Masher Stamped S’mores Craft Idea

This Potato Masher Stamped Bunny Craft is a wonderful way to welcome spring and create lasting memories with your children. It’s a simple, engaging, and versatile project that proves you don’t need fancy supplies to make something truly special.
On that note, we hope you have fun recreating it! Happy crafting, my friends!

Potato Masher Stamped Bunny Craft Idea
Here’s your checklist of supplies to bring this craft to life:
- Cardstock Paper
- Craft Paint
- Wiggle Eyes
- Embellishments
Prepare your creative haven by laying down a protective cover before the crafting magic begins!
Directions:
- First, prepare your workspace. Lay down some newspaper or a craft mat to protect your table. Squeeze a generous amount of white craft paint onto a paper plate. Spread it out slightly so the surface of the potato masher can be evenly coated.
- Take your potato masher and dip it straight down into the white paint on the paper plate. Make sure the entire round surface is covered in a thin, even layer of paint.
- Next, press the paint-covered masher firmly onto your sheet of construction paper. Lift it straight up to reveal a perfect circular stamp. This will be your bunny's head and body! Repeat this process to create as many bunnies as you like. You can try to stamp ten bunnies to match the book, or simply fill your page.
- Once the white paint has dried completely, it's time to add the details that transform your white circles into cute bunnies.
- Add the Ears: Using your black marker, draw two long bunny ears extending from the top of each white stamped circle. You can make them tall and straight, or give one a little flop for extra personality.
- Give Them Sight: Carefully glue two wiggle googly eyes onto the upper half of each white circle.
- Create the Nose: Cut a small triangle or circle from your pink craft foam and glue it just below the eyes. Alternatively, use a pink circular sticker for a quick and easy nose.
- Your bunnies are complete, but now you can build a world for them. Use your optional decorations to add more flair to your artwork. Place foam Easter eggs around the bunnies, draw some green grass at the bottom of the page with a crayon or marker, or add some sparkly glitter for a magical touch. Let your child's imagination guide the final decorations.
CLICK HERE TO PRINT THE DIRECTIONS FOR THIS CRAFT