Get ready to bring the fun of a campfire indoors with a craft that’s as delightful to make as its namesake is to eat! This Potato Masher Stamped S’mores Craft is a fantastic way for kids to get creative with unconventional art tools. It combines the joy of painting and stamping with the delicious thought of gooey marshmallows and chocolatey s’mores.
The star of this project is a simple potato masher, which creates the perfect waffle-like texture for our “marshmallow.” It’s a simple, low-mess activity that yields adorable results perfect for a rainy day, a pretend camping theme, or just an afternoon of creative fun. Let’s gather our supplies and make some super sweet art!
Gather Your S’mores Craft Supplies
Before you start, you’ll want to collect all the necessary materials. This craft uses common items you likely have around the house, making it easy to jump right in.
Materials List:
- Potato Masher: One with a waffle or grid pattern is ideal.
- Washable Craft Paint: White
- Cardstock Paper: Several sheets. We recommend gray or black for the background, and a sheet of light brown for the graham crackers & dark for the chocolate.
- Small Paper Plate: To use as a paint palette.
- Googly Eyes: Two small ones for each s’more friend.
- Scissors: Kid-friendly scissors are perfect.
- School Glue: A simple glue stick or liquid school glue works well.
- Optional: Baby wipes for easy cleanup.
Step-by-Step Stamping Instructions
Follow these simple steps to create your own adorable s’mores characters. Remember, the goal is to have fun, so don’t worry about making everything perfect!
Step 1: Prepare Your Paint Station
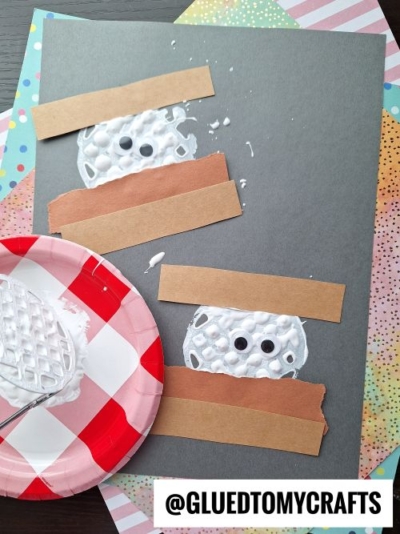
First, set up your painting area. Squirt a generous amount of white paint onto your paper plate.
Step 2: Stamp the Marshmallow
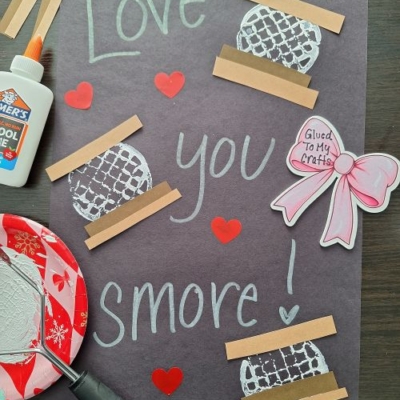
Now for the main event! Dip your potato masher into the white paint, ensuring the entire grid surface is coated. Firmly press the masher onto your dark-colored background cardstock. Lift it straight up to reveal a white, textured shape. This will be your fluffy marshmallow! Let it dry completely.
Step 3: Create the Graham Crackers
While the marshmallow dries, it’s time to make the graham crackers. Use your scissors to cut the light brown cardstock into two rectangular shapes. These will be the top and bottom crackers for your s’more. You can make them as large or small as you like, just be sure they fit with your stamped marshmallow.
Step 4: Add the Chocolate Layer
Next, grab your dark brown construction paper. Tear a strip of it by hand to create the melted chocolate layer. Tearing the paper instead of cutting it gives the “chocolate” a wonderfully gooey and uneven look, just like the real thing.
Step 5: Assemble Your S’more
Once the white paint is dry, it’s time to assemble your s’more. Glue the pieces onto the background paper. Start by gluing one light brown graham cracker rectangle either above or slightly overlapping the top of your white marshmallow stamp.
Next, glue the torn brown paper “chocolate” just below the marshmallow. Finally, add the second graham cracker rectangle below the chocolate layer. You now have a complete s’more structure!
Step 6: Bring Your S’more to Life!
Every s’more needs a friendly face. Glue two googly eyes onto the white marshmallow part of your craft. This simple touch instantly gives your creation personality and transforms it into a cute s’more friend.
Step 7: Display Your Masterpiece
That’s it! Your Potato Masher Stamped S’mores Craft is complete. Let all the glue dry thoroughly, and then find the perfect place to display your new piece of art. It looks great on the fridge, in a classroom, or as part of a collection of your child’s creative projects.
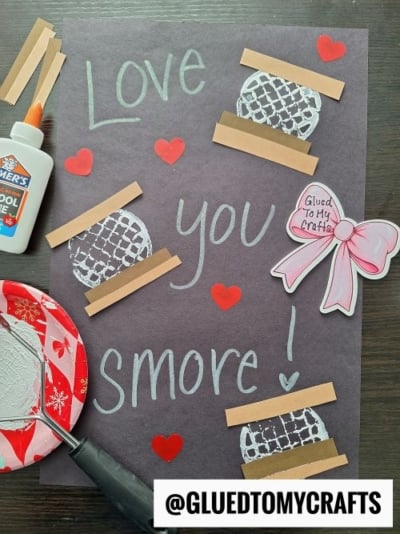
RELATED —> Handprint “Fall Is S’more Fun With You” Keepsake

This craft is a wonderful way to spend quality time with your kids, encouraging their creativity while developing fine motor skills. The unique use of a potato masher as a stamp is a fun surprise that shows children how everyday objects can become art tools. So, the next time you’re looking for an easy and engaging activity, give this s’mores craft a try. We’re sure it will be a huge hit!

Potato Masher Stamped S'mores Craft Idea For Kids
Here’s your checklist of supplies to bring this craft to life:
- Cardstock Paper
- Craft Paint
- Embellishments
- School Glue
Prepare your creative haven by laying down a protective cover before the crafting magic begins!
Directions:
- First, set up your painting area. Squirt a generous amount of white paint onto your paper plate.
- Now for the main event! Dip your potato masher into the white paint, ensuring the entire grid surface is coated. Firmly press the masher onto your dark-colored background cardstock. Lift it straight up to reveal a white, textured shape. This will be your fluffy marshmallow! Let it dry completely.
- While the marshmallow dries, it's time to make the graham crackers. Use your scissors to cut the light brown cardstock into two rectangular shapes. These will be the top and bottom crackers for your s'more. You can make them as large or small as you like, just be sure they fit with your stamped marshmallow.
- Next, grab your dark brown construction paper. Tear a strip of it by hand to create the melted chocolate layer. Tearing the paper instead of cutting it gives the "chocolate" a wonderfully gooey and uneven look, just like the real thing.
- Once the white paint is dry, it's time to assemble your s'more. Glue the pieces onto the background paper. Start by gluing one light brown graham cracker rectangle either above or slightly overlapping the top of your white marshmallow stamp.
- Next, glue the torn brown paper "chocolate" just below the marshmallow. Finally, add the second graham cracker rectangle below the chocolate layer. You now have a complete s'more structure!
- Every s'more needs a friendly face. Glue two googly eyes onto the white marshmallow part of your craft. This simple touch instantly gives your creation personality and transforms it into a cute s'more friend.
- That's it! Your Potato Masher Stamped S'mores Craft is complete. Let all the glue dry thoroughly, and then find the perfect place to display your new piece of art. It looks great on the fridge, in a classroom, or as part of a collection of your child's creative projects.
Grab our favorite books via our Amazon affiliate link! In our Amazon storefront you will find books, toys and craft supplies we absolutely love using for our Glued To My Crafts tutorials!