Are you looking for a fun, hands-on activity to pair with your next reading session? Whether you are a parent trying to fill a rainy afternoon or a teacher planning a classroom activity, this pool noodle stamped pigeon craft is a guaranteed hit.
Inspired by the hilariously stubborn bird in Mo Willems’ beloved “The Pigeon” book series, this art project brings the magic of story time to life. It is incredibly easy to set up, requires minimal supplies, and lets little ones practice their fine motor skills while getting a little messy. Plus, kids love watching their favorite book character appear right on the page!
What You Need for Your Pigeon Craft
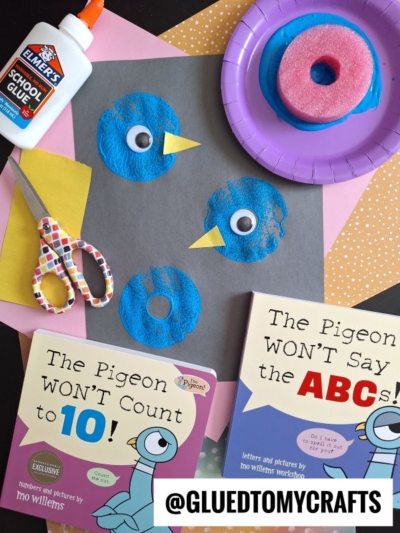
You probably already have most of these crafting staples tucked away in your supply closet. Here is what you need to make your own stamped pigeon:
- A slice of a pool noodle: Cut about an inch thick. (A donut-shaped sponge works perfectly, too!)
- Blue washable paint: To match the pigeon’s signature color.
- Grey construction paper: This serves as the background canvas.
- Yellow construction paper: Just a small scrap for the beak.
- Large googly eyes: Because every pigeon needs that classic, wide-eyed stare.
- School glue: Safe, non-toxic liquid glue works best.
- Scissors: Child-safe scissors if the kids are helping cut.
- A paper plate: To hold your paint.
Step-by-Step Stamping Instructions
Ready to create? Follow these simple steps to help your kids make their own feathered friend.
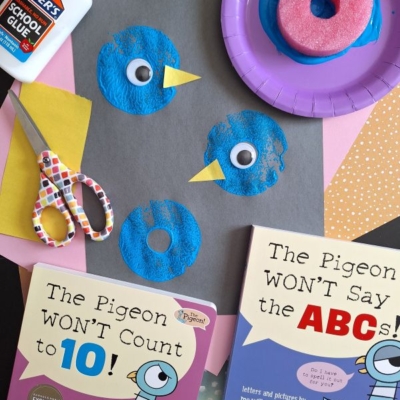
1. Prep Your Paint Station
Squirt a generous circle of blue washable paint onto your paper plate. Take your pool noodle slice (or donut sponge) and press it firmly into the paint. Make sure the bottom edge is completely coated so you get a solid, even ring.
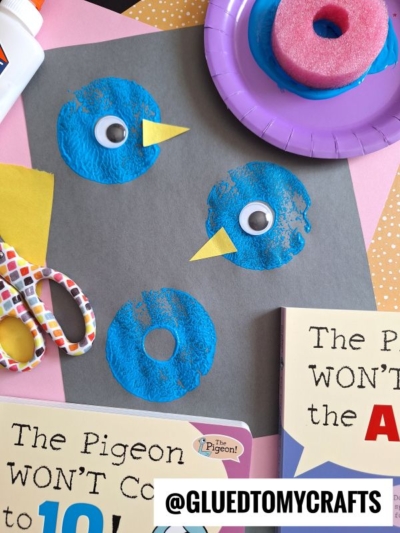
2. Stamp the Pigeon Heads
Place your grey construction paper flat on the table. Have your child take the paint-covered pool noodle and stamp it directly onto the paper. Press down firmly and lift straight up to reveal a perfect blue circle! You can stamp just one pigeon or create a whole flock on a single page. Let the paint dry completely before moving on to the next step.
3. Cut Out the Beaks
While you wait for the paint to dry, grab your yellow construction paper and scissors. Cut out a small triangle for each pigeon head you stamped. This will be the bird’s beak.
4. Bring the Pigeon to Life
Once the blue paint is dry, it is time to give your pigeon its personality. Add a small dot of school glue to the back of a googly eye and place it right on the edge of the blue circle. Next, glue the yellow paper triangle right below or next to the eye, pointing outward.
RELATED —> Cupcake Liner Pigeon & Duckling Craft
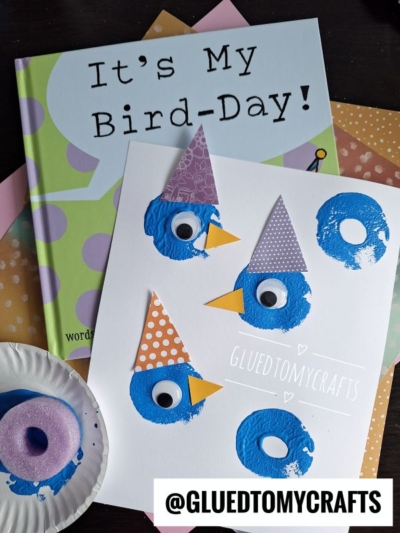
We hope you and your little ones have a blast bringing this pool noodle stamped pigeon craft to life! The best part about this activity is how easily it pairs with reading. Try making this craft right after reading The Pigeon WON’T Go to 10! or The Pigeon WON’T Say the ABCs!
Encourage your kids to draw speech bubbles next to their finished pigeons and practice writing their own silly demands. Crafting alongside reading helps build strong literacy connections while letting kids express their creativity. Have fun, and keep crafting!

Pool Noodle Stamped Pigeon Craft Idea For Story Time
Here’s your checklist of supplies to bring this craft to life:
- Cardstock Paper
- Craft Paint
- Pool Noodle Slice
- Wiggle Eyes
- Embellishments
Prepare your creative haven by laying down a protective cover before the crafting magic begins!
Directions:
- Squirt a generous circle of blue washable paint onto your paper plate. Take your pool noodle slice (or donut sponge) and press it firmly into the paint. Make sure the bottom edge is completely coated so you get a solid, even ring.
- Place your grey construction paper flat on the table. Have your child take the paint-covered pool noodle and stamp it directly onto the paper. Press down firmly and lift straight up to reveal a perfect blue circle! You can stamp just one pigeon or create a whole flock on a single page. Let the paint dry completely before moving on to the next step.
- While you wait for the paint to dry, grab your yellow construction paper and scissors. Cut out a small triangle for each pigeon head you stamped. This will be the bird's beak.
- Once the blue paint is dry, it is time to give your pigeon its personality. Add a small dot of school glue to the back of a googly eye and place it right on the edge of the blue circle. Next, glue the yellow paper triangle right below or next to the eye, pointing outward.
CLICK HERE TO PRINT THE DIRECTIONS FOR THIS CRAFT