The holiday season brings a special kind of magic, especially when you spend it making memories with your family.
Decorating the tree often serves as the centerpiece of these winter festivities. Hanging store-bought baubles is fun, but pulling out handmade ornaments from years past brings a unique wave of nostalgia.
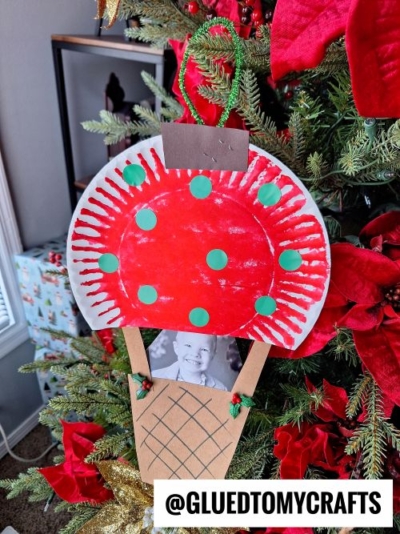
This year, you can add a brand new, highly personalized treasure to your evergreen branches. We are going to make an adorable paper plate Christmas bulb hot air balloon craft. This project blends the classic shape of a festive holiday bulb with the whimsical adventure of a hot air balloon!
Materials You Will Need
You probably already have most of these basic crafting supplies hidden away in your art closet. Gathering the right materials beforehand ensures a smooth, stress-free crafting session with your little ones.
Here is the complete list of supplies you need for this project:
- Small paper plates: The standard white, uncoated paper plates work best because they hold paint well.
- Craft paint: Grab some bright red washable paint for the main balloon.
- Paintbrushes or sponge brushes: Sponge brushes work wonderfully for little hands covering large areas.
- Colored cardstock: You need dark brown and black. Cardstock holds its shape much better than standard construction paper.
- A printed photograph: Find a clear, smiling picture of your child or student. Wallet-sized photos work perfectly for this scale.
- Green tinsel pipe cleaners: These add a lovely sparkle and serve as the hanger for your ornament.
- Black permanent marker: You will use this to draw the woven details on the basket.
- Craft scissors: Have adult scissors for the detailed cutting and safety scissors if your kids want to help.
- School glue and a stapler: Liquid glue works great for the small paper details, while a stapler provides sturdy reinforcement for the heavy pieces.
Step-by-Step Instructions
Follow these simple steps to build your paper plate Christmas bulb hot air balloon. Take your time, enjoy the process, and remember that perfection is never the goal when crafting with kids.
Step 1: Paint the Paper Plate
The paper plate serves as the large envelope of your hot air balloon. Go ahead and cut off a slight sliver to make it more “hot air balloon shaped.”
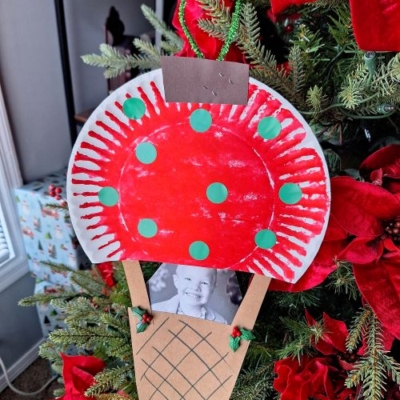
Next have your child paint the entire front surface of the paper plate with the red craft paint. Encourage them to use smooth strokes to cover all the white spaces.
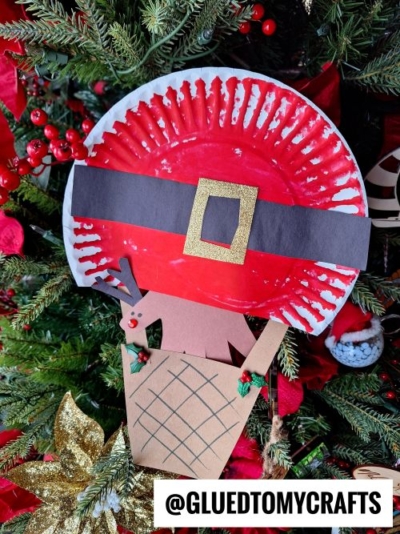
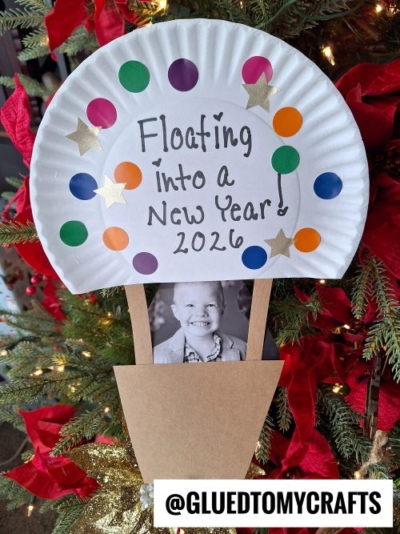
At this point in time you can also add polka dots, stickers, glitter glue etc. to give your balloon a custom Christmas look.
Step 2: Construct the Woven Basket
Next, we need to create the basket where your little passenger will ride. Cut a piece of light brown cardstock into a trapezoid shape. You want the top edge to be slightly wider than the bottom edge.
Take your black marker and draw a series of diagonal lines across the brown trapezoid. Then, draw crossing diagonal lines going the opposite direction. This simple crisscross lattice pattern instantly makes the flat paper look like a woven wicker basket.
Step 3: Prepare the Passenger
Now comes the most heartwarming part of the project. Take the printed photograph of your child and carefully cut around their silhouette. You want to feature their head and shoulders so it looks natural when placed inside the craft.
Apply a line of glue along the back bottom edge of the cut-out photograph. Press it firmly behind the top edge of your brown paper basket. When you flip it over, it should look exactly like your child is standing inside the basket, smiling out at you.
Step 4: Assemble the Hot Air Balloon
With all the separate pieces ready, we can put the hot air balloon together. Cut two thin, identical strips of dark brown cardstock. These will act as the ropes connecting the balloon to the basket.
Staple one end of each brown strip to the bottom edge of the decorated paper plate. Then, staple the other ends to the back of the basket, making sure your child’s photo remains visible. The stapler provides a much stronger hold than glue, ensuring your ornament survives the holiday season.
Step 5: Add the Hanger and Final Touches
To make this look like a true Christmas bulb, cut a small rectangle from the dark brown cardstock. Staple this “cap” directly to the top center of the paper plate.
Take your green tinsel pipe cleaner and bend it into a loop. Staple the ends of the loop to the back of the brown cap.
The final step is to add any other embellishments you see fit. Then allow it to dry completely before you display it proudly for all to see!
RELATED —> Pom Pom Stamped Christmas Ornament
Creating holiday crafts provides a wonderful excuse to slow down and enjoy the season with the people you love most. This paper plate Christmas hot air balloon brings together the magic of flight, the joy of the holidays, and the sweet faces of your children.
We would absolutely love to see how your ornaments turn out! Try experimenting with different paint colors, adding fun glitter textures, or including your family pets in the basket. Share pictures of your finished crafts with us on social media and tag our page.
If you enjoyed this project, be sure to browse our blog for even more easy, engaging, and budget-friendly family craft ideas. Happy holidays and happy crafting!

Paper Plate Christmas Bulb Hot Air Balloon Craft
Here’s your checklist of supplies to bring this craft to life:
- Large Paper Plate
- Craft Paint
- Cardstock Paper
- Pipe Cleaner
- Embellishments
- School Glue
Prepare your creative haven by laying down a protective cover before the crafting magic begins!
Directions:
- The paper plate serves as the large envelope of your hot air balloon. Go ahead and cut off a slight sliver to make it more "hot air balloon shaped."
- Next have your child paint the entire front surface of the paper plate with the red craft paint. Encourage them to use smooth strokes to cover all the white spaces.
- At this point in time you can also add polka dots, stickers, glitter glue etc. to give your balloon a custom Christmas look.
- Next, we need to create the basket where your little passenger will ride. Cut a piece of light brown cardstock into a trapezoid shape. You want the top edge to be slightly wider than the bottom edge.
- Take your black marker and draw a series of diagonal lines across the brown trapezoid. Then, draw crossing diagonal lines going the opposite direction. This simple crisscross lattice pattern instantly makes the flat paper look like a woven wicker basket.
- Now comes the most heartwarming part of the project. Take the printed photograph of your child and carefully cut around their silhouette. You want to feature their head and shoulders so it looks natural when placed inside the craft.
- Apply a line of glue along the back bottom edge of the cut-out photograph. Press it firmly behind the top edge of your brown paper basket. When you flip it over, it should look exactly like your child is standing inside the basket, smiling out at you.
- With all the separate pieces ready, we can put the hot air balloon together. Cut two thin, identical strips of dark brown cardstock. These will act as the ropes connecting the balloon to the basket.
- Staple one end of each brown strip to the bottom edge of the decorated paper plate. Then, staple the other ends to the back of the basket, making sure your child's photo remains visible. The stapler provides a much stronger hold than glue, ensuring your ornament survives the holiday season.
- To make this look like a true Christmas bulb, cut a small rectangle from the dark brown cardstock. Staple this "cap" directly to the top center of the paper plate.
- Take your green tinsel pipe cleaner and bend it into a loop. Staple the ends of the loop to the back of the brown cap.
- The final step is to add any other embellishments you see fit. Then allow it to dry completely before you display it proudly for all to see!
CLICK HERE TO PRINT THE DIRECTIONS FOR THIS CRAFT