
Crafting Memories with Tiny Hands in Clay
Creating art with your children is not just a fun activity; it’s an opportunity to make lasting memories together.
Below, we are sharing how to recreate these various clay ornament ideas, that offer a unique way to capture your child’s growth and creativity, making them perfect keepsakes for years to come.
These seven different handprint clay designs are easy and enjoyable for kids to make. So gather your supplies, roll up your sleeves, and prepare to get creative with your little ones. Happy crafting, my friends!

Handprint ornaments make thoughtful and personalized gifts for friends and family. They capture the innocence and wonder of childhood, making them perfect for grandparents, aunts, uncles, and close family friends.
Getting Started:
- Before you begin, it’s essential to choose the right type of clay for your project. Air-dry clay is a popular option because it’s easy to work with and doesn’t require baking. It’s also lightweight, making it ideal for hanging ornaments. However, if you’re looking for a more durable option, oven-bake polymer clay might be a better choice, as it hardens to a very sturdy finish.
- Once you’ve selected your clay, you’ll need to gather a few other basic supplies, such as rolling pins, wax paper and a cutting tool {such as a butter knife} for sculpting out the handprint design. Fortunately, many of these items may already be in your kitchen or craft box, minimizing the need for a shopping trip.
- When working with clay, it’s important to keep it moist and pliable. If it starts to dry out, spritz it lightly with water or use a damp cloth to cover it. This ensures you can achieve the best results when capturing your child’s handprint.
Preparing Your Workspace:
- Setting up your workspace is a crucial first step to ensure a smooth crafting experience. Choose a clean, flat surface where your child can comfortably reach all their materials.
- Lay down a plastic tablecloth or wax paper to protect the surface from clay residue and make cleanup easier.
Creating the Perfect Handprint:
- Capturing the perfect handprint requires a gentle touch and a bit of patience. Begin by kneading the clay until it’s soft and pliable. Roll it out to an even thickness of about ¼-inch. A thicker piece of clay will hold the handprint better and be more durable once it’s dry.
- Guide your child to press their hand firmly yet gently into the clay. Ensure they keep their fingers slightly apart to create a defined print. If the first attempt isn’t perfect, don’t worry—simply re-roll the clay and try again until you’re satisfied with the impression.
- After achieving a satisfactory print, use a knife to cut around the handprint, leaving a border. This will form the base of your ornament.
- Remember to add a small hole near the top before the clay dries to thread a ribbon for hanging.
- Allow your child’s handprint design to air-dry for a few days before decorating.
Decorating Your Ornament:
- Now comes the exciting part—decorating your handprint ornament! Encourage your child to use their imagination and creativity to embellish their piece. Paints and markers are excellent choices for adding color once the clay has dried. Encourage your child to experiment with different hues and patterns to personalize their ornament. Acrylic paints work well for vivid colors, while metallic markers provide a shimmering touch.
- For an extra personal touch, consider adding your child’s name or the date using letter stamps or hand carving. Adding these details can transform the ornament into a treasured keepsake, highlighting the time and effort put into its creation.
RELATED —> Thumbprint Heart Magnets

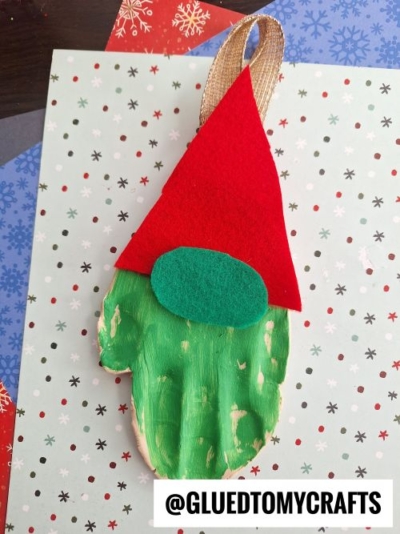
HANDPRINT SANTA GNOME ORNAMENT

HANDPRINT GREEN CHRISTMAS TREE ORNAMENT

HANDPRINT GINGERBREAD TREE ORNAMENT – USE BROWN CLAY

HANDPRINT REINDEER ORNAMENT – USE BROWN CLAY

HANDPRINT TREE ORNAMENTS

HANDPRINT GNOME ORNAMENTS – USE FELT FOR THEIR NOSES
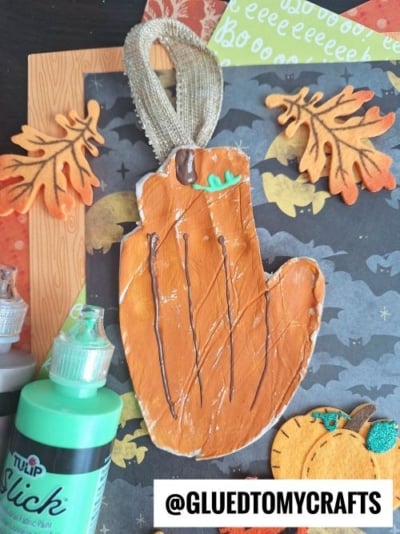
HANDPRINT PUMPKIN ORNAMENT FOR FALL

HANDPRINT TURKEY ORNAMENT FOR THANKSGIVING

HANDPRINT CLAY GHOST ORNAMENT FOR HALLOWEEN

CLAY HANDPRINT ACORN ORNAMENT
CLAY GRINCH GNOME ORNAMENT

HANDPRINT RED CARDINAL CLAY ORNAMENT

CLAY HANDPRINT PENGUIN ORNAMENT

CLAY HANDPRINT MISTLETOE ORNAMENT

HANDPRINT CLAY LOVE BIRD ORNAMENT

HANDPRINT VALENTINE’S DAY GNOME ORNAMENT

HANDPRINT LORAX ORNAMENT FOR DR. SEUSS WEEK

HANDPRINT LEPRECHAUN GNOME FOR ST. PATRICK’S DAY
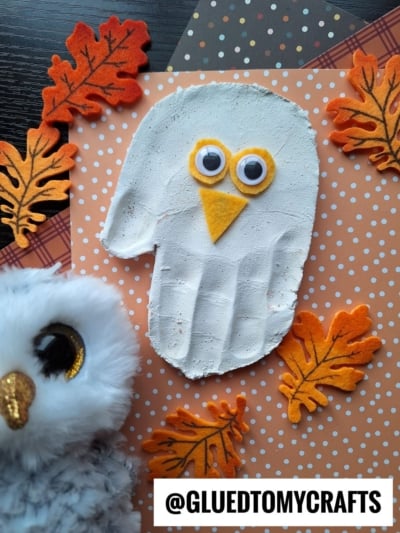
HANDPRINT SNOWY OWL KEEPSAKE
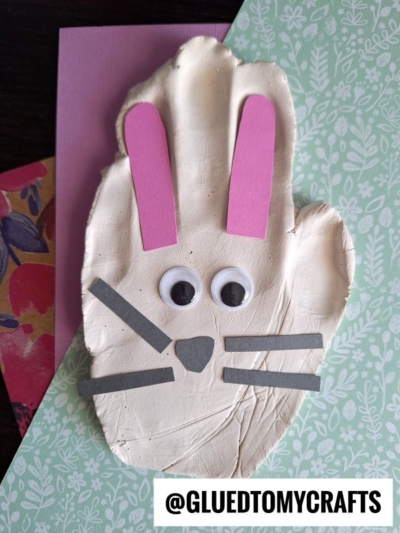
HANDPRINT EASTER BUNNY ORNAMENT FOR SPRING
![]()
Creating handprint clay ornaments with your children is not only a fun and engaging activity but also a beautiful way to capture the fleeting moments of childhood. By choosing the right materials, setting up a creative workspace, and encouraging your child’s imagination, you can craft unique keepsakes that will be cherished for years.
These crafts offer more than just a creative outlet; they strengthen family bonds, teach valuable skills, and provide endless opportunities for exploration and discovery. Whether you’re making ornaments for yourself or as gifts, the memories you create during the process are truly priceless.
Now that you’re equipped with these craft ideas, it’s time to gather your materials and start creating. Your child’s little hands won’t stay small forever, so make the most of this opportunity to craft memories that will last a lifetime.
