Bring the magic of the great outdoors inside with this simple and fun campfire craft. This easy activity is perfect for a camping-themed week or a quiet afternoon indoors.
We love this project because it uses basic supplies you likely already have in your kitchen and craft bin. Plus, it gives children a wonderful chance to experiment with watercolors and watch bright colors blend together to make a fiery effect.
Materials You Need:
- Round white coffee filters
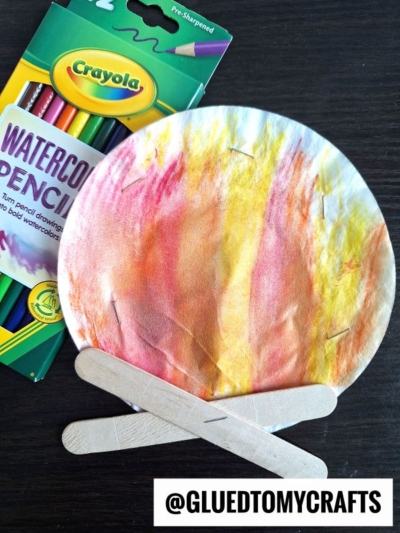
- Watercolors (watercolor pencils or a standard paint palette)
- A small cup of water and a paintbrush
- Popsicle sticks (two for each campfire)
- Stapler or craft glue
- Optional: Small star stickers
Step-by-Step Instructions:
Step 1: Paint the flames
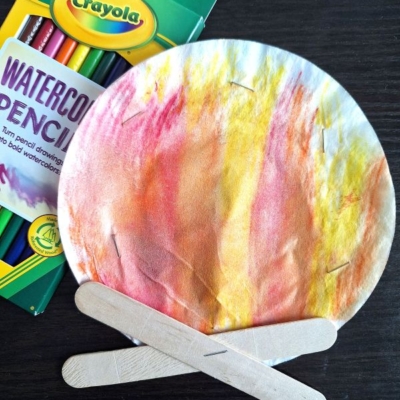
Lay a white coffee filter flat on a tray or a piece of scrap paper to protect your table. Have your child paint the coffee filter using red, orange, and yellow watercolors. Let them add plenty of water so the colors bleed and mix together. This creates a beautiful, bright fire effect.
Step 2: Let the filter dry
Move the wet coffee filter to a safe spot. Allow it to sit until the paper is completely dry.
Step 3: Create the logs
Grab two plain popsicle sticks. Cross them over each other at the bottom to form an “X” shape. These will serve as the wooden logs for your campfire.
Step 4: Put the campfire together
Once the painted coffee filter feels dry to the touch, attach your crossed popsicle sticks to the bottom edge. You can use a stapler for a quick hold, or use craft glue if you have extra time to let it dry.
Step 5: Add extra sparks
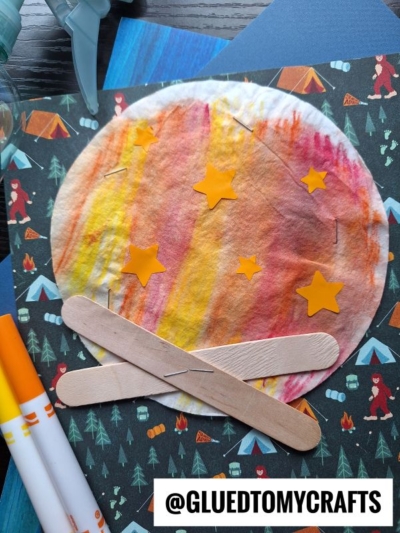
Give your campfire a little extra character. You can attach small orange paper stars or fun stickers to the painted filter to look like floating embers and sparks.
Display your colorful campfires on a bulletin board or use them as a fun backdrop for storytelling time!
RELATED —> Chalk Art Campfire Art On Paper

Let your creativity shine as you build, decorate, and display your campfire creations. This craft is all about having fun, exploring color, and making something uniquely your own. We’d love to see what you come up with – share your finished campfires with us on Facebook and inspire others to join in the crafting adventure!

Coffee Filter & Popsicle Stick Campfire Craft Idea
Here’s your checklist of supplies to bring this craft to life:
- Coffee Filters
- Jumbo Popsicle Sticks
- Embellishments
- Small Spray Bottle w/tap water inside
Prepare your creative haven by laying down a protective cover before the crafting magic begins!
Directions:
- Lay a white coffee filter flat on a tray or a piece of scrap paper to protect your table. Have your child paint the coffee filter using red, orange, and yellow watercolors. Let them add plenty of water so the colors bleed and mix together. This creates a beautiful, bright fire effect.
- Move the wet coffee filter to a safe spot. Allow it to sit until the paper is completely dry.
- Grab two plain popsicle sticks. Cross them over each other at the bottom to form an "X" shape. These will serve as the wooden logs for your campfire.
- Once the painted coffee filter feels dry to the touch, attach your crossed popsicle sticks to the bottom edge. You can use a stapler for a quick hold, or use craft glue if you have extra time to let it dry.
- Give your campfire a little extra character. You can attach small orange paper stars or fun stickers to the painted filter to look like floating embers and sparks.
- Display your colorful campfires on a bulletin board or use them as a fun backdrop for storytelling time!
CLICK HERE TO PRINT THE DIRECTIONS FOR THIS CRAFT