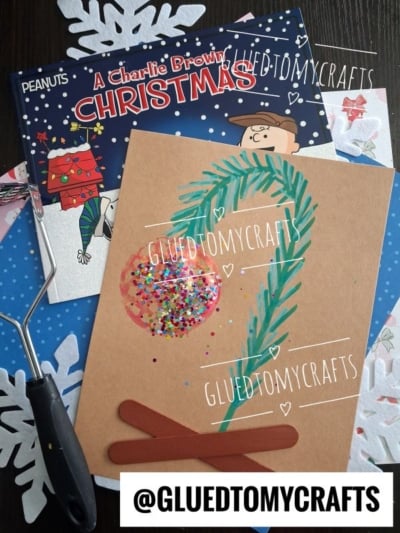
Charlie Brown’s little tree is the most lovable underdog in holiday history. It’s tiny and droopy, and it bends under the weight of a single red ornament. Kids adore it, and so do we.
This Christmas, your little ones can make their own version with a surprising tool from your kitchen drawer: a potato masher. That’s right. The same gadget that whips up holiday mashed potatoes becomes a stamp that prints a perfect, textured ornament in seconds.
This Charlie Brown Christmas tree craft is easy and budget-friendly. It’s ideal for preschool classrooms, homeschool afternoons, library story times, or a cozy day at the kitchen table. Pair it with a reading of A Charlie Brown Christmas, and you’ve got a holiday activity kids will remember. Let’s make some merry little masterpieces!
Craft Supplies:
- Brown kraft cardstock (one sheet per child)
- Green paint (washable tempera or acrylic)
- Paintbrush (a medium flat or round brush works best)
- Potato masher (the kind with a round grid or wavy head)
- Red paint
- Multicolored glitter and/or sequins
- 2 popsicle sticks per child
- Brown paint
- Glue (white school glue or a glue stick, plus tacky glue for the sticks)
Handy extras: paper plates for paint, a smock or old T-shirt, baby wipes, and a tray or baking sheet to catch glitter.
Directions:
Step 1: Paint the Popsicle Sticks First
Start with the stand so it has time to dry. Have your child paint two popsicle sticks with brown paint, front and back. Set them aside on a paper plate.
Step 2: Paint the Drooping Charlie Brown Pine Branch
Place the brown kraft cardstock in front of your child. Squeeze a little green paint onto a paper plate.
- Start near the bottom center of the paper and paint a thin line that goes up, then curves over and droops down, like the top of a candy cane. This is the “bent from one ornament” shape that makes Charlie Brown’s tree so famous.
- Next, add the pine needles. Show your child how to make short, feathery strokes coming off both sides of the branch. Flick the brush outward like little whiskers.
- Mix in a slightly darker or lighter green if you have one. Different shades make the needles look extra realistic.
Tip: Remind kids that Charlie Brown’s tree is sparse and scraggly. Fewer needles look more authentic, which makes this step great for little artists who get frustrated easily.
Step 3: Stamp the Ornament With the Potato Masher
Here comes the magic moment!
- Pour a thin layer of red paint onto a paper plate. Spread it out so it’s wide enough for the masher head.
- Have your child press the potato masher into the paint, then lift it up and check that the bottom is evenly covered.
- Position the masher right under the drooping tip of the branch, as if the ornament is hanging from it.
- Press down firmly and hold for a count of three. Then lift straight up. Ta-da! A round, textured ornament appears.
- While the paint is still wet, shake some loose craft glitter on top.
Step 4: Glue the Popsicle Stick Stand in an X Shape
Once the brown sticks are dry:
- Add a dot of tacky glue to the center of one stick.
- Lay the second stick across it to form an X.
- Glue the X to the bottom of the branch so it looks like the simple wooden stand holding up Charlie Brown’s tree.
- Press and hold for about 30 seconds. Then let the whole craft dry flat.
That’s it! Your Charlie Brown Christmas tree is ready to display.
RELATED —> Handprint Charlie Brown Christmas Tree Keepsake
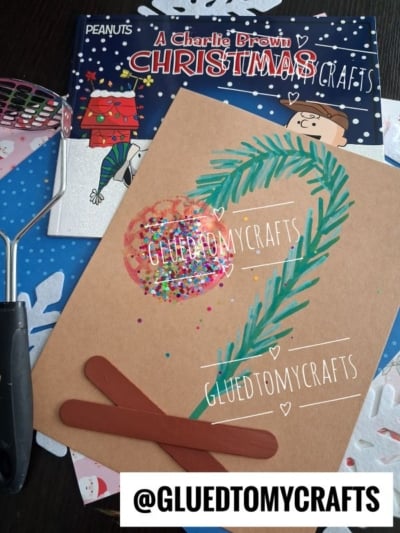

We would love to see your kids’ Charlie Brown Christmas trees! Snap a photo of their masterpiece and tag us on Instagram at @GluedToMyCrafts. Every wobbly branch and glitter explosion makes our day.
Pin this tutorial to your holiday crafts board so you can find it again. Share it with a teacher friend, a grandparent, or the parent group chat. Every little tree deserves a home, after all.
Happy crafting, and Merry Christmas from our craft table to yours!