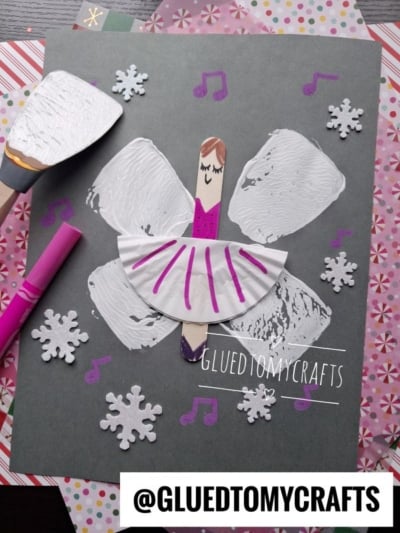
Some of the best holiday crafts start in the kitchen drawer. This sweet Christmas fairy gets her shimmery wings from a simple spatula dipped in white paint. One press, and you get a lovely textured print that looks like frosty fairy wings.
Add a popsicle stick body, a cupcake liner tutu, and a sprinkle of snowflakes, and you have a dancing holiday fairy that feels straight out of The Nutcracker. It’s quick, low-mess, and great for little hands. Kids love the stamping part, and grown-ups love that most of the supplies are already at home.
This craft works well for a cozy afternoon at home, a classroom holiday party, or a winter-themed art station. Let’s make some magic!
Craft Supplies:
- 1 wooden popsicle stick (one per sugar plum fairy)
- 1 sheet of cardstock paper (we used gray)
- White paint (washable tempera or acrylic)
- A small spatula
- A paper plate (for the paint)
- 1 cupcake liner (for the tutu)
- Elmer’s glue stick
- Markers
- Glitter snowflake stickers
Directions:
Step 1: Set Up Your Stamping Station
Pour a small puddle of paint onto your paper plate. You don’t need much. A puddle about the size of a cookie is plenty.
Place your cardstock on a flat surface. The dark color makes the white wings pop beautifully, almost like snow against a winter night sky.
Tip: Lay down newspaper or a plastic tablecloth first. Stamping can get a little enthusiastic!
Step 2: Stamp the Fairy Wings
This is the star of the show. Dip the flat edge of your spatula into the paint. Gently tap off any extra so it doesn’t drip.
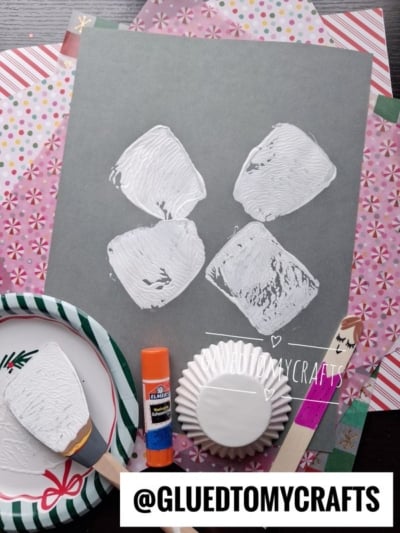
Now press the spatula onto the cardstock to make your first wing. Imagine a big “X” in the center of your paper. You’ll stamp one wing on each arm of that X:
- Upper left wing: Press the spatula at an angle, pointing up and out to the left.
- Upper right wing: Mirror it on the right side.
- Lower left wing: Stamp below the first wing, angled down and out.
- Lower right wing: Mirror it again on the right.
Leave a small gap in the middle where the fairy’s body will go. Press firmly, then lift straight up. You’ll see lovely ridges and texture from the spatula. That texture is what makes the wings look so magical.
Tip: Re-dip the spatula before each wing so every print looks bold and full. If one looks a little patchy, that’s okay. It adds a frosty, sparkly feel!
Set the cardstock aside to dry for about 10 to 15 minutes while you work on the fairy.
Step 3: Decorate Your Fairy’s Body
Grab your popsicle stick. This will become your fairy from head to toe. Think of the stick in four sections:
- Hair (very top): Color the rounded tip with marker or paint. Kids can choose any hair style they like!
- Face (just below the hair): Use the black marker to draw two closed, happy eyes with little eyelashes. Add tiny eyebrows and a small smile. Closed eyes give her a dreamy, dancing look.
- Bodice (the middle): Color a section and add tiny black dots to look like a sparkly dress top.
- Slippers (very bottom): Color the bottom tip for her ballet shoes.
Step 4: Fold and Decorate the Tutu
Take one cupcake liner and flatten it gently with your hand. Then fold it in half to make a half-circle. The ruffled edges will fan out just like a real tutu!
Now grab your marker. Draw lines from the folded edge out toward the ruffled edge. Follow the natural pleats of the liner. These lines make the skirt look full and twirly.
Tip: Try mixing different line styles to make the tutu extra pretty. Let kids experiment with patterns too, like dots or zigzags.
Step 5: Assemble Your Christmas Fairy
Check that your painted wings are dry to the touch. Then it’s time to bring your fairy to life!
- Rub the glue stick along the back of the popsicle stick.
- Place the stick straight down the center of your cardstock, right between the four wings. The upper wings should sit near her shoulders, and the lower wings near her skirt.
- Press firmly for a few seconds.
- Add glue to the back of the folded cupcake liner, along the flat folded edge.
- Place the tutu across the middle of the stick, just below the bodice. The folded edge goes at her waist, and the ruffles fan downward.
Hold everything in place for a moment so it sticks well.
Tip: If the popsicle stick won’t stay put with a glue stick, a small dab of liquid school glue works as a backup. Just give it a little extra drying time.
Step 6: Add the Finishing Touches
Now for the sparkle! Peel and stick glitter snowflake stickers around your sugar plum fairy. Scatter them across the background so it looks like she’s dancing in a gentle snowfall.
Want to show that she’s dancing to holiday music? Use a marker to doodle little music notes around her. Double eighth notes (two notes joined at the top) look especially cute.
Now display your Popsicle Stick & Spatula Stamped Fairy PROUDLY for all to see!
RELATED —> Spatula Stamped Melted Snowman Card
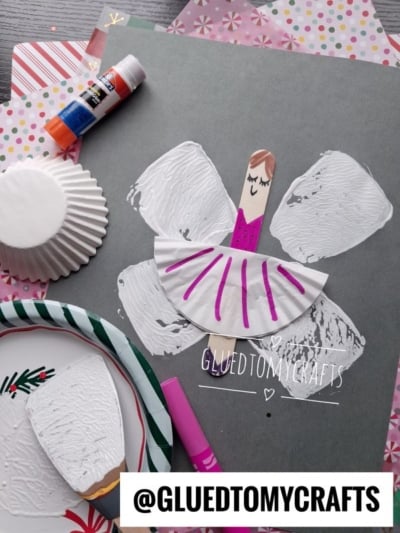
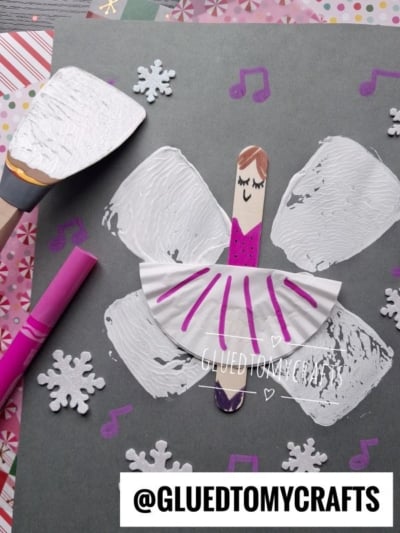
And just like that, a kitchen spatula, a jumbo popsicle stick, and a cupcake liner have turned into a sweet little holiday fairy piece of art. Hang her on the fridge, tuck her into a holiday card, or display her in the classroom for everyone to admire.
The best part of crafting with kids isn’t the finished project. It’s the giggles, the paint-smudged fingers, and the proud smiles at the end. We hope this craft brings a little extra sparkle to your holiday season.
Happy crafting, my friends! We can’t wait to see your sugar plum fairies twirl. 💜
