Glued To My Crafts

Join thousands of others who have gotten GLUED to our craft tutorials!

  • Home
  • About Us
  • Safety Guidelines
  • Seasonal Crafts
    • New Years
    • Valentine’s Day
    • St. Patrick’s Day
    • Spring
    • Easter
    • Mother’s Day
    • Summer
    • Father’s Day
    • Patriotic
    • Halloween
    • Thanksgiving
    • Fall
    • Winter
    • Christmas
    • Snowmen
    • Story Time
  • Monthly Themes
    • January Craft Ideas
    • February Craft Ideas
    • March Craft Ideas
    • April Craft Ideas
    • May Craft Ideas
    • June Craft Ideas
    • July Craft Ideas
    • August Craft Ideas
    • September Crafts
    • October Crafts
    • November Crafts
    • December Crafts
  • Amazon Storefront
  • Privacy Policy

One Paper Plate, Four Festive Christmas Crafts!

Four paper plate Christmas crafts for kids: a Christmas tree, a Santa, a snowman, and a rainbow ornament. Each is decorated with colorful craft materials and set on festive backgrounds. Text overlay in the center.

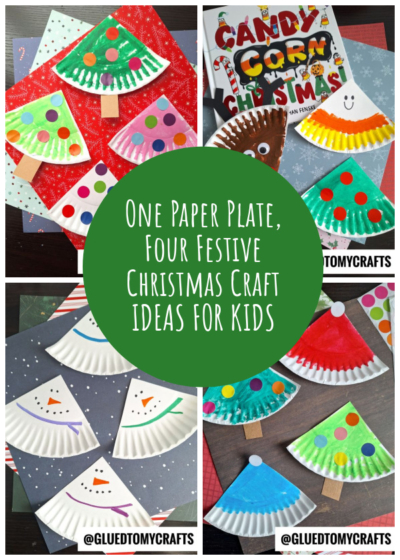
Get ready to bring some holiday magic to your craft table. You do not need expensive supplies to make beautiful memories with your family this season.

We are going to show you how to turn a single white paper plate into four unique and fun Christmas crafts. This simple project is perfect for keeping little hands busy and decorating your home with cheerful handmade art.

Before we dive into the individual designs, you need to prep your canvas. Take your large white paper plate and cut it into four equal quarters. Each wedge will become a brand new holiday character.

Craft Supplies:

Here is everything you need to gather for this crafting session:

  • 1 large white paper plate (cut into four wedges)
  • Scissors
  • Craft paint (red, green, and brown)
  • Paintbrushes
  • Markers (black and orange)
  • Colorful circle stickers
  • Small scraps of brown, black, and white paper
  • Googly eyes
  • School glue or a glue stick

Four paper plate Christmas trees, decorated with colorful circle stickers and brown paper trunks, are displayed on festive red and blue holiday paper backgrounds. @GLUEDTOMYCRAFTS is written at the bottom.

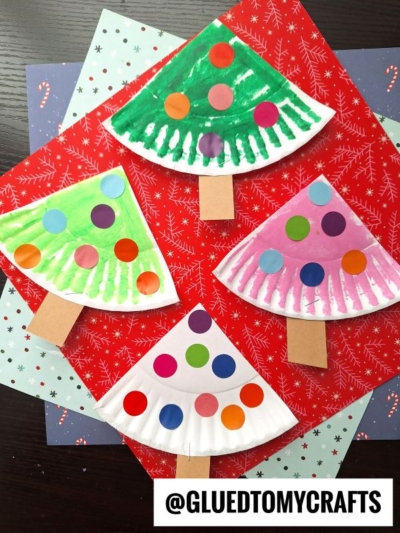
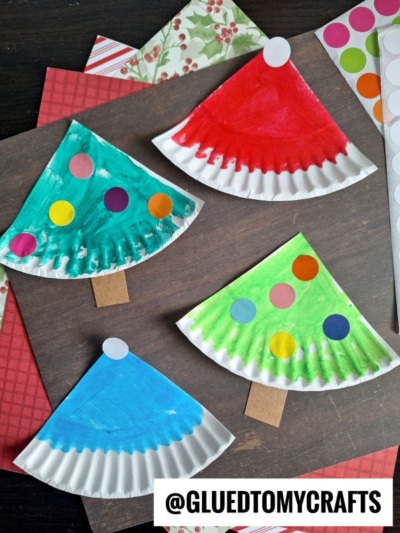
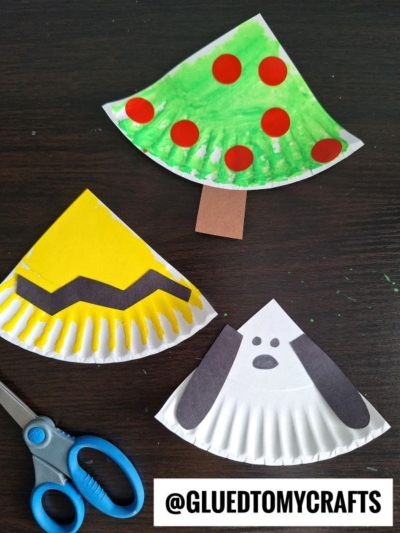
1. The Cheerful Christmas Tree

This colorful tree is incredibly easy to make and looks great on the fridge.

  1. Grab one paper plate wedge and paint the entire surface bright green.
  2. Let the paint dry completely.
  3. Peel and stick your colorful circle stickers all over the green triangle to create round ornaments.
  4. Cut a small rectangle from your brown paper scrap.
  5. Glue the brown rectangle to the bottom center of the ruffled edge to serve as the tree trunk.

Four colorful paper plate Christmas tree crafts, each painted in different colors and decorated with round stickers, are displayed on a table with craft supplies and patterned paper in the background.

2. The Sweet Santa Hat

Turn your next wedge into a cozy hat inspired by Santa Claus himself.

  1. Take your second paper plate wedge and paint the smooth center section bright red.
  2. Leave the ruffled bottom edge completely white. This unpainted section creates the fluffy white trim of the hat.
  3. Let the red paint dry.
  4. Cut a small circle from your white paper scrap.
  5. Glue the white circle to the pointed top of the wedge to make the pom-pom.

Four Winter Themed Toddler Crafts featuring paper plate snowmen with drawn faces and colorful scarves are arranged on a dark, starry background. The image has the watermark @GLUEDTOMYCRAFTS at the bottom right corner.

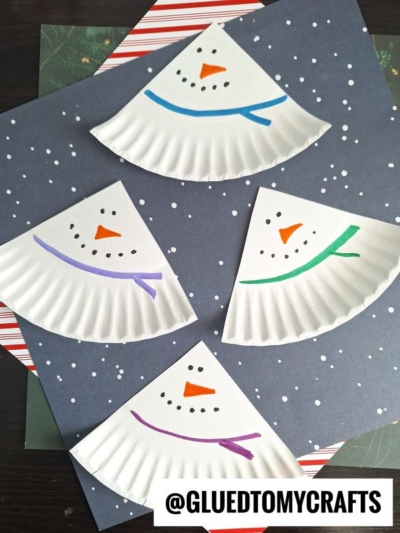
3. The Smiling Snowman

This craft uses the natural white color of the plate to create a friendly frosty face.

  1. Keep your third paper plate wedge completely white.
  2. Cut a tiny triangle out of your orange paper scrap. Glue it to the center of the wedge to make a carrot nose.
  3. Use a black marker to draw two small dots for the eyes.
  4. Draw a dotted, curved line below the nose to create a sweet, coal-inspired smile.
  5. Pick your favorite colored marker and draw a thick line with a small fringe near the top point to give your snowman a warm winter scarf.

A children’s book titled Candy Corn Christmas with four paper plate crafts: a brown reindeer, a smiling candy corn, a red watermelon slice, and a green Christmas tree. @gluedtomycrafts is written at the bottom.

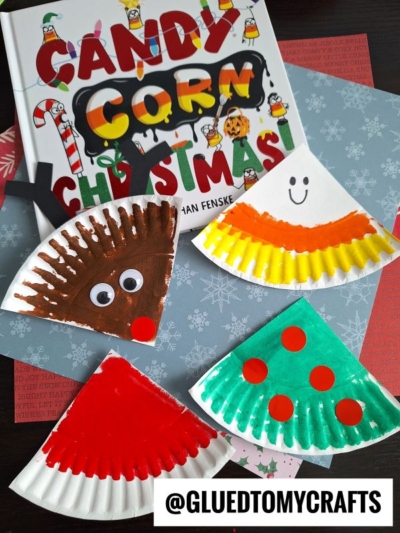
4. The Red-Nosed Reindeer

Bring Rudolph to life with your final piece of the paper plate.

  1. Paint your last paper plate wedge entirely brown and let it dry.
  2. Cut two small antler shapes out of your black paper scrap.
  3. Glue the black antlers to the back of the pointed top, so they stick out above the wedge.
  4. Glue two googly eyes near the middle of the painted surface.
  5. Stick a bright red circle sticker right at the bottom center of the ruffled edge to give your reindeer a glowing nose.

We hope you enjoy spending this creative time with your family. These simple decorations add a wonderful personal touch to your holiday season.

Grab your supplies, gather around the table, and let the festive crafting begin! We would love to see your beautiful artwork, so please share pictures of your finished paper plate crafts with us. Simply use the hashtag #gluedtomycrafts on Instagram and Facebook. Happy holidays, my friends!

A blue text on a white background, perfect for creating a charming the places you'll go keepsake.


OUR PRIVACY POLICY

OUR COPYRIGHT POLICY

  • Email
  • Facebook
  • Instagram
  • Pinterest
  • Twitter
  • YouTube

Love our crafts?

Follow us on Google

Click & check the box to see us more in your search results!

LOOKING FOR SOMETHING?

EXPLORE OUR SITE:

© 2012–2026 Glued To My Crafts
All activities should be supervised by an adult at all times. Please refer to our safety guidelines for more information.


Please note that all the content of the website, including printables, are for classroom and personal use only. This means that any digital item you download from our site can be used for non-commercial use only. We kindly request that you do not reproduce or sell our creations. We appreciate your understanding and cooperation in respecting our content and intellectual property rights.

Accessibility Adjustments

Powered by OneTap

How long do you want to hide the toolbar?
Hide Toolbar Duration
Select your accessibility profile
Vision Impaired Mode
Enhances website's visuals
Seizure Safe Profile
Clear flashes & reduces color
ADHD Friendly Mode
Focused browsing, distraction-free
Blindness Mode
Reduces distractions, improves focus
Epilepsy Safe Mode
Dims colors and stops blinking
Content Modules
Font Size

Default

Line Height

Default

Color Modules
Orientation Modules