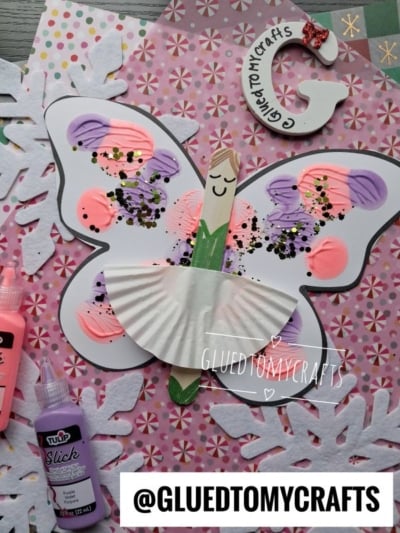
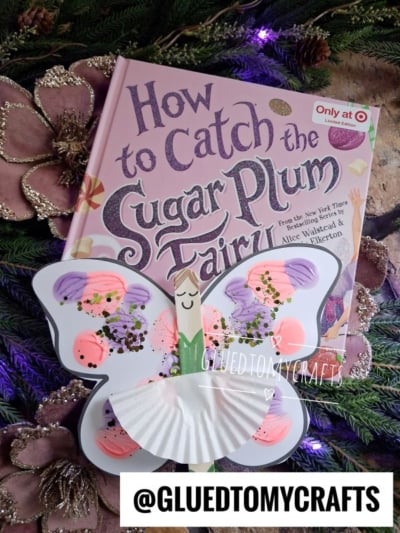
Some crafts are pure magic from the very first squeeze of paint. This Popsicle Stick and Paint Splat Fairy is one of them! It’s an original idea here at Glued To My Crafts, and we can’t wait for you to try it.
This sweet little fairy starts with a plain wooden craft stick and a blank pair of butterfly wings. Then comes the fun part. Kids squeeze dots of paint onto one wing, fold the paper, press, and open it up to reveal a mirror-image surprise. Every pair of wings turns out different, so every fairy is one of a kind.
It also makes a lovely Sugar Plum Fairy for the holidays, a spring garden fairy, or a birthday party keepsake. And yes, there’s a free printable butterfly wing template to make it even easier!
Craft Supplies:
- Wooden jumbo craft sticks (popsicle sticks)
- Tulip Slick Dimensional Fabric Paint (we used pink and purple)
- Loose craft glitter
- Free printable butterfly wing template – password is GLUEDTOMYCRAFTS2026
- White cardstock paper
- Paper cupcake liners (we used white)
- Markers
- Glue (craft glue or a hot glue gun for grown-ups)
- Scissors
Optional extras: a craft mat or old newspaper
Directions:
Step 1: Print and Cut Out the Butterfly Wings
Print the free butterfly wing template onto white cardstock. Cardstock is sturdy enough to hold the thick paint without curling or tearing.
Cut along the bold black outline. Little ones can cut on their own if they’re ready, or a grown-up can do this step ahead of time. Keep the dashed center line visible. You’ll use it as your folding guide.
Step 2: Create the Fairy Body
Grab a wooden craft stick. This will be your fairy’s body!
- Color the dress. Use a marker or paint to color the middle section of the stick. This becomes the fairy’s bodice.
- Add the shoes. Color the very bottom tip of the stick to make tiny ballet slippers.
- Add the hair. Use a marker or paint across the top of the stick for hair.
Leave a little bare wood between the hair and the dress. That’s where the face will go later.
Feel free to switch up the colors! If you used paint, set the stick aside to dry while you work on the wings.
Step 3: Make the Paint Splat Wings
Here’s where the magic happens!
- Fold the butterfly wings in half along the dashed line, then open them back up. This creases the paper so it folds neatly later.
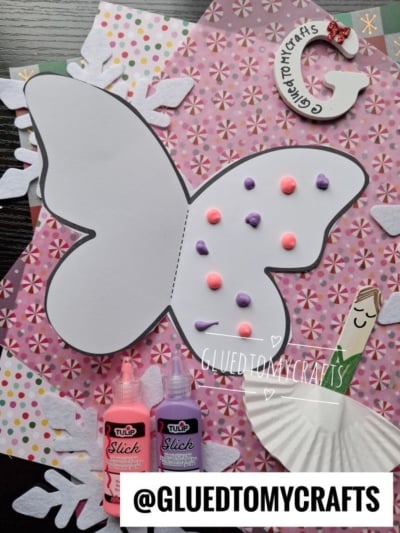
- Lay the wings flat. On one side only, squeeze several dots of paint. Mix up the sizes: some big, some small, some close together, some spread apart.
- Carefully fold the blank side over the painted side.
- Gently press and smooth the paper with your hand. Rub in little circles from the center outward to spread the paint.
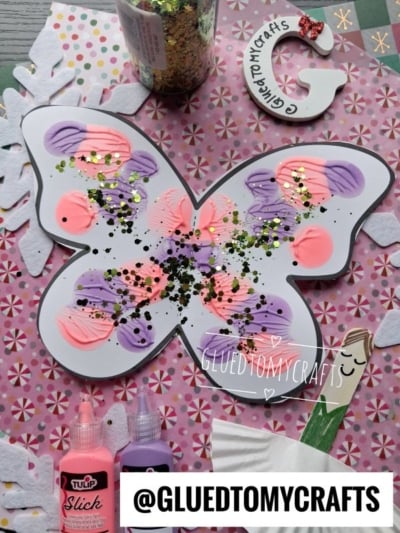
- Slowly open the wings and enjoy the big reveal!
Each wing now mirrors the other, with soft, swirly, marbled patterns where the pink and purple blend together.
Step 4: Add the Glitter
While the paint is still wet, sprinkle glitter all over the wings. Focus on the center seam and the upper parts of the wings for extra sparkle.
The wet paint works like glue, so the glitter sticks right where it lands. Tap off any extra over a paper plate and pour it back into the jar.
Now let the wings dry completely. Dimensional paint is thick, so give it several hours, or let it dry overnight for the best results.
Step 5: Make the Tutu
Take a paper cupcake liner and flatten it out. Fold it in half to make a half circle. The ruffled edges will flare out just like a ballerina’s tutu.
Glue the folded liner across the middle of the craft stick, just below the bodice. Press it in place and hold for a few seconds so it stays put.
Step 6: Assemble Your Fairy
Once the wings are fully dry, flip them over so the plain side faces up. Add a line of glue down the center crease.
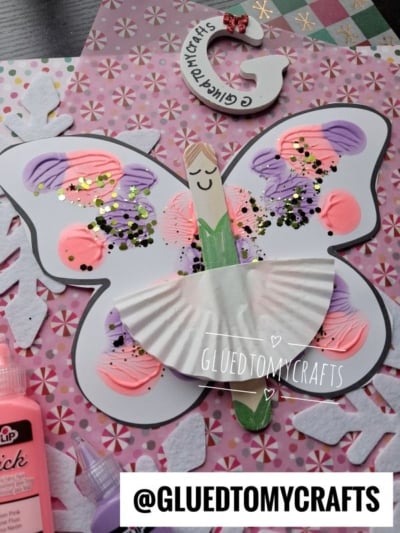
Press the craft stick fairy onto the glue, right down the middle, with the painted side facing out. Flip it back over, and your fairy now has gorgeous paint splat wings peeking out from behind her!
Grown-up tip: A hot glue gun creates a quick, strong hold. Craft glue works great too. Just let it set before moving on.
Step 7: Draw the Face
The final touch brings your fairy to life. Use a marker to draw a sweet face on the bare wood near the top of the stick.
Try these easy face ideas:
- Sleepy eyes: Two curved lines with tiny eyelashes
- A happy smile: One small, curved line
- Rosy cheeks: Two little dots with a pink marker
Kids can give their fairy any personality they like. Silly, sleepy, sparkly, or brave, it’s all up to them!
RELATED —> Paper Plate Valentine Fairy House Craft Idea
Your fairy adventure starts with the wings, and we’ve made that part easy for you. Download the free printable butterfly wing template and print as many copies as you need for your kids, your classroom, or your next craft party.
Just print, cut, squeeze, fold, and watch the magic unfold!
We’d love to see your finished fairies. Share your creations and tag @GluedToMyCrafts so we can cheer on your little artists. And be sure to stick around for more original, kid-friendly craft ideas. There’s always something fun happening here at Glued To My Crafts! Happy crafting, my friends! ✨
